WebSocket API
The custom WebSocket API allows you to create a connection between Labvanced and any other server during runtime. This essentially allows for the possibility of sending data in both directions between the Labvanced server and the other server you specify. If you need to send data only in one direction (ie. saving it to your server directly), see the documentation for the Webhook API.
Some examples of experiments where the WebSocket API can be utilized include the following:
- An experiment where you want to send/receive experimental triggers (e.g. trial/stimulus onset or participant response) from Labvanced to an EEG system, Eye-Tracking system, or some other local data recording device.
- An experiment where you want to send online recorded data over the internet to some other server/API that processes it (e.g. some AI/ machine learning process or real time data analysis).
- An experiment where you want to create bidirectional communication between Labvanced and some other process which can run locally or remotely (E.g. for BCI, biofeedback, or other closed-loop systems).
In the case of connecting Labvanced with a local server (such as for connecting devices), you can currently accomplish this via simple scripts (described below) and by setting up events in the Labvanced study editor. In the future, an integrated solution in the Labvanced Desktop App will be available where you can establish this connection with just a button click.
Script Solution
Using scripts, you can customize basic Python code which requires you run the script and ultimately allows for the flexibility to meet research needs. By running a separate Python script, Labvanced communicates with the WebSocket API and Python communicates to the external device.
WebSocket API configuration works by pointing to a certain port and IP. Then, this is reflected in the Python code. By pointing to each other, a line of communication is established through the WebSocket API.
NOTE: To view the connection, a GUI can be used for this semi-automatic process.
Our previous approach (to embed it directly in the Labvanced program) was a bit too limited and hard to get to work across different operating systems. So now, with these new Python scripts it should work on all platforms (Linux, MacOS, Windows) and it should be possible to bidirectionally send & receive LSL stream data.
What you need to do to try it:
- Install the 4 required libraries using something like pip install -r requirements.txt
- Then you can start in the background on the same machine where the Labvanced experiment will be started either (to receive LSL markers in Labvanced) python3 lsl_marker_receive.py or (to send LSL markers from Labvanced) python3 lsl_marker_send.py.
NOTE: You can also easily adapt these scripts in case you want specific LSL parameters or stream names.
In our GitHub WebSocket API repository, you can find two example Python scripts to send or receive LSL markers from/to a Labvanced experiment in the Lab Streaming Layer folder, as well as more detailed instructions about how to set this up.
You can also import this Socket Connection Sample Study from our Public Experiment Library and see how the events are set up.
Examples of Experiments Utilizing WebSocket API for LSL Integration
There are two example studies in the Labvanced study Library that correspond to the above:
Sending LSL Markers (lsl_marker_send.py): https://www.labvanced.com/page/library/53231
Receiving LSL Markers (lsl_marker_receive.py): https://www.labvanced.com/page/library/53230
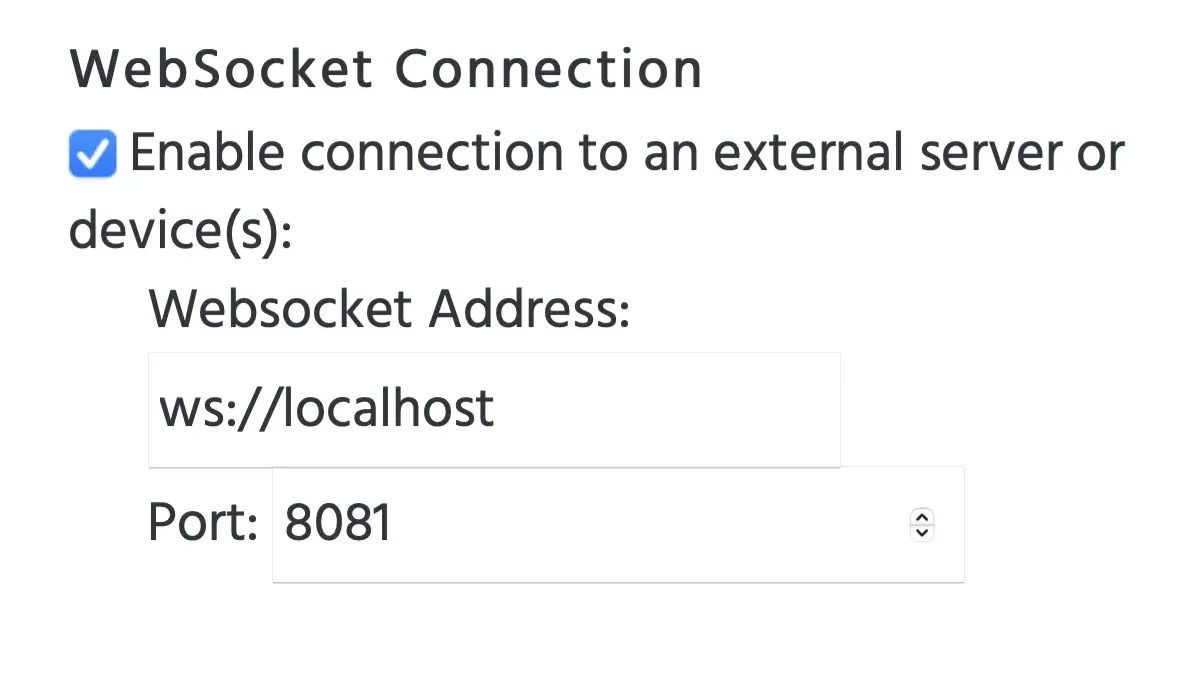
Please note that upon importing or inspecting these example studies, you see in their “Study Settings” under the “Experiment Features” subsection that the checkbox for the "WebSocket Connection" is checked with connection details to make sure that the Labvanced experiment can connect to the Python script running on the same computer, as shown in the image below: