Desktop App Guide
Contents:
Overview
With the desktop app, you can sync your studies locally to your lab’s computer. This allows you to focus on data collection while being in an offline mode, as well as integrate external devices like EEGs, all with a single app. For more information, refer to the desktop app technology page.
Note: Please note that the desktop app is available only for group license and departmental license holders.
Installation Process
Below is an overview of the installation process.
Operating Systems Compatible with the Labvanced Desktop App
The desktop app is compatible with the following operating systems:
- Windows
- MacOS
- Linux Ubuntu
Download and Installation Process
- By accessing the following page, you can select which option you want to download to your local computer: https://www.labvanced.com/page/desktop
- When downloading is complete, extract the .zip folder
- Scroll through the files and double click on the Labvanced executable (ie. the Labvanced.exe file)
- After a few seconds, you can select the directory or location of where you want the app files to be saved
- Click ‘Install’
- It will take about 10-20 seconds to install
- Upon completion, you will be asked whether you want to download FFmpeg license
Note: The FFmpeg license is free and allows you to support media files like audio or video files in your experiments, so it’s important. Without it, media files won’t be able to be used.
- This will take a few more seconds to download
- At this point, in the dialogue box you can then: a.) create a shortcut to have on your desktop and b.) select to launch the app as soon as it finished downloading
Special Note: Downloading the Desktop App for MacOS
Under the ‘System Settings’ in the ‘Privacy & Security’ menu, the option for allowing applications downloaded from ‘Anywhere’ is hidden for the latest MacOS versions. So before proceeding with downloading the desktop app, this needs to be selected.
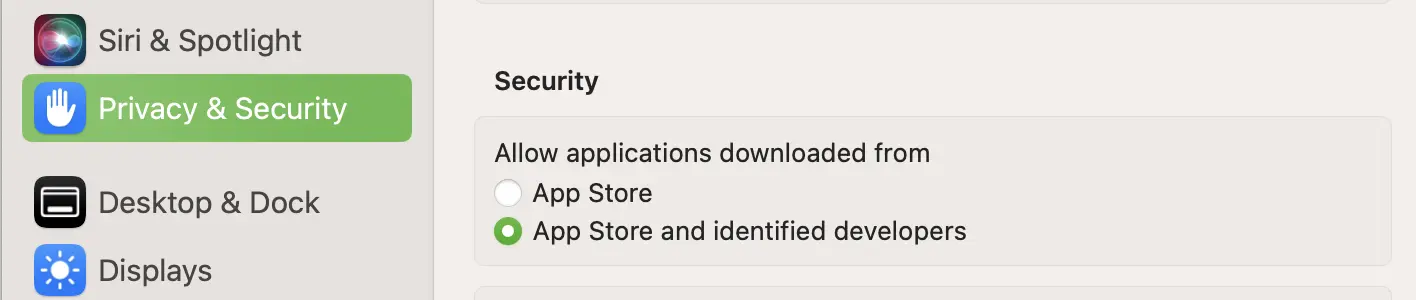
Default view does not allow for apps downloaded from ‘Anywhere’.
- To make this option visible in order to select it:
- Go to the search bar to search through your applications
- Find and open the ‘Terminal’ application (which is a part of all computers)
- Paste this command into the terminal
sudo spctl --master-disableand press theReturnor enter key - Your computer will ask for your password as a confirmation
- Return to the ‘Privacy & Security’ menu and select ‘Anywhere’
- Now, you can return to the installation process described above and continue with installing the desktop app

Upon running the terminal command, the ‘Anywhere’ option is now available.
App Walkthrough
Main View
Upon launching and opening the desktop app, the login screen will show. You can sign in using your username and password. If there is an update, you can accept it if you want.
The studies will load just like in the browser version. In general, there are similarities to what you see when you open labvanced.com but there are a few differences. For instance, there is no Dashboard view and there are no navigation tabs at the top or bottom. But otherwise, this is used just like the browser version when creating and editing studies. For instance you can create a new study, and start editing right within the application.
![View of the desktop app in the Online mode [top left toggle].](/content/learn/content_imgs/learn/guide/desktop-app/desktop_app_view1.webp)
View of the desktop app in the Online mode [top left toggle].
Local – Online Modes
One big difference is this top toggle here between ‘local’ and ‘online’ modes. When you toggle to ‘local’ only the studies that are locally available to your computer will appear.
Making a Study Locally Available
To make a study locally available you simply select the study and then click the ‘Access Locally’ button from the left side menu. This will download the study to your computer and from this point forward you can use it without internet access and just use it completely locally in your lab.
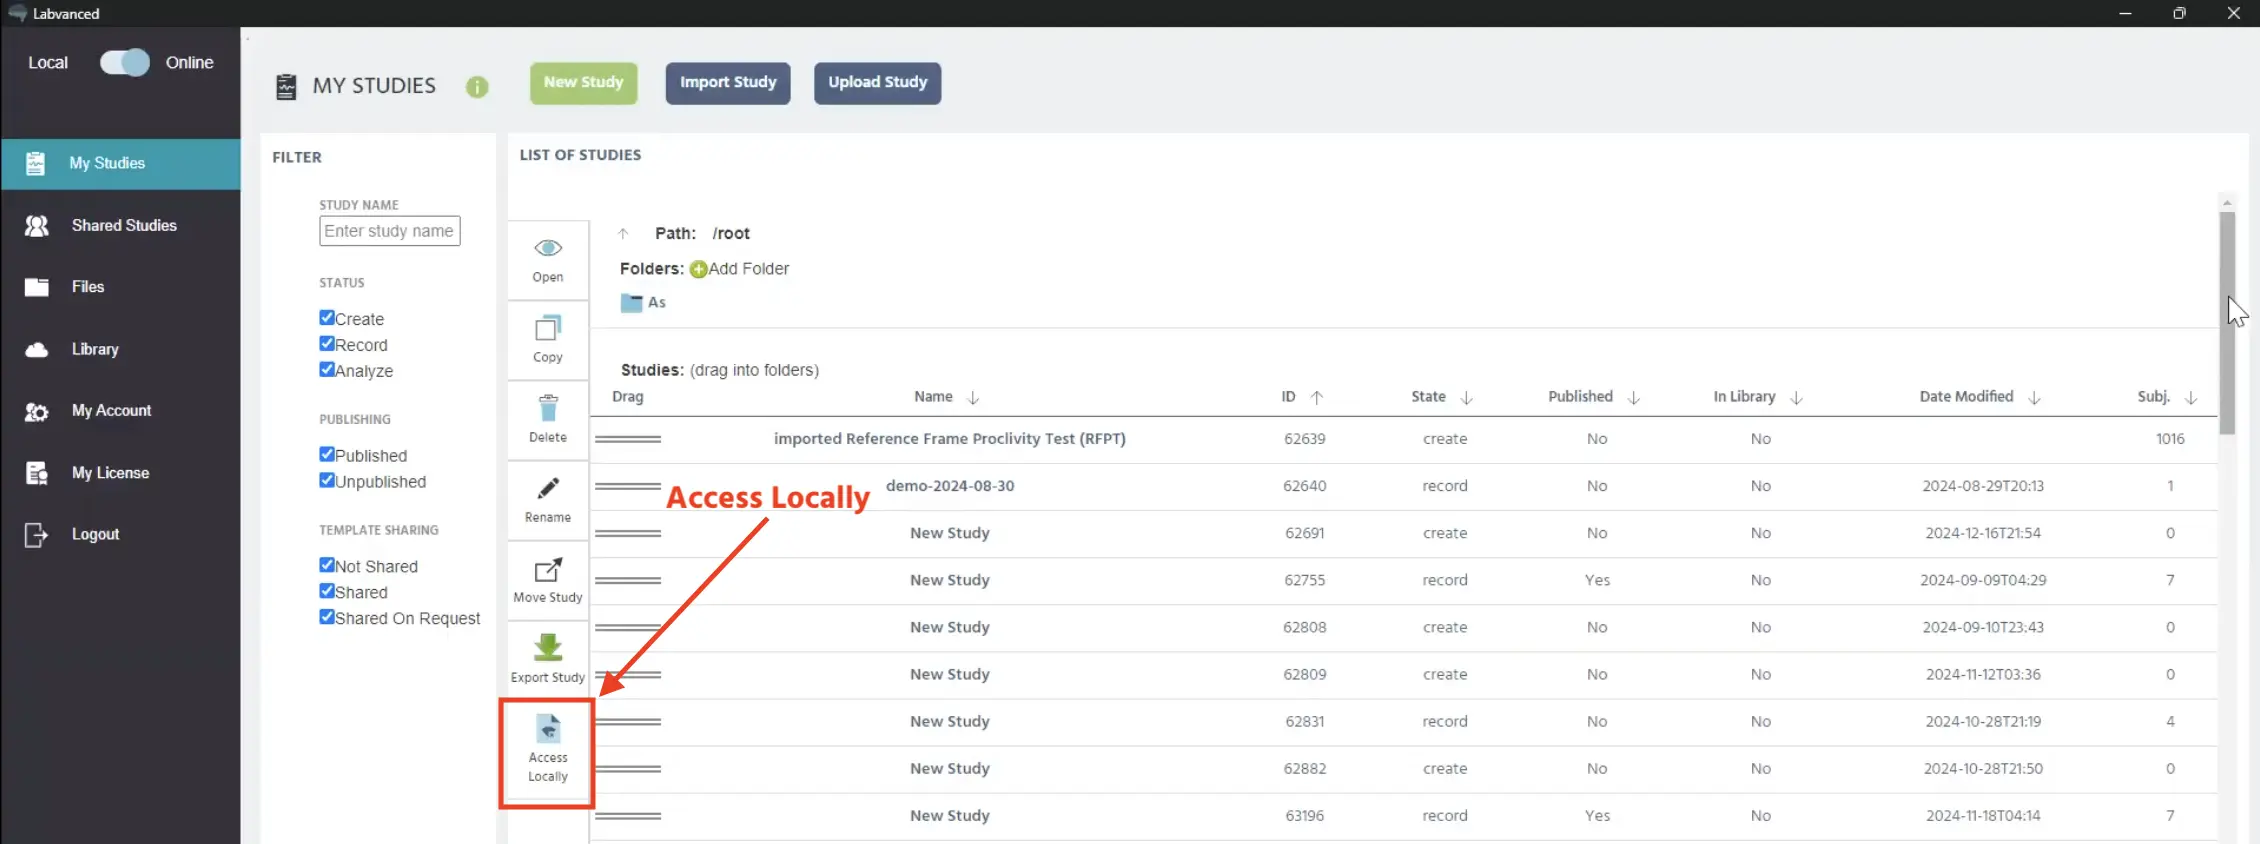
To access a study locally, select the study and then click this button.
In this ‘local’ or ‘offline’ view, you will now see the study. While this is similar to the other online mode, it is a much more focused and clean-cut view of the studies available and dedicated for recording data.
Sync Settings
Using the ‘Sync Settings’ options, you can specify how you want your experiment to be (or not be) updated once an internet connection is re-established upon toggling back to the ‘online’ mode. For example, you may want your study to be updated automatically if any changes were made or for data to be sent to the servers.
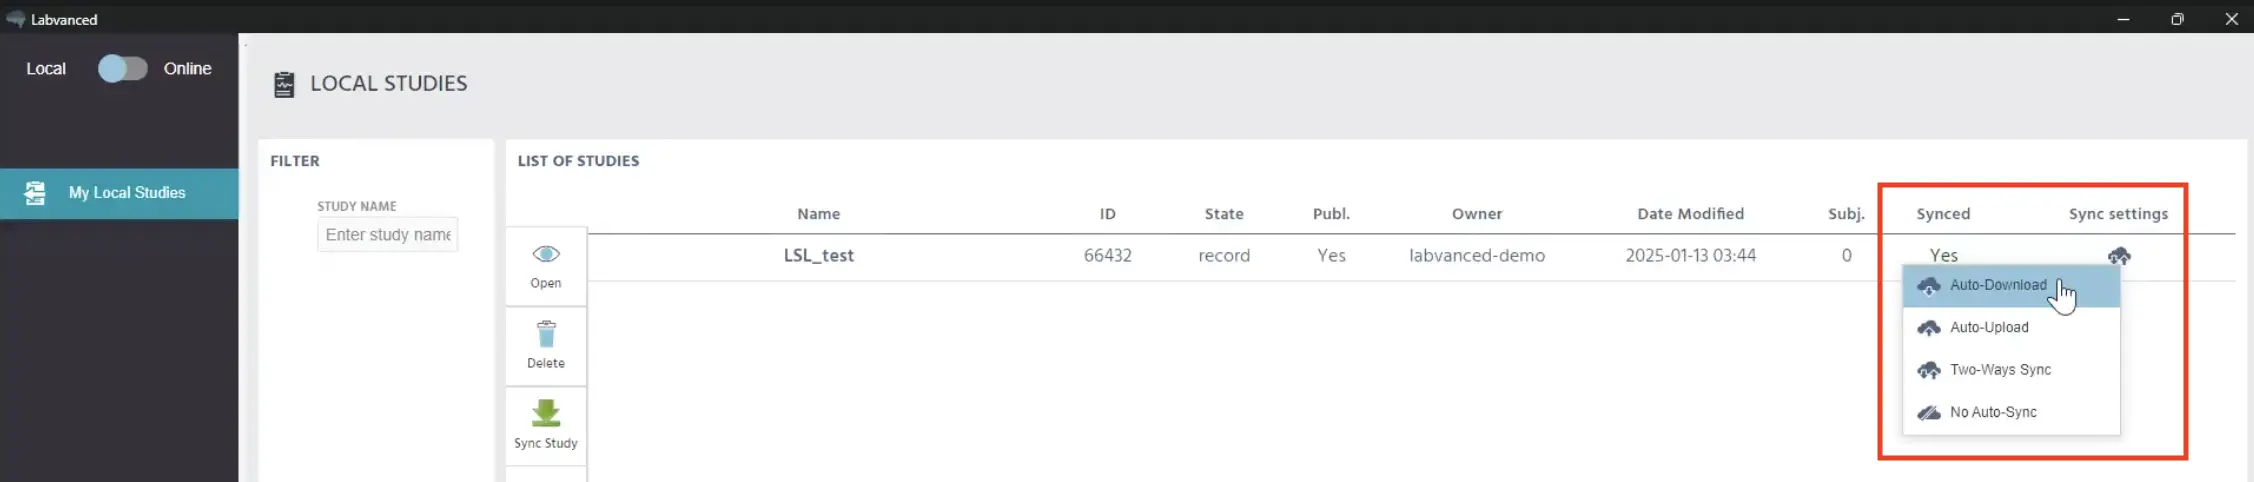
The sync settings appear when clicking the cloud icon.
The table below explains these setting options in detail:
| Sync Setting Option | Description |
|---|---|
Auto-download | Updates study design. Upon re-establishing an internet connection, any changes that were made to the experiment design will be automatically reflected in the local version. This is helpful so you don’t have to remember every time to sync it yourself. |
Auto-upload | Uploads participant data, backing up to the servers. Any data recorded locally will be uploaded to the Labvanced server. So if this isn’t selected in any way, then you will have the data locally and export it as you wish. |
Two-ways sync | Both experiment and data are updated. The experiment design will sync automatically, if any changes were made, and also the data recordings will be sent to the servers. |
No auto-sync | Keeps the study entirely local. The experiment won’t be updated if any changes were made while being online and data recordings will not be sent to the servers. |
Thus, you can decide using these setting options how you want your study to behave, whether it is synced and updated and in what direction, or whether you prefer to keep it entirely local.
Run Study
Upon selecting a study in the local mode, you can click the ‘Open’ option from the side menu.
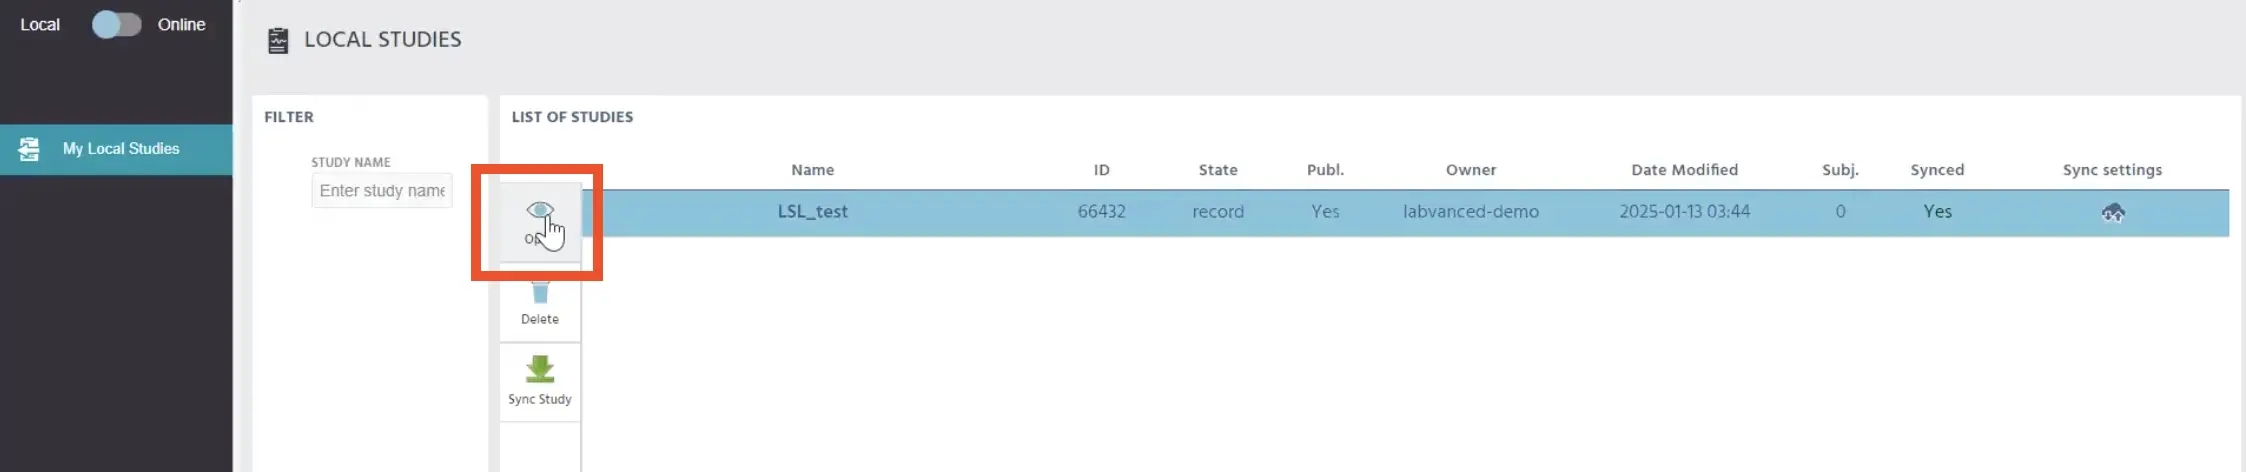
Select a study and click this ‘Open’ button to access the study locally.
From here, you can then proceed to do a test run or a recording session locally.
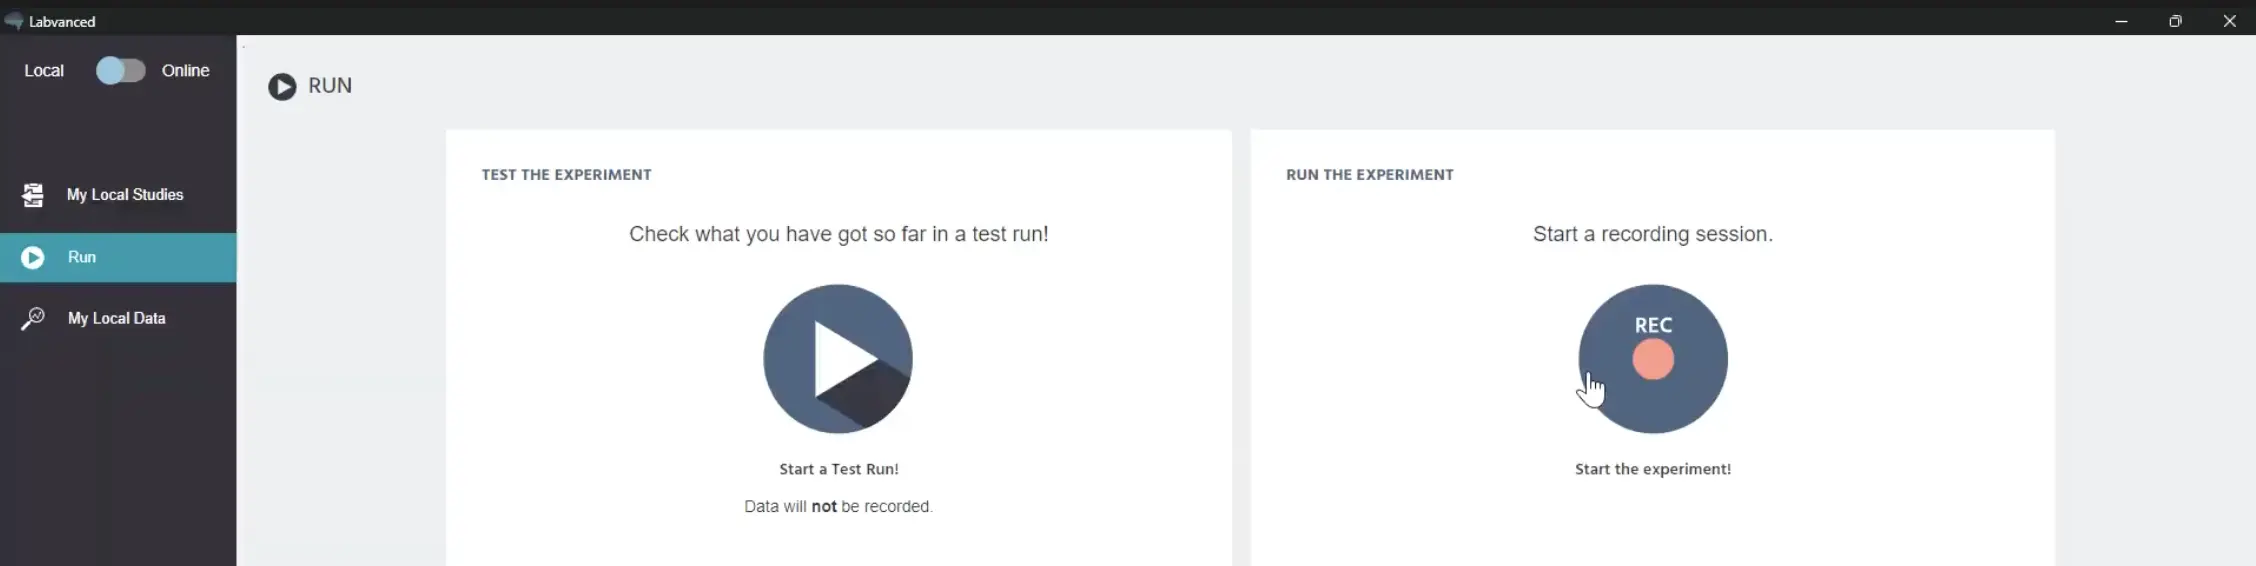
Options to do a test run or start a recording session locally.
LSL Integration: Connecting External Devices
The Lab Streaming Layer (LSL) is used to connect external devices with Labvanced. LSL is used to establish a connection with commonly used lab equipment in order to record data using:
- EEG systems
- Eye trackers
- Motion sensors
- Wearables
- and many more devices
Detailed walkthrough: For a detailed walkthrough and example of how to set up a study with an EEG connection, from beginning to end, see this page.
The image below is from a data recording session from an EEG study that was created and set up in Labvanced:
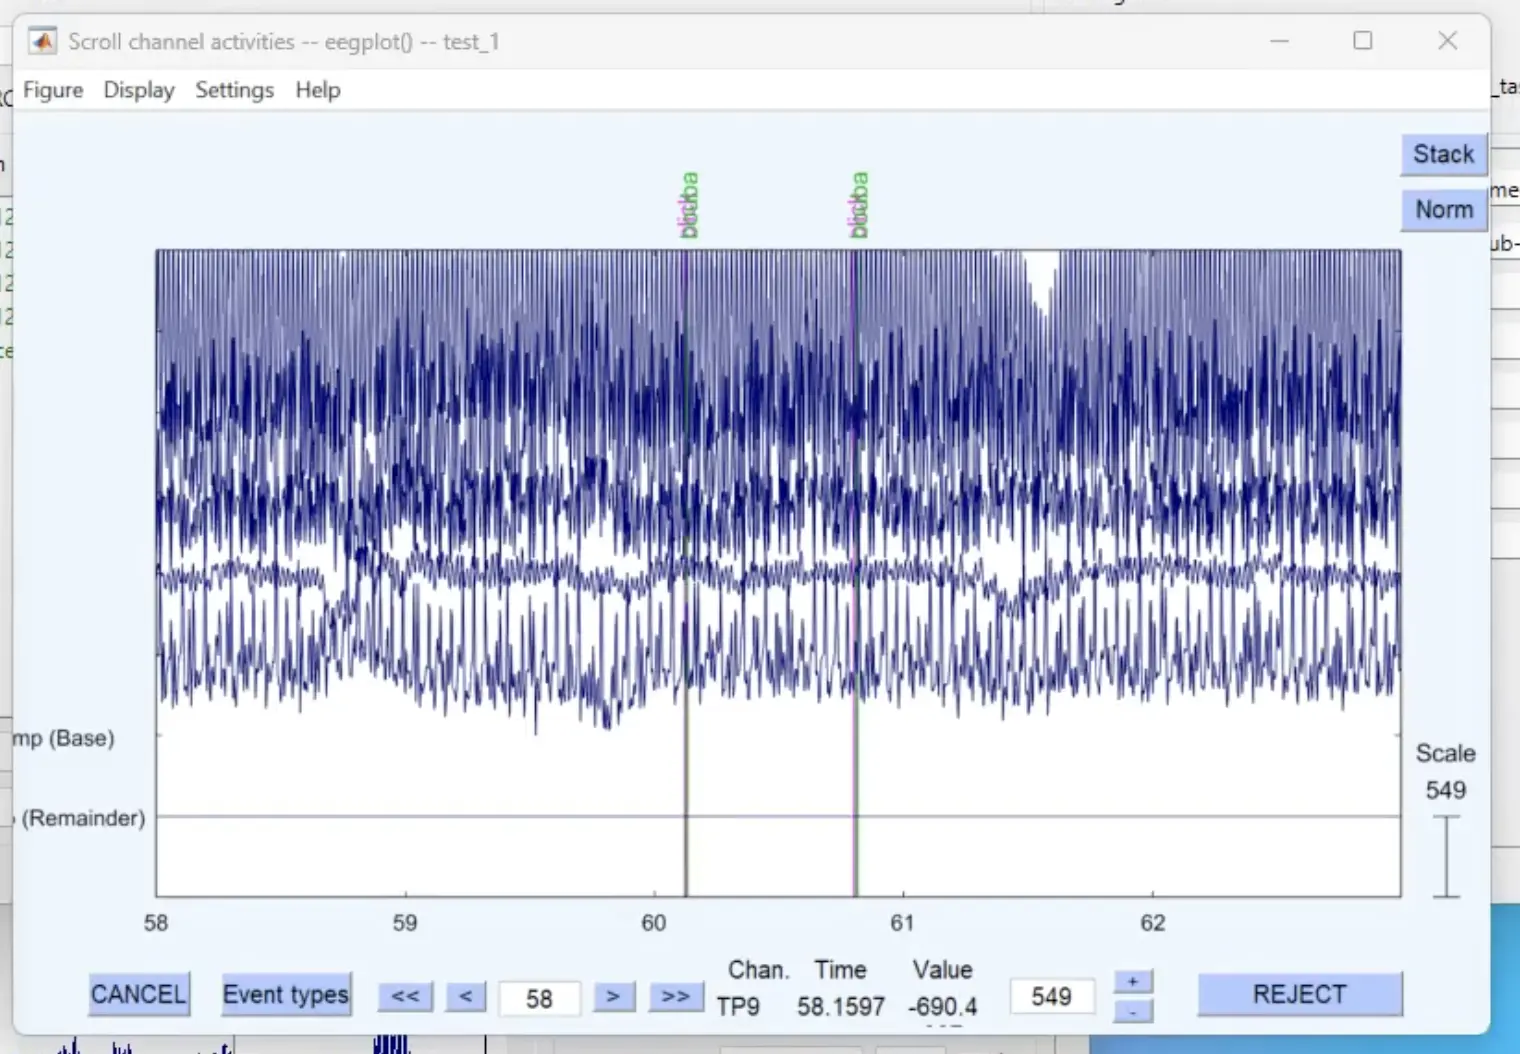
Preview of an EEG study done using the Labvanced desktop app. The event markers are listed vertically at the top in pink and green.
These are the two common scenarios for establishing a connection between Labvnanced and your external device(s):
| Scenario 1 | Scenario 2 |
|---|---|
| Connect your external devices via the Labvanced ‘Study Settings’ and the desktop app. For older devices (like EEGs with serial ports) or custom protocols, you may need to consider Scenario 2. | If the default settings are not enough for you or you need to follow another protocol, then you can utilize a Websocket API to establish an LSL connection between your device(s) and Labvanced. See our Websocket API documentation for more information. |