The Functions of the Run Tab
Description
The Run Tab can be used to do test recordings (with and without data collection) and to enable data recordings of formal runs of your study. It is separated into 3 columns / sections. In the left column, you can test the execution of the whole study without data recordings being made. In the center column, you can start a test session with data recordings enabled. In the right column, you can enable or disable the data recording status of the study, which is necessary for publishing.
Enabling Recording and Locking Editing
In order to keep a consistent data structure, studies are either in the creation / editing state OR in the recording state. A newly created study will always be in the editing state. Clicking on the enable / disable recording button will switch the study back and forth between states. Data can only be recorded when the study is in the recording state, which locks the editing of the study such that no more changes to the experiment structure will be allowed.
If you make changes to a study while it is in the recording state (editing is locked) and wish to save these changes, you will be asked to select one of the following three options:
- Delete all recorded data, disable publishing, and switch back to the editing state: If you choose this option, please make sure to download and store any relevant data beforehand.
- I know what I am doing and save anyway: Please be very careful with this option and only choose it if you are sure that the changes you have made will not change the data-output (i.e. variables) of your study. Otherwise you might cause severe damage to your study. The study will remain in the recording state.
- Cancel editing and reload from server: Choosing this option will discard your changes and reload the locked version from the server. The study will remain in the recording state; this is the safest option.
The lock feature is important to ensure that major alterations are not performed during live runs of the study. If you make a change while a subject is participating in the study, it could alter their experience and render their data unusable.
You can also switch back from the recording state to the editing state within the "Run View". When doing so, you will see a dialog box that reminds you to download all of the collected data before proceeding. Returning to editing mode unpublishes the experiment AND deletes all of the data that was recorded.
Group and Session Selection
Experiments can be set up with multiple subject groups and/or multiple sessions. However, one execution of the experiment is always fixed to one specific subject group and one session. When you start the experiment outside from the Run tab (e.g. via the link or the experiment library), the group and session assignment will typically be done automatically. This can be set to manual in the study settings. For more information read the "Groups" section under "Study Design." When you start the study from the Run tab, you can determine the group and session independently. This can be useful either for testing functionality of a specific group or session, or when doing local recordings and needing to assign a participant to a specific group and/or session based on your custom choices. When you press "Start A Test Run", or "Start the Experiment" a dialog will appear in which you can determine the Group and Session. Additionally, you can provide a "Subject Code", which will work as a custom identifier for a participant and will be shown in the data view.
Subject Counters
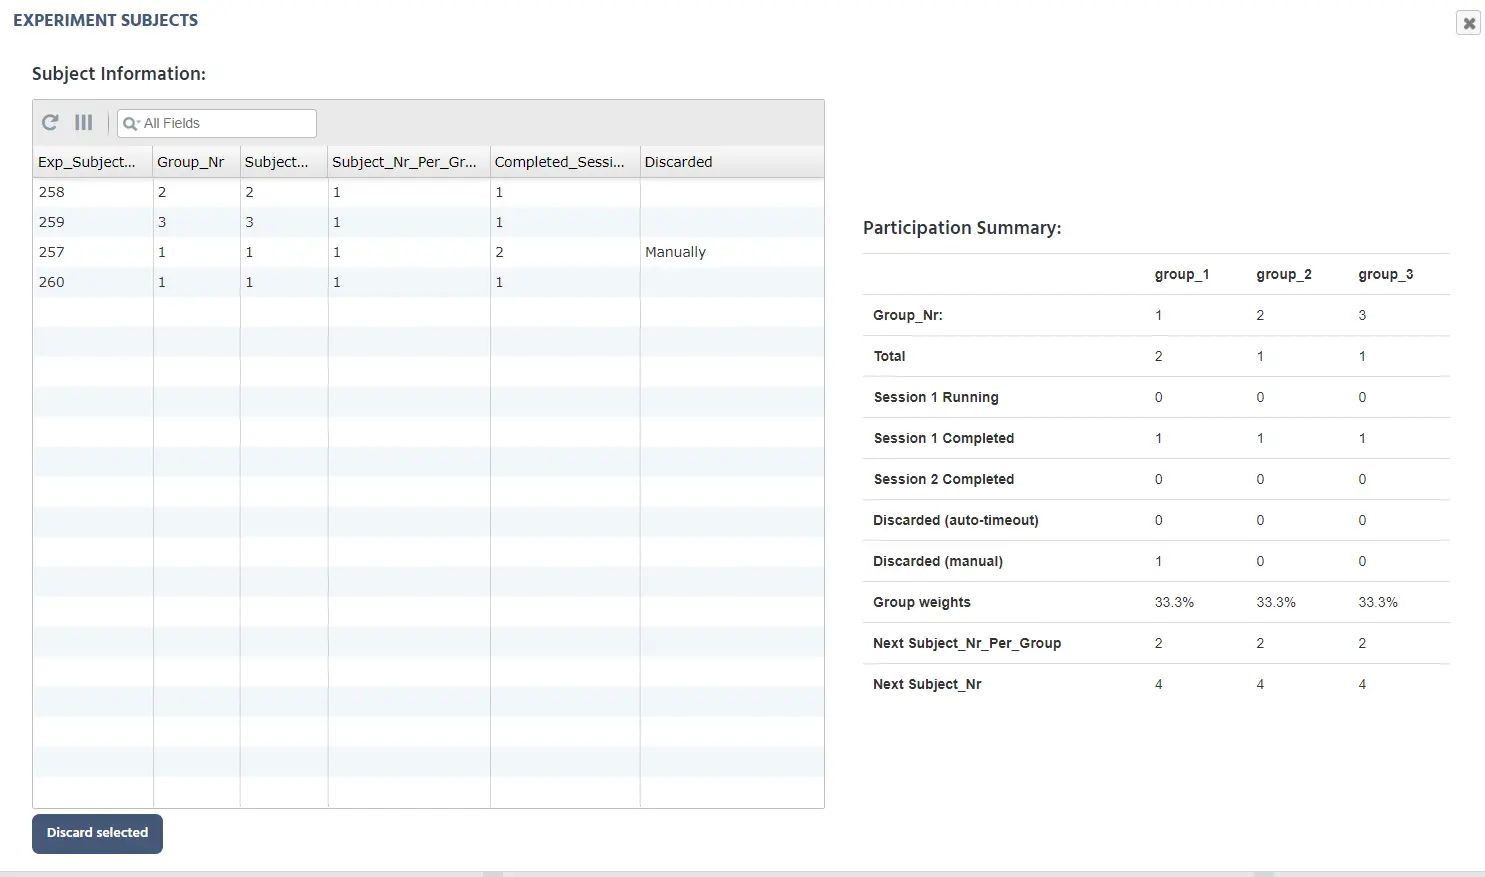
Labvanced has two types of subject counters for each study: a global participant counter, which will always increase when a new subject starts the experiment; and a subject counter for each group, which will increase when a subject starts the experiment and is assigned to that subject group. Functionally, the counters are most important for between-subject balancing. For instance, if a factor with 3 levels is set to be random and balanced between subjects, then for subject 1 the factor level 1 will be chosen, for subject 2 the factor level 2, and for subject 3 the factor level 3. The sequence will then repeat, so for subject 4 the level 1 will be chosen (and so on). The counters show exactly how many participants have been assigned to each group and thus how many more are needed to balance the groups. Users can view and also reset the subject counters (set all counters to zero), in the central column of the Run section. But please be aware, this might interfere with your between subject balancing.
There is also a counter for subject numbers with replacement. This will be visible if automatic subject discarding is enabled. The counter will show a table of the subject numbers in your experiment, including how many times that subject number has been assigned and re-assigned. Balancing as specified will be maintained.

Recording Limits (Before Publishing)
For users who are using Labvanced under the free or single study plan, the number of recordings which can be stored within the data-view is limited as long as the study is not published. Currently there can be maximally 3 recordings in the data-view under the free / single study plan before publishing the study. However, you can download and then delete your current recordings from the data-view to be able to record more data before publishing. Most often, it will be easier to publish your study if you want to conduct more data recordings. There is no limit to how many data sets can be held in the data view for published studies (even for free / single study plan users). For published studies, the number of possible recordings (per month) is dependent on your license plan.