Introduction to the Labvanced Guide
Welcome to the Labvanced Guide! You are about to embark on the exciting journey of launching your online experiment and this guide is here to help navigate you through the waters!
Table of Contents
With this guide, you will be able to learn the different sections of the Labvanced interface step-by-step, as well as explore featured topics.
Also, checkout our videos section to learn how to use the Labvanced platform. The video below walks you through the platform and gives you an overview:
If you have any questions or any difficulties implementing the topics discussed in this guide, please reach out to us as we are always improving how this information is explained and presented!
Getting Started
Explore the core building blocks that power your experiments. From setting up your first study to understanding how different components interact, this section covers key topics that are crucial to understand in order to get started.
Task Editor
The Task Editor is where your experiment comes to life. Design workflows, structure trials, and control the flow of your study with an intuitive interface that lets you translate ideas into interactive tasks.
Stimulus Presentation
Learn how to present visual, auditory, or interactive stimuli with precision. This section introduces the tools you need to control timing, layout, and delivery, essential for creating engaging and scientifically sound experiments.
Correctness of Response
Understand common approaches for evaluating participant input in Labvanced. This part covers you how to define and assess responses.
Objects
Objects are the building blocks of your experiment’s interface. Discover how to create, customize, and manipulate elements like text, images, and buttons to build dynamic experimental environments.
Events
Events drive interactivity in Labvanced. Learn how actions (like clicks, key presses, or time triggers) can initiate changes, making your experiment responsive and adaptive.
Variables
Variables allow you to store, track, and control data throughout your study. This section introduces how to use them effectively to manage conditions, record responses, and create flexible experimental logic.
Relating the Guide to the Labvanced Interface
The Labvanced platform consists of various functions that enable you to create, run, and share online experiments and psychological studies directly in the browser. In the interface, these different functions are separated into various sections or tabs based on where you are in the experimental design process.
You can navigate between these tabs by using the black navigation panel located on the left side of the interface. The side menu is essentially divided into two categories:
Before explaining these tabs and how to navigate through the platform, let’s quickly take a look at the featured topics that are also covered in the Labvanced guide.
Main App Tabs
Upon logging into the Labvanced platform, the Main App Tabs that appear on the left-side menu are explained below so you can confidently navigate through Labvanced:
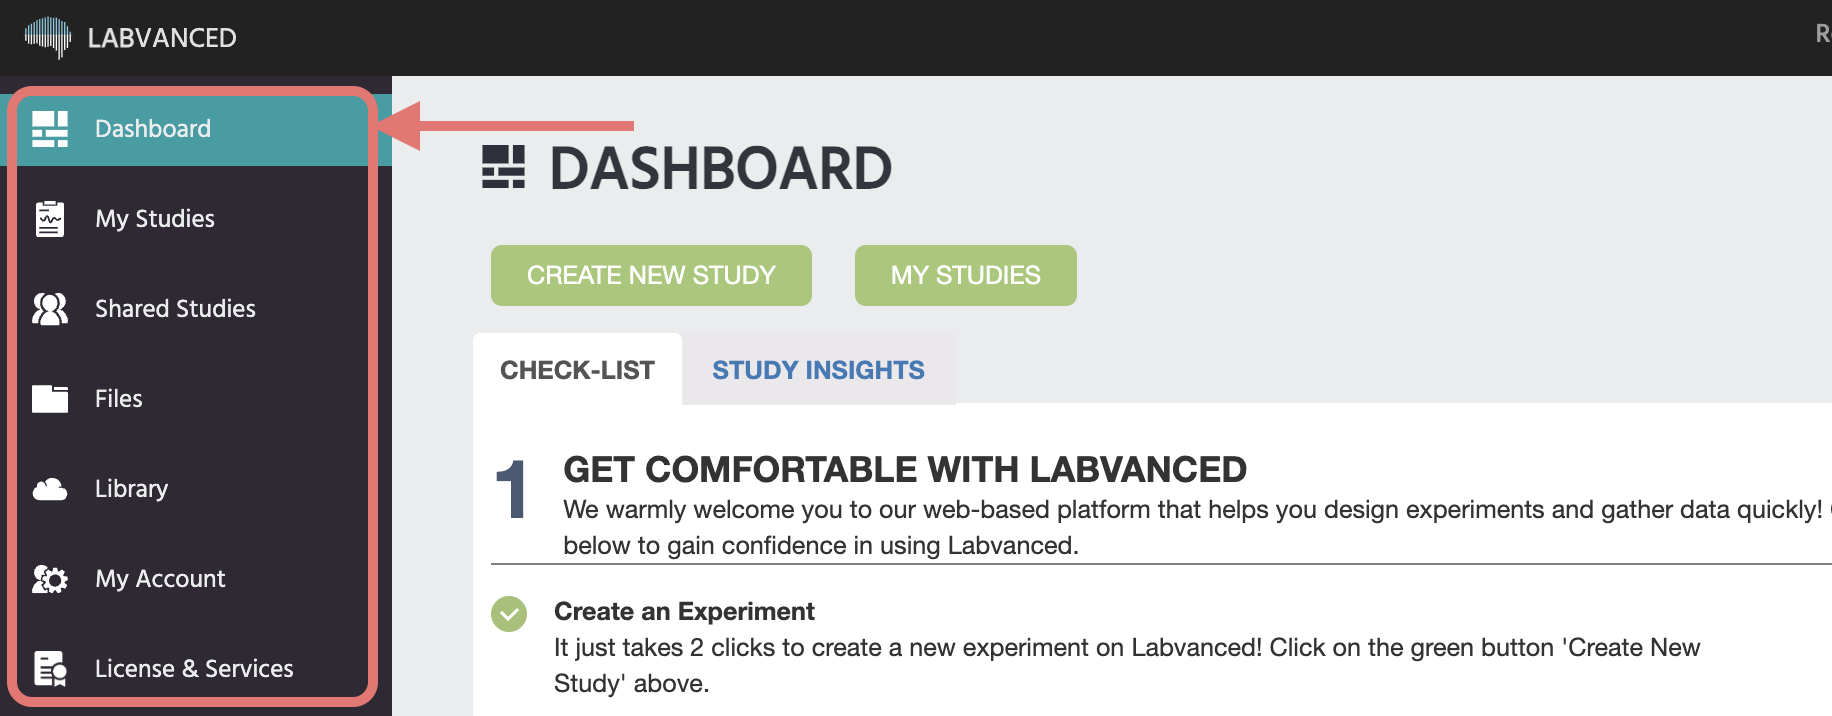
- The Dashboard: Background about the app’s ‘Dashboard’ which is the first tab that users see when they log in to the app. The dashboard is designed to help with onboarding, provide relevant notifications, easy access to video tutorials, and report study insights.
- My Studies: The My Studies tab is where you can create, import, and edit all of your studies. New studies can be created here.
- Shared Studies: The Shared Studies tab shows all of the studies that have been shared with you that you have accepted the invitation to edit. This tab has the same functionality as the My Studies tab, with the additional option to copy any Shared Studies to your personal account. You cannot delete studies from this tab.
- Files: The Files tab contains a folder for each study. Shown in each folder are all of the media files used in the study. This is also where you will find any participant recordings, which are grouped in folders according to Subject ID. Right-clicking on the folders will bring up options to download, rename, delete, and edit the settings of the directories (folders). Right-clicking on the files inside the folders will give you the option to delete or rename files.
- Library: Introduction to the Public Experiment Library, a free and public resource that is a collection of all publicly available online studies created in Labvanced. When you import a study, it creates a new study which is displayed in the ‘My Study’ tab and you can use this imported study as a template as a starting point for building your experiment.
- My Account: The My Account tab shows all of the information relating to your account. This includes your license plan, the features associated with this plan, and how much of your license quota you have used up to this point. If you are the owner of a Group license, you can also see the users that have been added to the license and their statistics, such as the number of studies published and the number of new datasets recorded in the past 90 days.
- License & Services: This tab provides you information and data regarding your license, including: the type of license, expiration date, what features you have available, how much storage you have used and more.
Study Tabs
When a specific single study is opened and in an editing state, the side menu changes to have more options which are relevant for study creation:
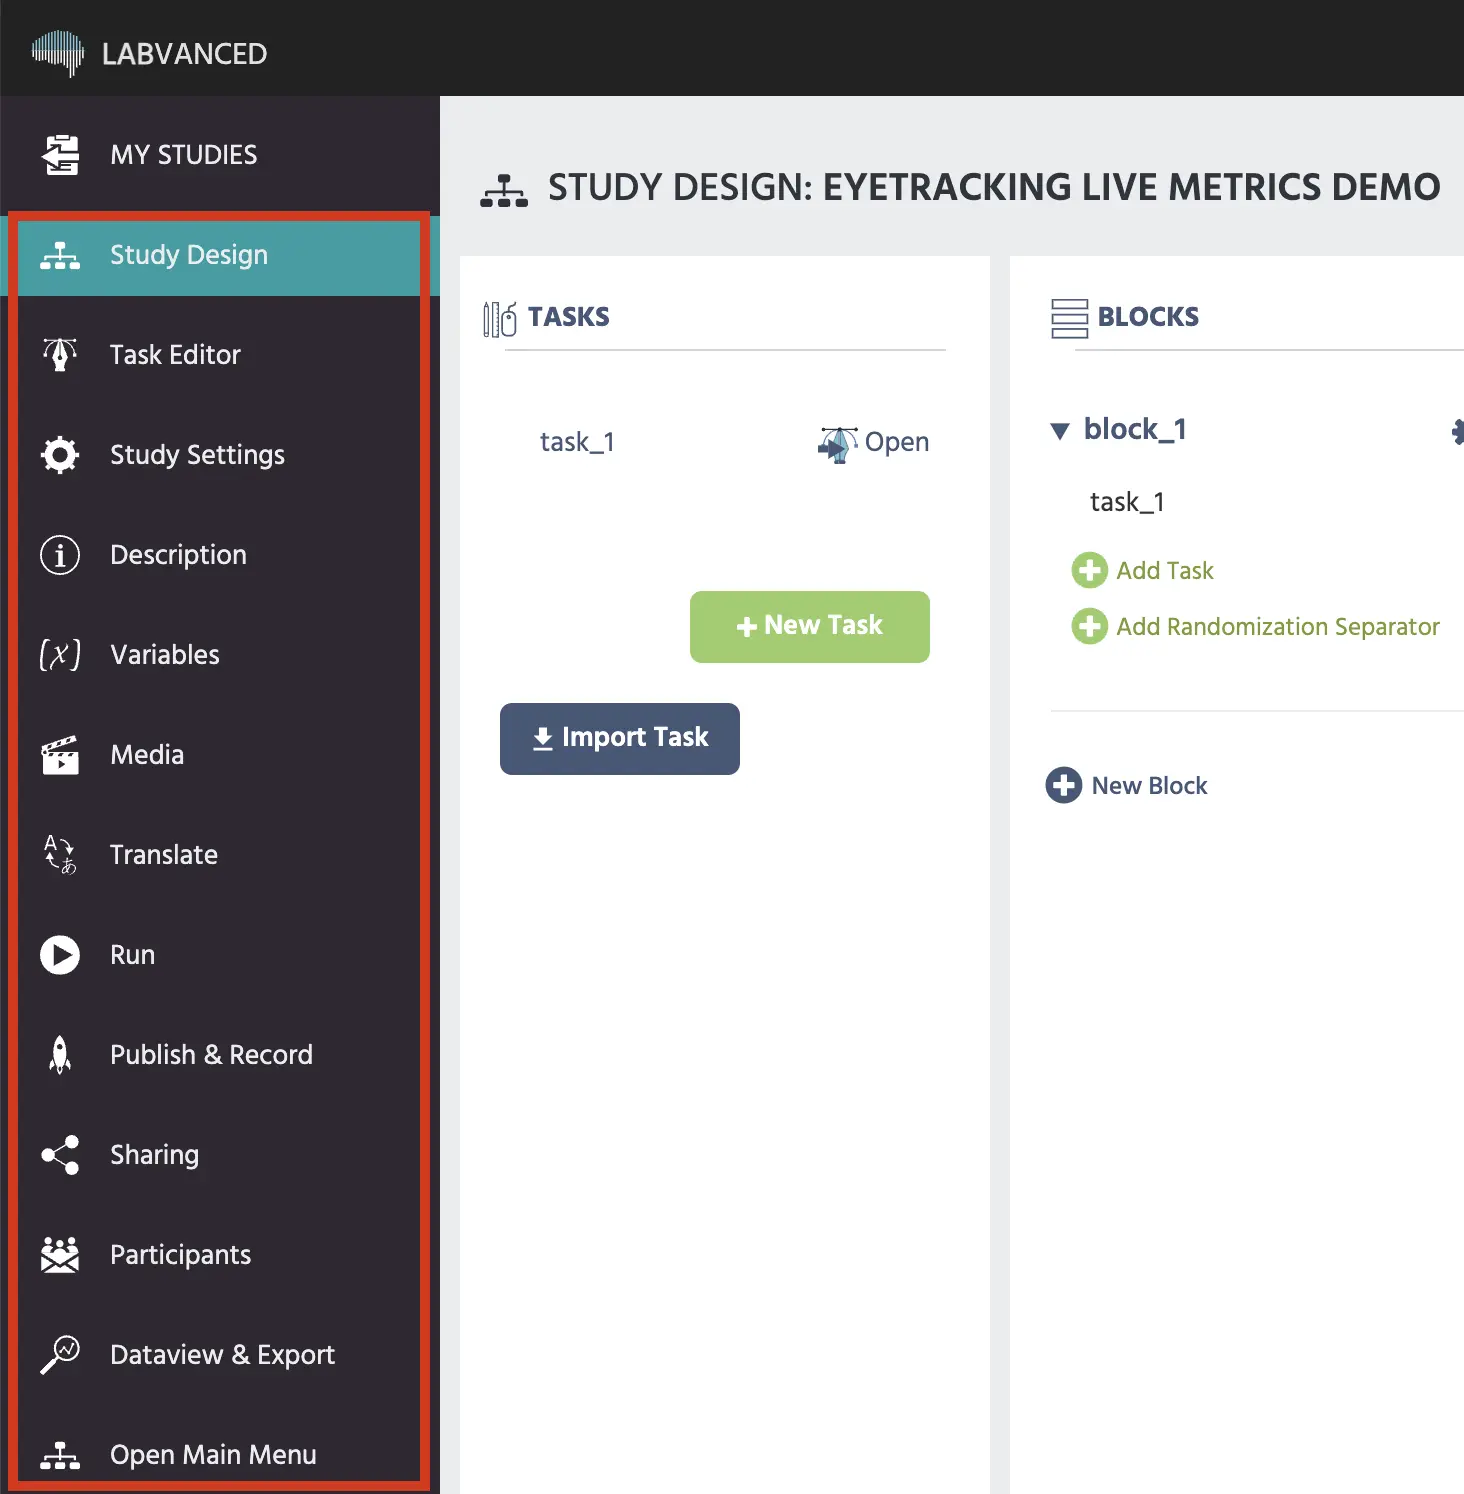
- Study Design: This part of the guide explains the principles of the Study Design tab, shown in the image above. Concepts covered include: tasks, block, sessions, and groups and how implementing them in the Labvanced platform looks like.
- Task Editor: This part of the guide is an in-depth explanation of everything that has to do with creating tasks in your online experiment. Topics covered include the trial system, objects / stimuli, variables, and events, as well as advanced topics like implementing eye tracking and multi-user features in a task.
- Settings: Description and instructions on how to utilize the study settings tab in Labvanced in order to specify certain requirements for their study, like which browsers are allowed, what screen size is permitted, what should happen in the event that the participant exits from a ‘full-screen’ mode of the study and more.
- Variables: This part of the guide introduces you to the Variables tab in the editor and describes what information is presented here with regards to the variables you have created in your online study.
- Media: Explanation of the media tab and overview of the files (videos, images, etc.) that are used in the study.
- Texts & Translate: Guide to the translate tab, relevant for online studies that are multilingual, ie. translated to multiple languages.
- Launch & Participate: Explanation of how to do test recordings in Labvanced (with or without data collection). This tab is relevant for testing out your experiment before beginning official data collection.
- Subject Management: Where you can go to manage your subjects by adding them, inviting them to your experiment, as well as communicate with them by editing the email templates that are sent out for each session.
- Dataview and Export: Guide to how to access, view and export the experimental data collected from your online study.
- Open Main Menu: Returns you back to the main tabs.
This video goes through the app tabs in greater detail:
Featured Topics
These featured topics are explained in detail in this guide which are of importance for researchers using Labvanced to set up their experiment:
- Randomization & Balance: Discover how randomization and balance are handled and implemented within Labvanced.
- Eye Tracking: Information about technical specifications about our webcam-based Eye Tracking, settings, how running the study looks like and sample data output.
- Sample Studies: Introduction about the resourceful Sample Studies page and how you can utilize it to get ahead with your study creation and design, as well as familiarization with the platform.
- Participant Recruitment: Instructions about participant recruitment and linking your Labvanced study with external crowdsourcing services.
- API Access: How to utilize APIs for your data management and experimental design, as well for connecting external devices. APIs covered include the: REST, Webhook, and WebSocket APIs.
- Other Topics:
- Precise Stimulus Timings: Learn about how precision, accurate timing and stimulus presentation are handled and ensured in Labvanced.
- Multi User Studies: Introduction to studies with multiple participants, allows you to create experiments where 2 or more participants are interacting in real time.
- Head Tracking: This part of the guide provides an overview and introduction of our head tracking feature.