Head Tracking in a Task
Description
To create a new task with head tracking activated, simply create a new task within your study.
Under the Task Settings, navigate to the Physiological Signals tab, and you can enable head tracking with just a click.
Events, Actions and Variables
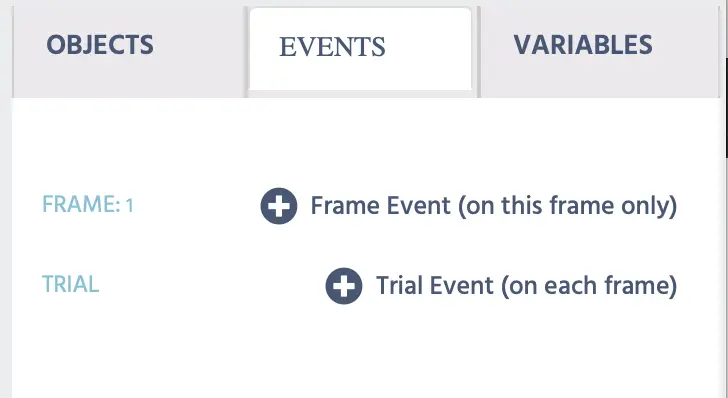
In order to activate this feature in your experiment, you have to create an Event. Go to the ‘Event’ tab on the right side of the editor and select it, then click on ‘Frame Event’ A dialog box will appear wherein you will name the event and also set up the triggers/actions that should occur at the time of the specified event. In this case, the goal is to set up variables that record data points based on head positioning and movements.
- Event > Frame Event
- Give the event a name / description > Next
After this, the dialog box will move on to prompt you to specify a trigger type for the event.
- Select Trigger Type > Physiological Signals > Headtracking > Next
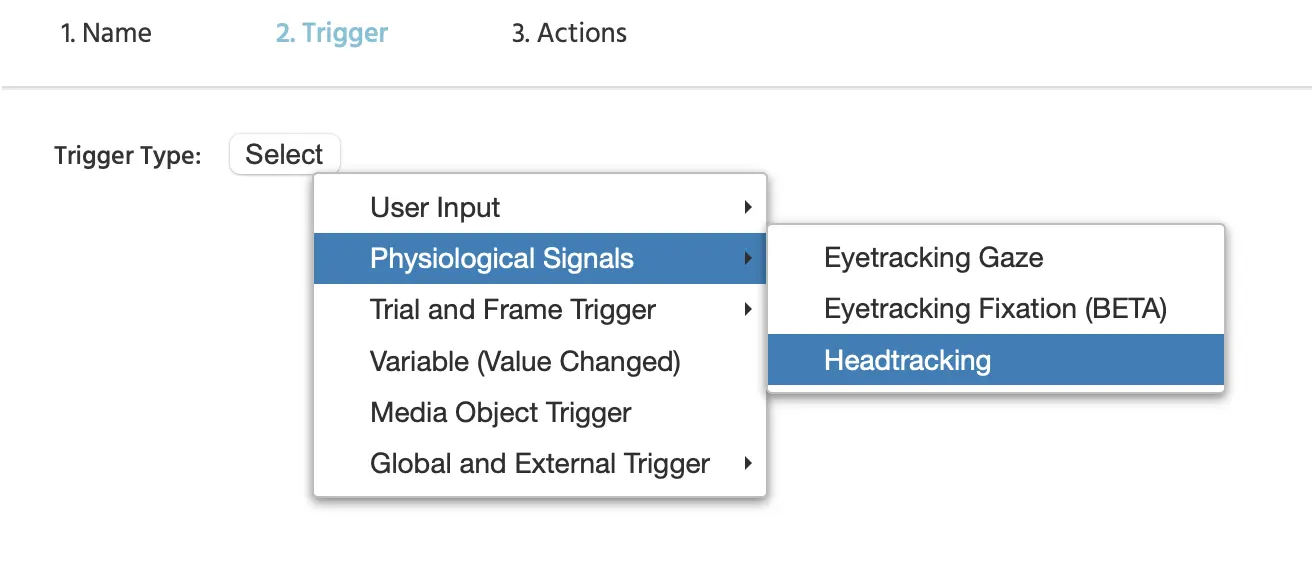
Upon selecting ‘Headtracking’ and clicking ‘Next’ to progress along the dialog box, it is time to specify what action should occur upon a detected change in head position or movement. In this case, the aim of the ‘Action’ would be to record data based on the head position or movement across time. Once you select the ‘Headtracking’ option you will see that this event will be triggered automatically by any head orientation changes or movements:

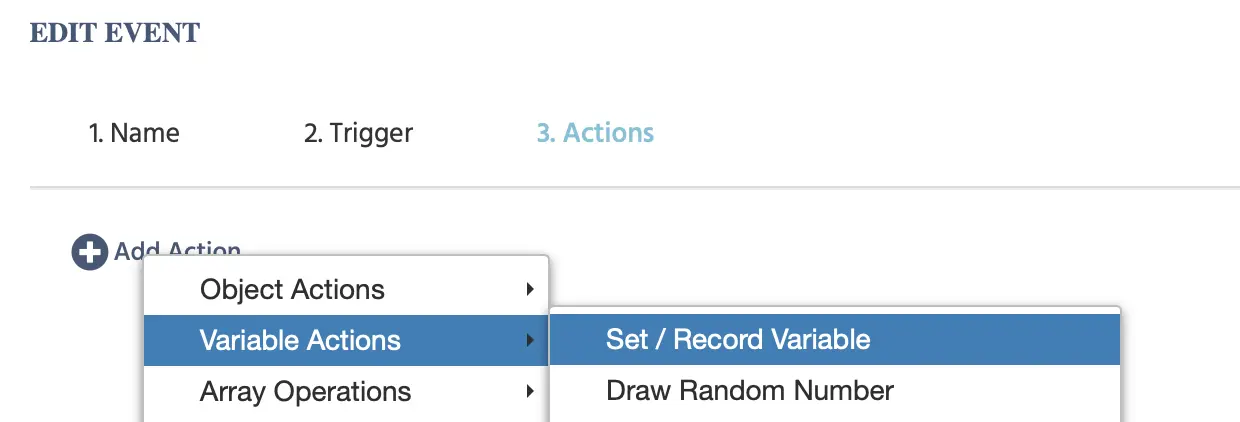
Moving on to the next step in the event system, in order for the data to be recorded and stored, an action must be added through the following steps:
- Variable Actions > Set / Record Variable
Once this is done, the interface, as shown below, will allow you to:
- ‘Select’ the variable where the data will be stored and
- Specify what physiological signal you want to be measured by clicking on the pencil / pen icon

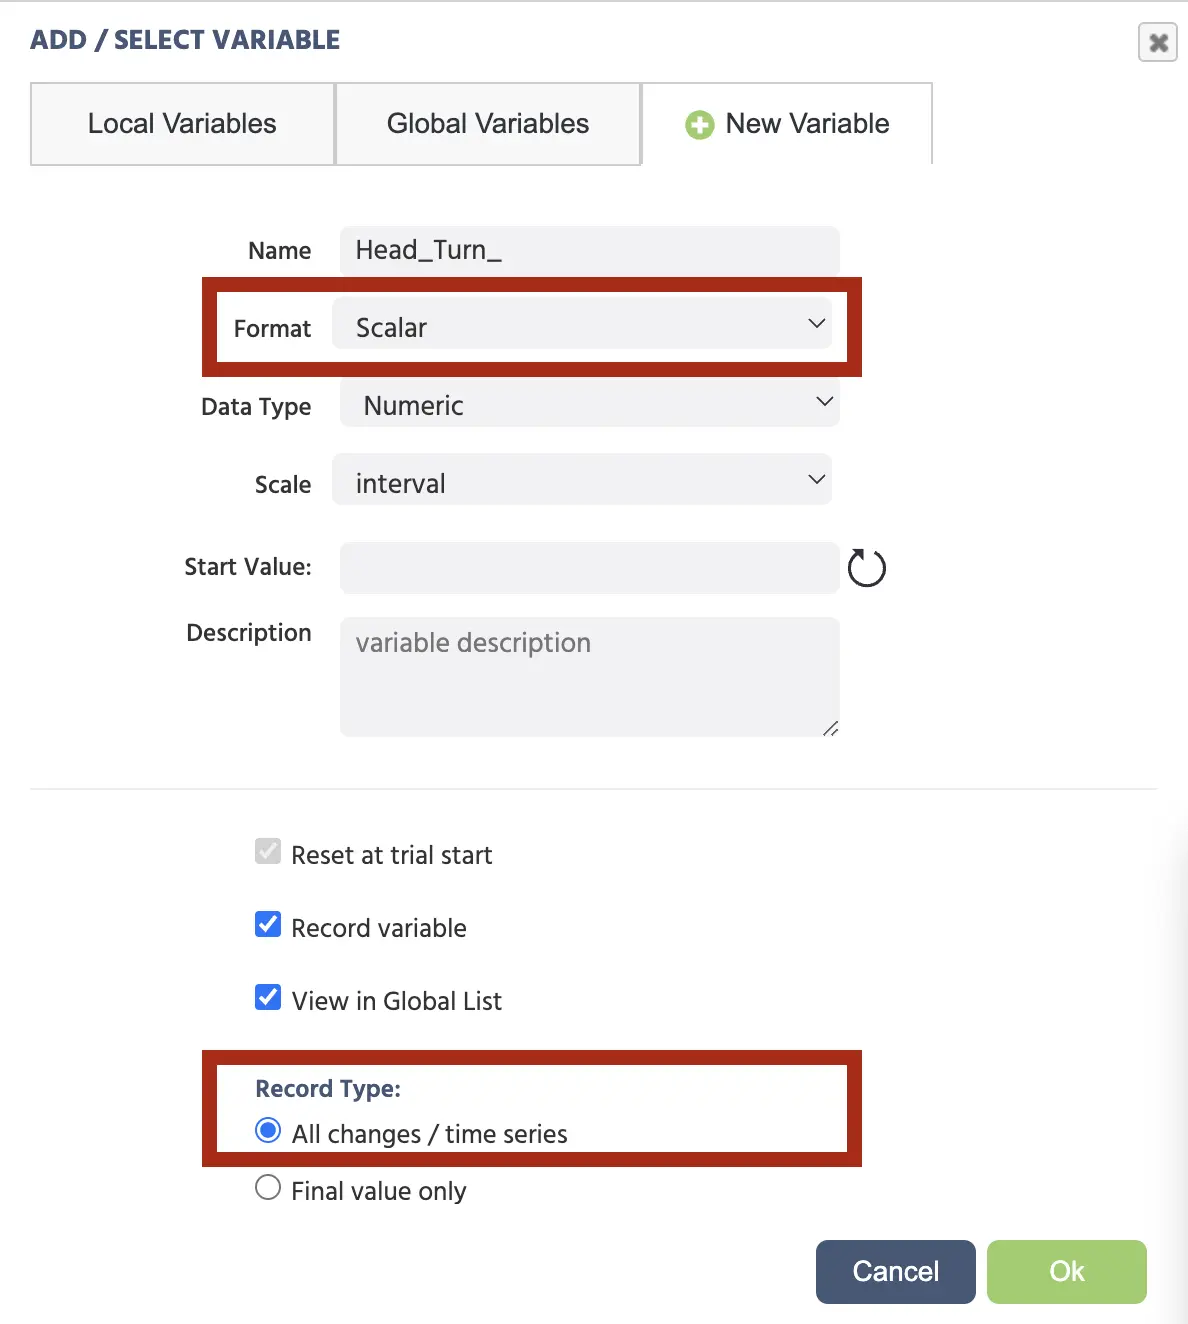
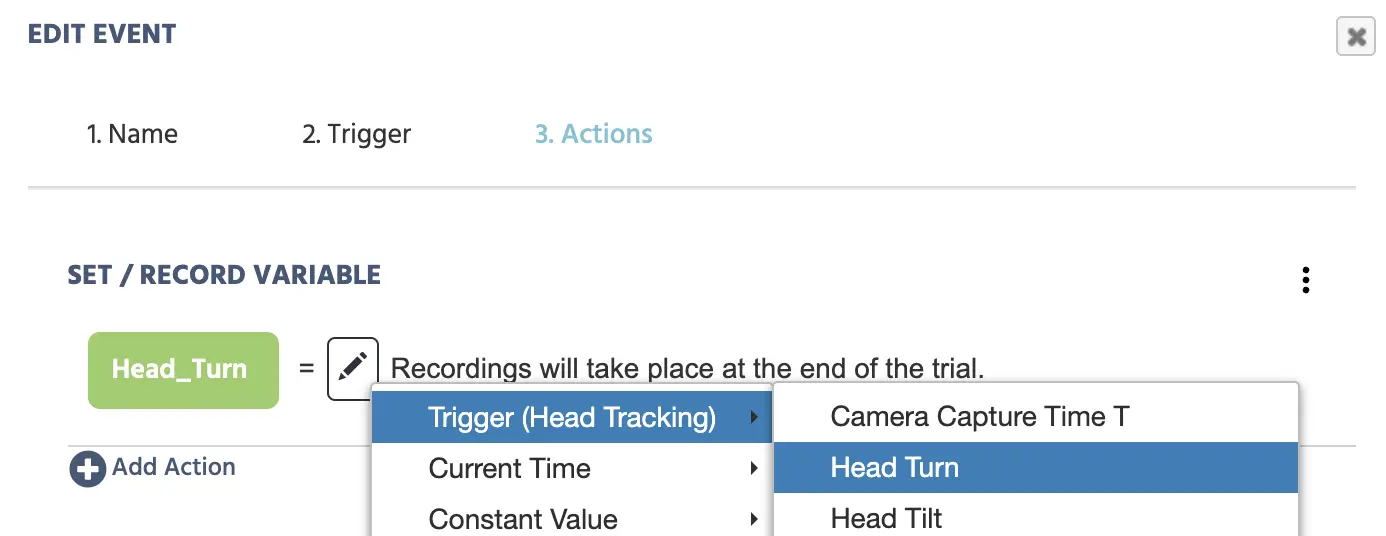
By clicking select, you can specify or create a variable where you want the measurements to be stored using this event. In the example below, we create a ‘new variable.’ The name of the variable is Head_Turn and the format is Scalar because the measurement is a single number. Also, because the variable is recorded across time, the ‘All changes / time series’ option must also be selected.
- Note: For more information about variables, please refer to the Variables section in the Learn Documentation.
Once this variable is created, you can click the pencil icon to specify what aspect of heat turning behavior you want to measure. In the example below, as the variable name we gave, the Head Turn physiological measurement will be tracked.
- Note: The other available options for head tracking-related measurements are described a little further below.
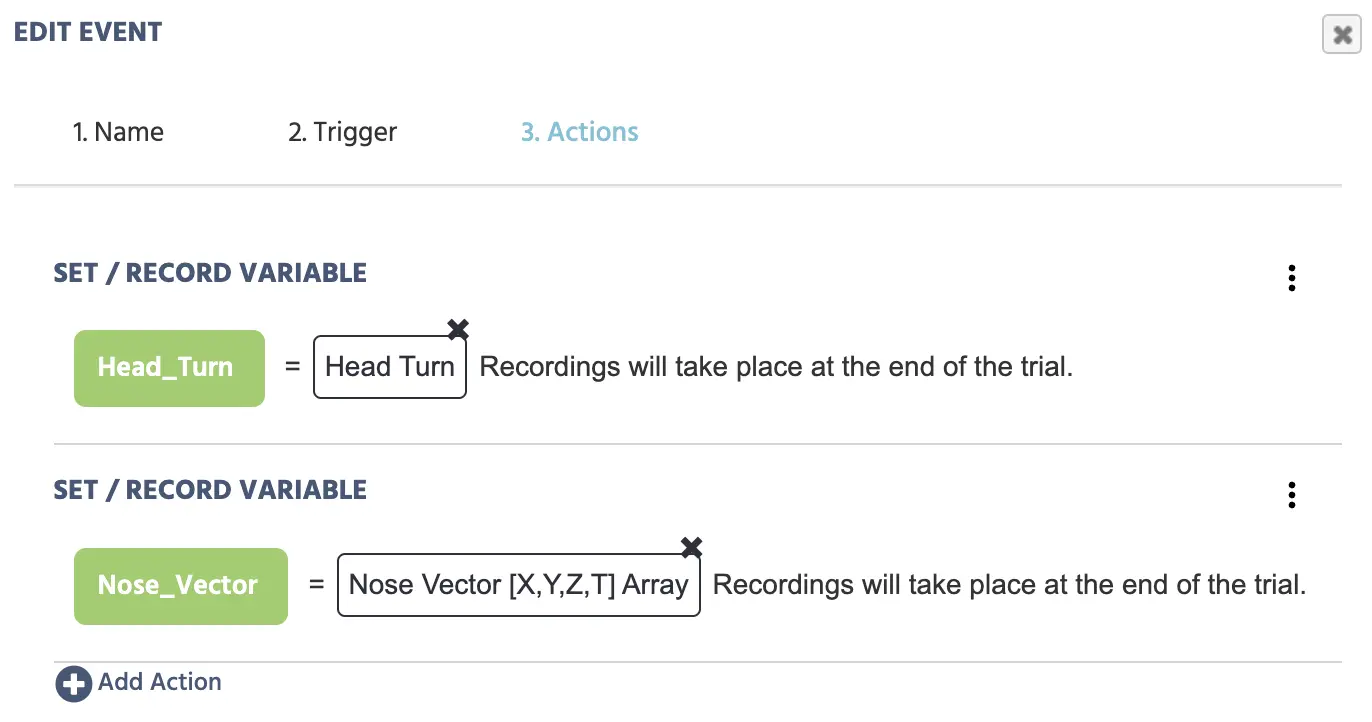
In this example, where a new variable is created, we give the name Nose_Vector because a vector option will be chosen to be recorded. When there are multiple values being recorded, the Array option is selected as the ‘Format.’ And again, since there are multiple values across time, the ‘All changes / time series’ option for ‘Record Type’ is selected.

Once this variable is created, the Nose Vector option is selected from the ‘Actions’ menu.
- Trigger (Head Tracking) > Nose Vector [ X,Y,Z,T ] Array
The 'Actions' menu then will have the following variables listed based on what we have done so far:
Head Tracking Options
In this section, each of the drop-down options will be explained and the type of measurements that they provide.
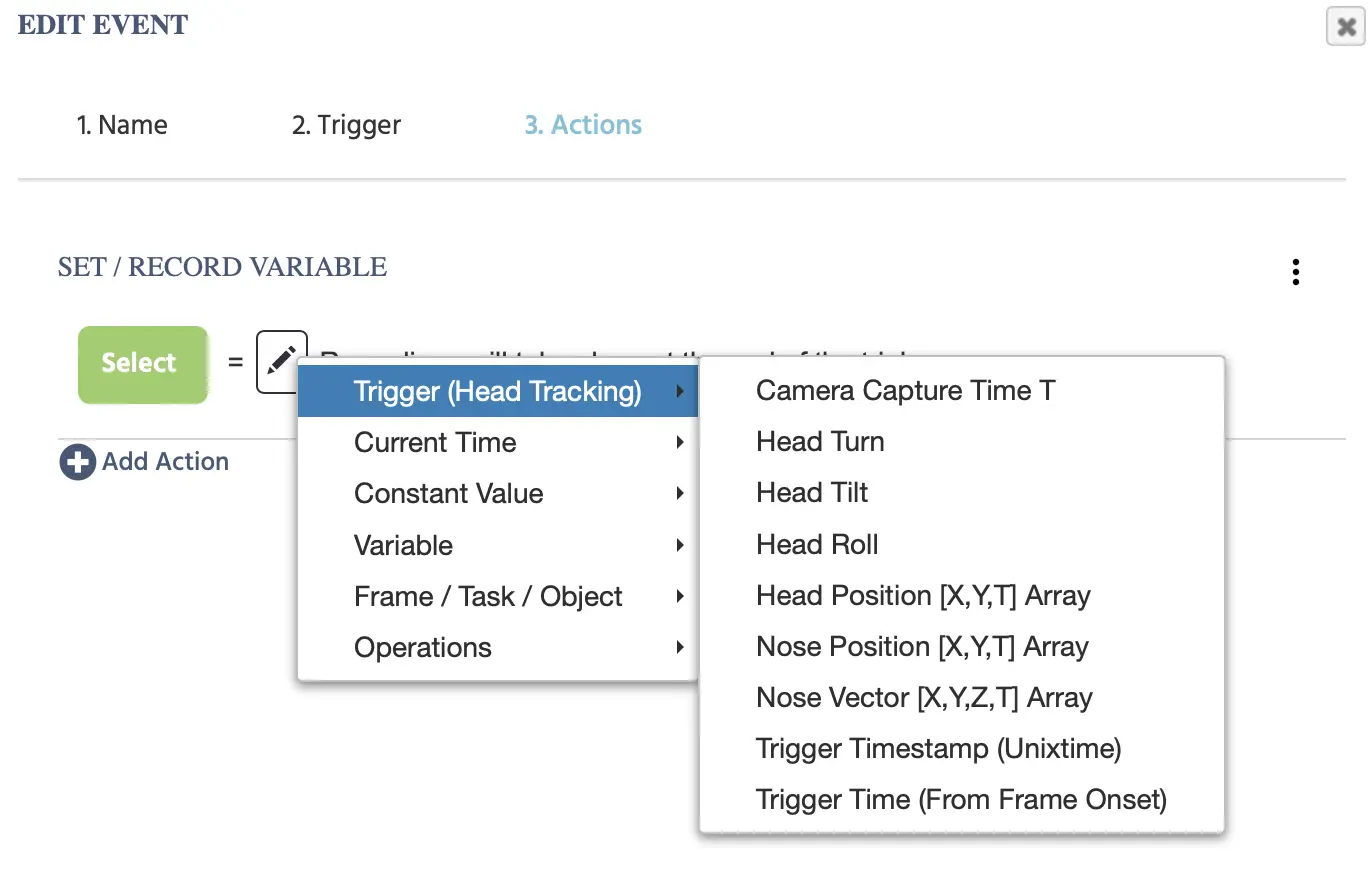
As seen by the drop-down above, the following options are given for recording data related to head position and orientation:
- Camera Capture Time T: When the camera captured the frame, ie. a unix timestamp of when the frame capture occurred. This is the time that the image / frame was captured before any processing occurs.
- Head Turn: Head turning from left to right, this is referred to as the yaw in literature
- Head Tilt: Head tilting from up to down, known as head pitch in the literature
- Head Roll: Captures the movement of the head rolling from side to side
- Head Position [X,Y, T] Array: This array captures the numerical values associated with head position, this includes the x- and y-coordinates for the center of the head along with the timestamp variable (T).
- Nose Position [X,Y, T] Array: This array captures the numerical values associated with the position of the nose specifically, this includes the x- and y-coordinates for the where the nose is located along with the timestamp variable (T) of when the measurement occurred.
- Nose Vector [X,Y, Z, T] Array: This measurement works by projecting a vector from the nose tip and is useful for testing whether the participant is attending to the screen ( this is especially important for studies where eye tracking is not enabled). Thus, if the nose points off screen (ie. the participant is not attending to the experiment) the Z value decreases from 1 and moves closer to 0.
- Trigger Timestamp (Unixtime): Time point during the experiment when the trigger itself occurs where the head tracking was detected and accounts for when the trigger occurred in the system. Essentially, this is the time where processing the image / frame is processed and this value is largely affected by the participant’s graphics card. In theory, it should be as close as possible to the value T.
- Trigger Time from Frame Onset: This is the time value of when the time occurred with regards to when the frame onset happened.
For additional information about head tracking, please contact us by booking an intoductory demo call.