The Text Editor
Description
The text editor can be used to format and edit any (editable) text element on the frame. It appears when double clicking inside an editable text element. Aside from editing text, the text editor can be used to render / display variables and to insert / combine images and tables within text elements. The most obvious text element is the text object itself, but many other objects also have editable text elements, either as an optional header or as text answering options (e.g in checkboxes and multiple choice elements).
Each of these text elements can be edited by clicking into the text. A small blue border shows the element boundaries of the editable text element. Once the cursor focus is within the text, a text toolbar will appear above the current frame. Here one can make several text formatting choices, but also insert variables, images, tables, etc.
While it is possible to change the text content and the style of an editable element from trial to trial, it is currently not possible to change the text content or styles dynamically during the experiment execution using the event system. If you want to show different texts or different styles (in one object / element), the best solution is to make two versions / two objects and then dynamically show and hide them based on your custom logic. 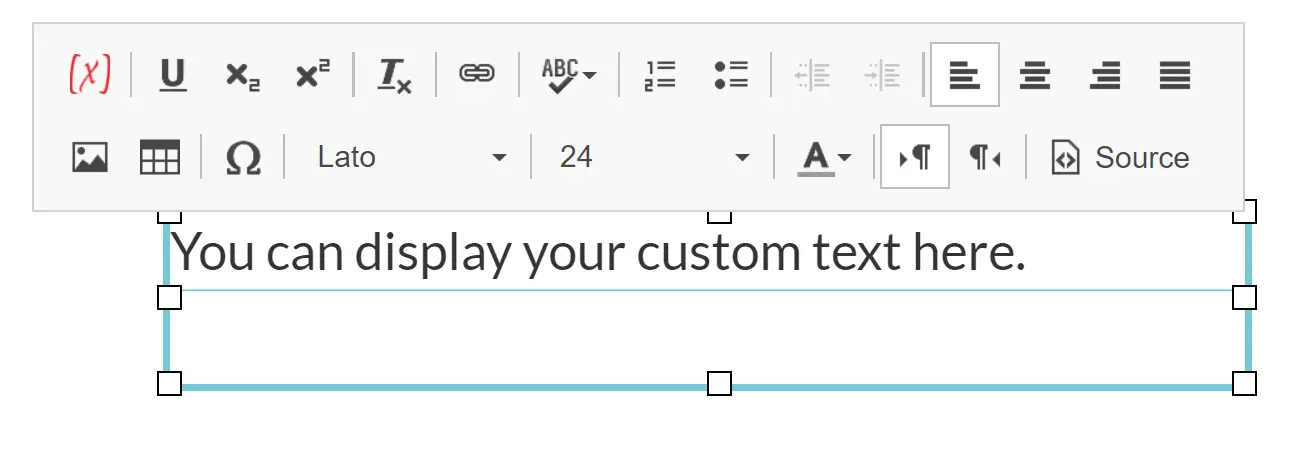
Text Formatting Options
The text editor has similar formatting / editing options to most word processors. These options are listed below (from left to right in the text editor):
- Insert Variable: Inserts / renders a variable value.
- Underline: Underlines the text.
- Subscript: Makes the text appear below normal text.
- Superscript: Makes the text appear above normal text.
- Remove Format: Clears all formatting.
- Link: inserts a URL that can be clickable. Contains advanced settings.
- Spelling Check: Performs a spelling check.
- Numbered List: Makes a numbered list.
- Bullet Lis:t Makes a bullet list.
- Text Align Left: Aligns the text to the left.
- Text Align Center: Centers the text.
- Text Align Right: Aligns the text to the right.
- Text Align Block: Makes the text use the whole line.
- Insert Image: Inserts an image.
- Insert Table: Inserts a table.
- Insert Symbol: Inserts a symbol / special character.
- Font type: Changes the font type. Can also be used to make the text bold and italic.
- Font size: Changes the font size.
- Font color: Change the font color.
- Text direction from left to right: Specifies that the text should be read from left to right. (default)
- Text direction from right to left: Specifies that the text should be read from right to left. (language will still need to be manually changed in Settings)
- Source: Shows the current coding for the object.
Display / Rendering Variables
To display a variable's value, click within a text element and then click on the first (red variable) icon within the text editor toolbar. The variable-select menu will open and you can select a variable that you want to display. After you press "ok," the variable will be inserted within the text element and a placeholder showing either the variable's name or its start value will be placed into the text as a handle. This allows users to combine static text with dynamic variable values (e.g. you can provide feedback by doing something like this: "your score is: 'variableX'") A variable's value can also be formatted (style changes can be applied to a variable) when the handle is selected and then respective changes are made. Typically, it is better to first apply all of the desired style changes and then insert the variable(s). The variable value will automatically adapt to the surrounding style. Upon experiment execution, the variable values will be updated automatically. In other words, the value which is shown will always be the current value / state of the variable.
Inserting Images & Tables
Users can also insert images and tables within editable text elements by clicking on the respective icons in the text editor toolbar. When inserting an image, click on the "Browse Server" button to select an image from your Labvanced file repository. You must provide the height and the width of the image in pixels and then press "ok". Inserting images into editable text elements can be useful if you want to combine image selection within a multiple choice element, or when you want to combine images and text for some kind of description / explanation.
When you insert a table into an editable text element, you have to provide the overall width, the number of rows, and the number of columns. You can also make a few further specifications, such as adding a header row or making a border around the table. Each cell of the table can then be edited separately.