
Video Conference Object
Overview
The Video Conference Object allows two or more participants to join and take part in a call during a Labvanced study. It can be used as a part of social psychology or team research study design or simply as a way for you to join the call and provide your participants with additional instructions. The Video Conference Object comes with many control options like specifying whether screensharing or toggling the video is allowed, but can also be adapted to your experimental needs via events by specifying what should happen and when.
Contents:
- Study Settings for the Video Object
- Basic Properties and Functionalities
- Enabling Screen Sharing
- Events: More Control over the Video Conference Object
- Helpful Demos (Importable)
Study Settings
Under the Study Settings tab in your study, make sure that the option for Stream IO (Video Conferencing) Integration is enabled. Here, you will input your API key and API secret key that are provided by the Stream IO video conferencing platform.
Acquiring API Keys for the Video Conference Object
Upon creating an account at StreamIO, you can navigate to its dashboard and click the blue button in the upper right corner of the page that says Create App. Here you can specify your setting options like what server location you prefer and so on. Upon creating it, you will be able to access the API key and API secret key which then you should paste in the Labvanced Study Settings as described above.
Basic Properties and Functionalities
Adding the Video Conference Object to the Editor
To be able to add the Video Conference Object to the editor, the API keys must first be entered in the Study Settings tab as described in the previous section.
Upon taking care of that, open the Media group in the task editor toolbar and select Video Conference. Upon selecting it, you will be prompted to assign it a unique variable name.
Once the variable has been created you will be prompted to activate your audio and video settings. Based on your study, you can activate just the audio or just the video or both.
About the Video Conference Variable
From the Variables tab, you can see the created variable now listed. Please note that the Start Value is automatically created. This is used as the default value of the Call ID to distinguish the particular call (for example, if you have multiple calls set up in your study, unique IDs will be important to the design and coordination of the calls).
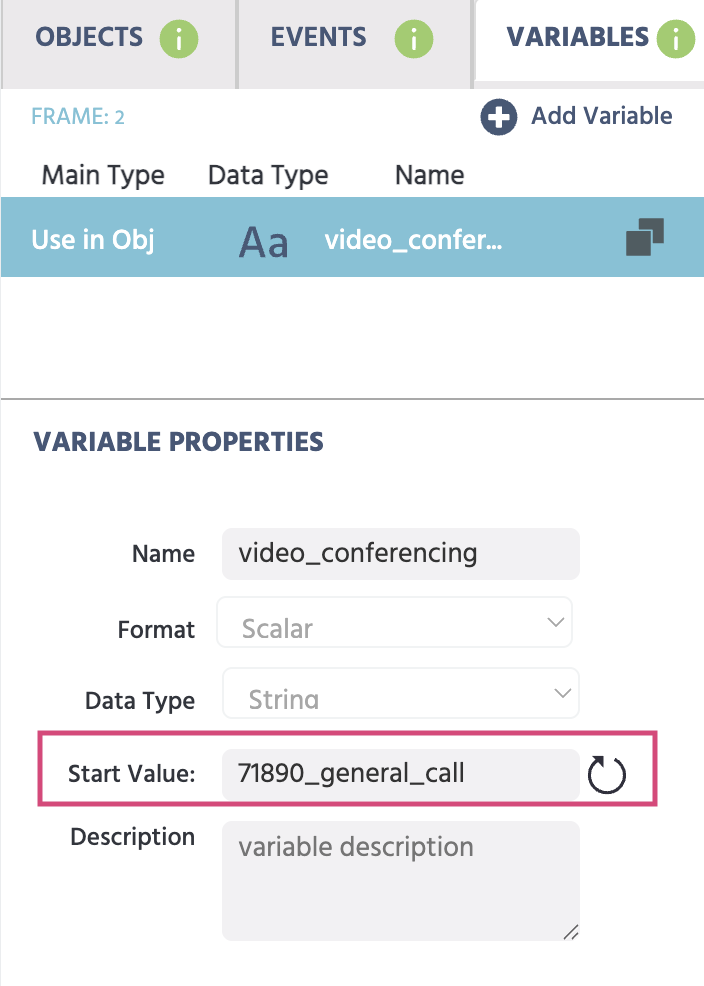
This value is used to handle all interactions with streamIO regarding the specific call.
If you have an advanced or complicated design, please feel welcome to reach out to us with any questions.
Note: The base case of a study including the Video Conferencing object in a study is that every participant would end up joining the same meeting. This is the default behavior of this object if you simply add the object to your task and do nothing else. If participants are required to join separate calls, some more work is required (ie., setting and controlling the Call ID variable) or if the call is to be limited to a specific number of participants a customized event action will be required.
Video Conference Object Properties
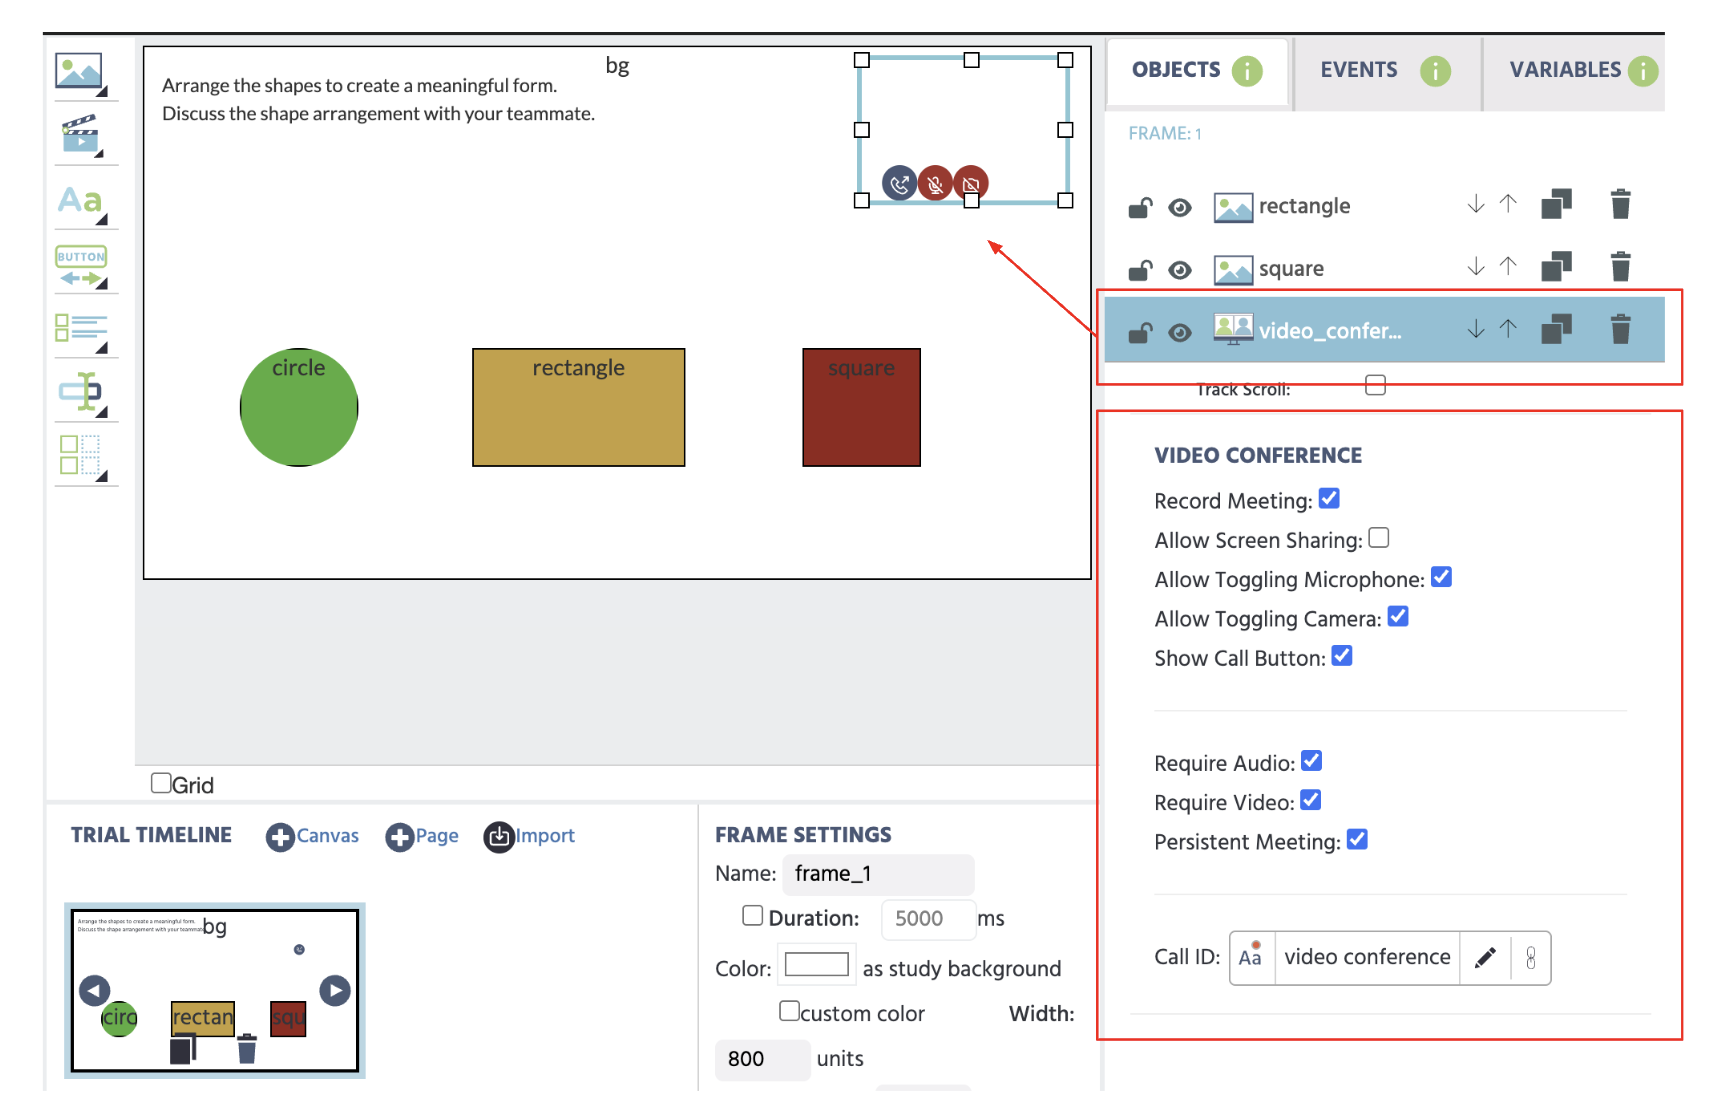
- Record Meeting: The record meeting option allows you to record (per participant) an individual .mp4 file of them during the meeting.
- Allow Screen Sharing: Enables screen sharing during the call. For instructions on how to set this up, see the upcoming section.
- Allow Toggling Microphone: Permits the participants to toggle their microphone on/off.
- Allow Toggling Camera: Permits the participants to toggle their camera on/off.
- Show Call Button: Displays the call button which participants use to join a call by clicking on it. This can be disabled and events can be used to automatically make participants enter a call via Events (whether it’s at the beginning of the study or at any other specific point).
Additional options include:
- Require Audio: Requires audio during the call, ie. microphone permissions to be on.
- Require Video: Requires video during the call, ie. camera permissions to be on.
- Persistent Meeting: The meeting connection continues in the background even while other trials are being done, allowing participants to ‘rejoin’ the meeting once returning to a task or trial where there is a video conference object.
Downloading Data
Under the Dataview & Export tab, you can navigate to a particular session to preview participant recordings. Right-clicking on the recordings folder allows you to download the .mp4 recordings in a zip folder. Within that folder, you can find the specific recordings.

IMPORTANT NOTE: Recordings are kept for only 2 weeks due to the nature of the StreamIO integration. Please make sure you download your call-related data, such as video files, before then!!!
Enabling Screen Sharing
If your study involves screen sharing, then a few extra steps are needed in order to activate this. To enable screen sharing, you must navigate to your StreamIO dashboard to the particular app which you created to use in your Labvanced experiment (ie., the app you made in order to acquire the API keys).
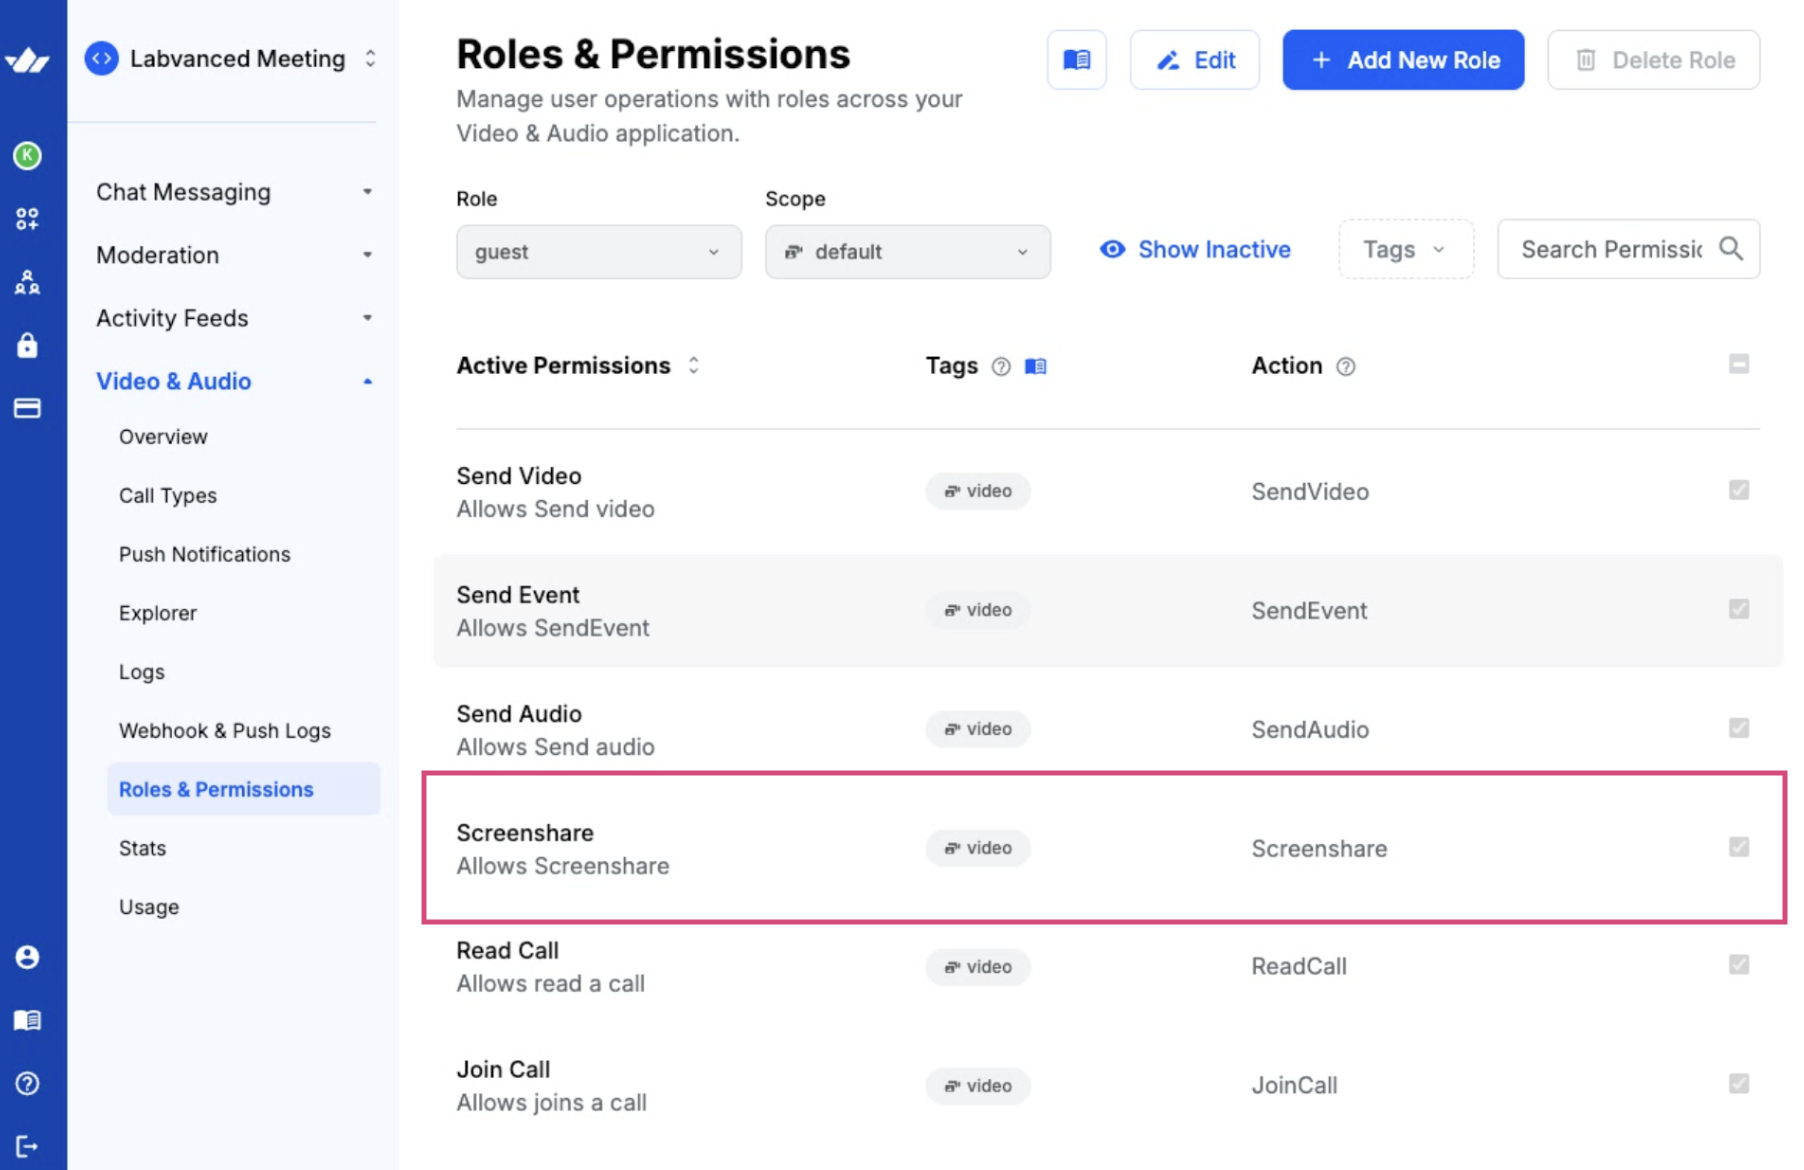
Then, under the settings for Video & Audio → Roles & Permissions you must add the Screenshare permission to guest users.
Please note that at the top you have to select from the Role drop-down the guest option and from the Scope drop-down the default option.
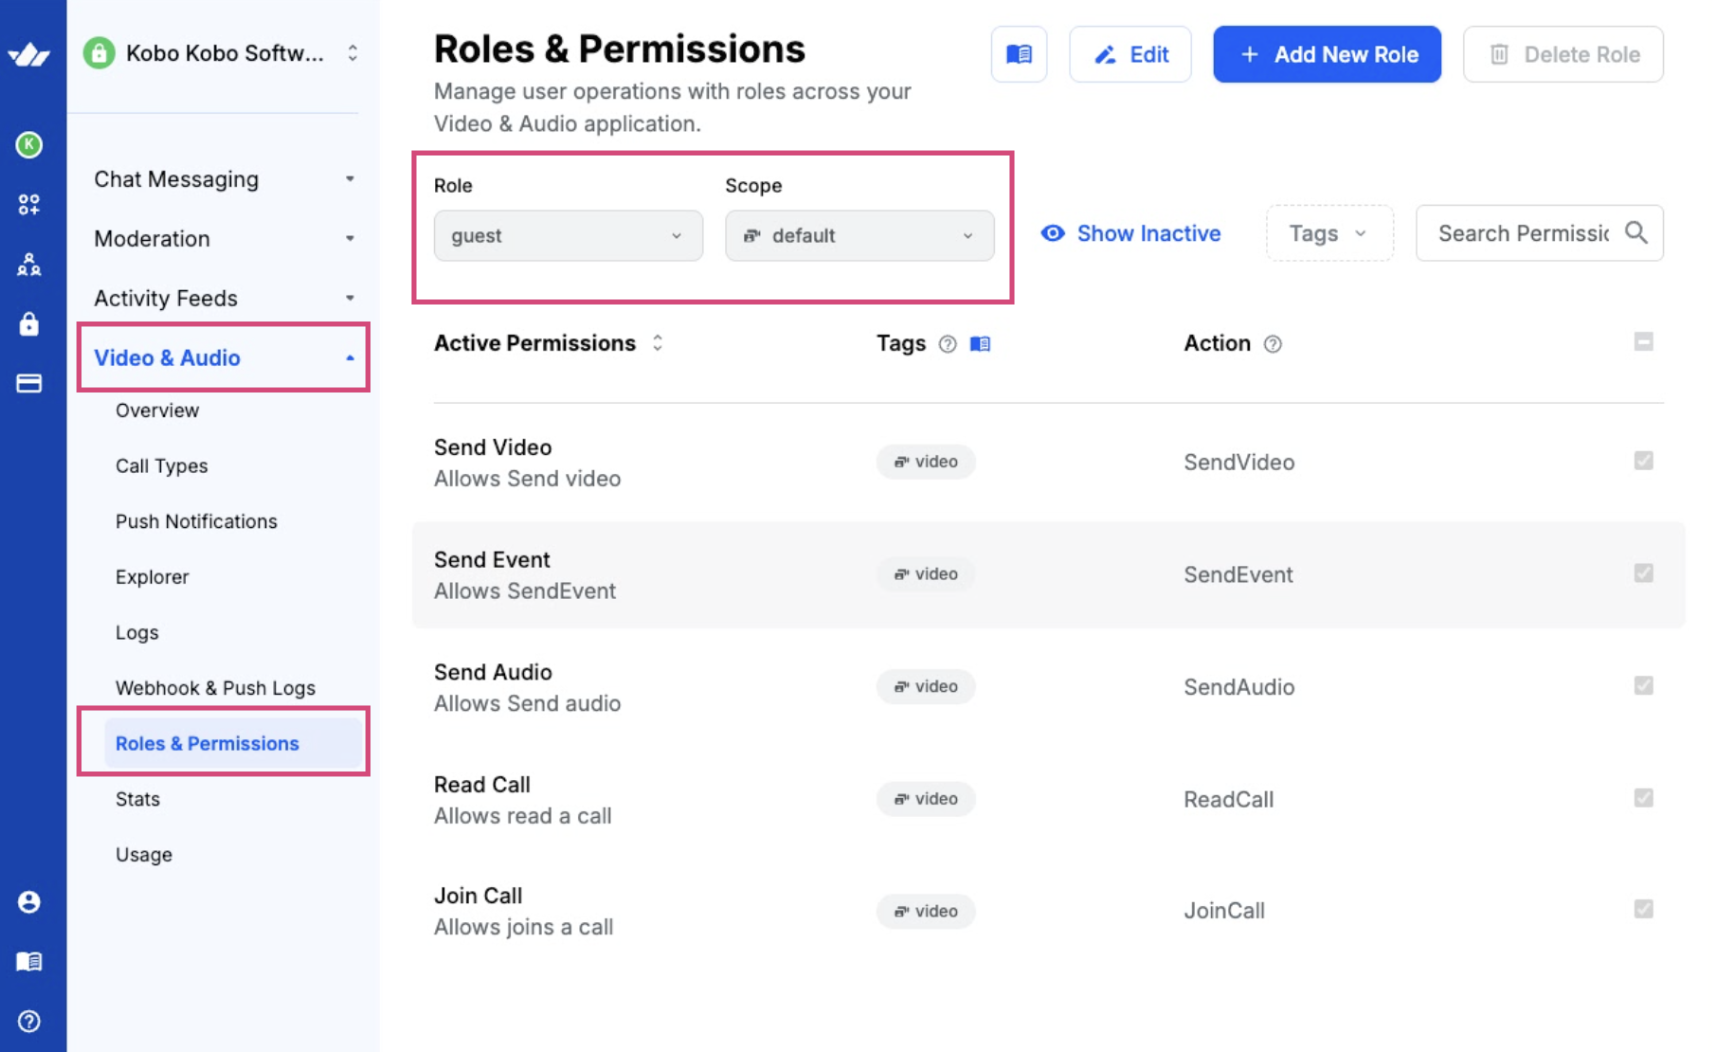
However, we need to use the Edit button at the top of the page, and add the Screenshare permission so that we have this as the permissions for the guest user.
Events: More Control Over the Video Conference Object
Below are a few relevant and handy events (triggers and actions) pertaining to handling the video conferencing object worth keeping in mind when designing your experiment.
Media Object Trigger
The Media Object Trigger option allows you to use an aspect of the call as a prerequisite for an action occurring. For example if a participant JoinedConference then a particular set of actions can occur in the experiment, such as a video starting to play or a specific set of instructions to appear.

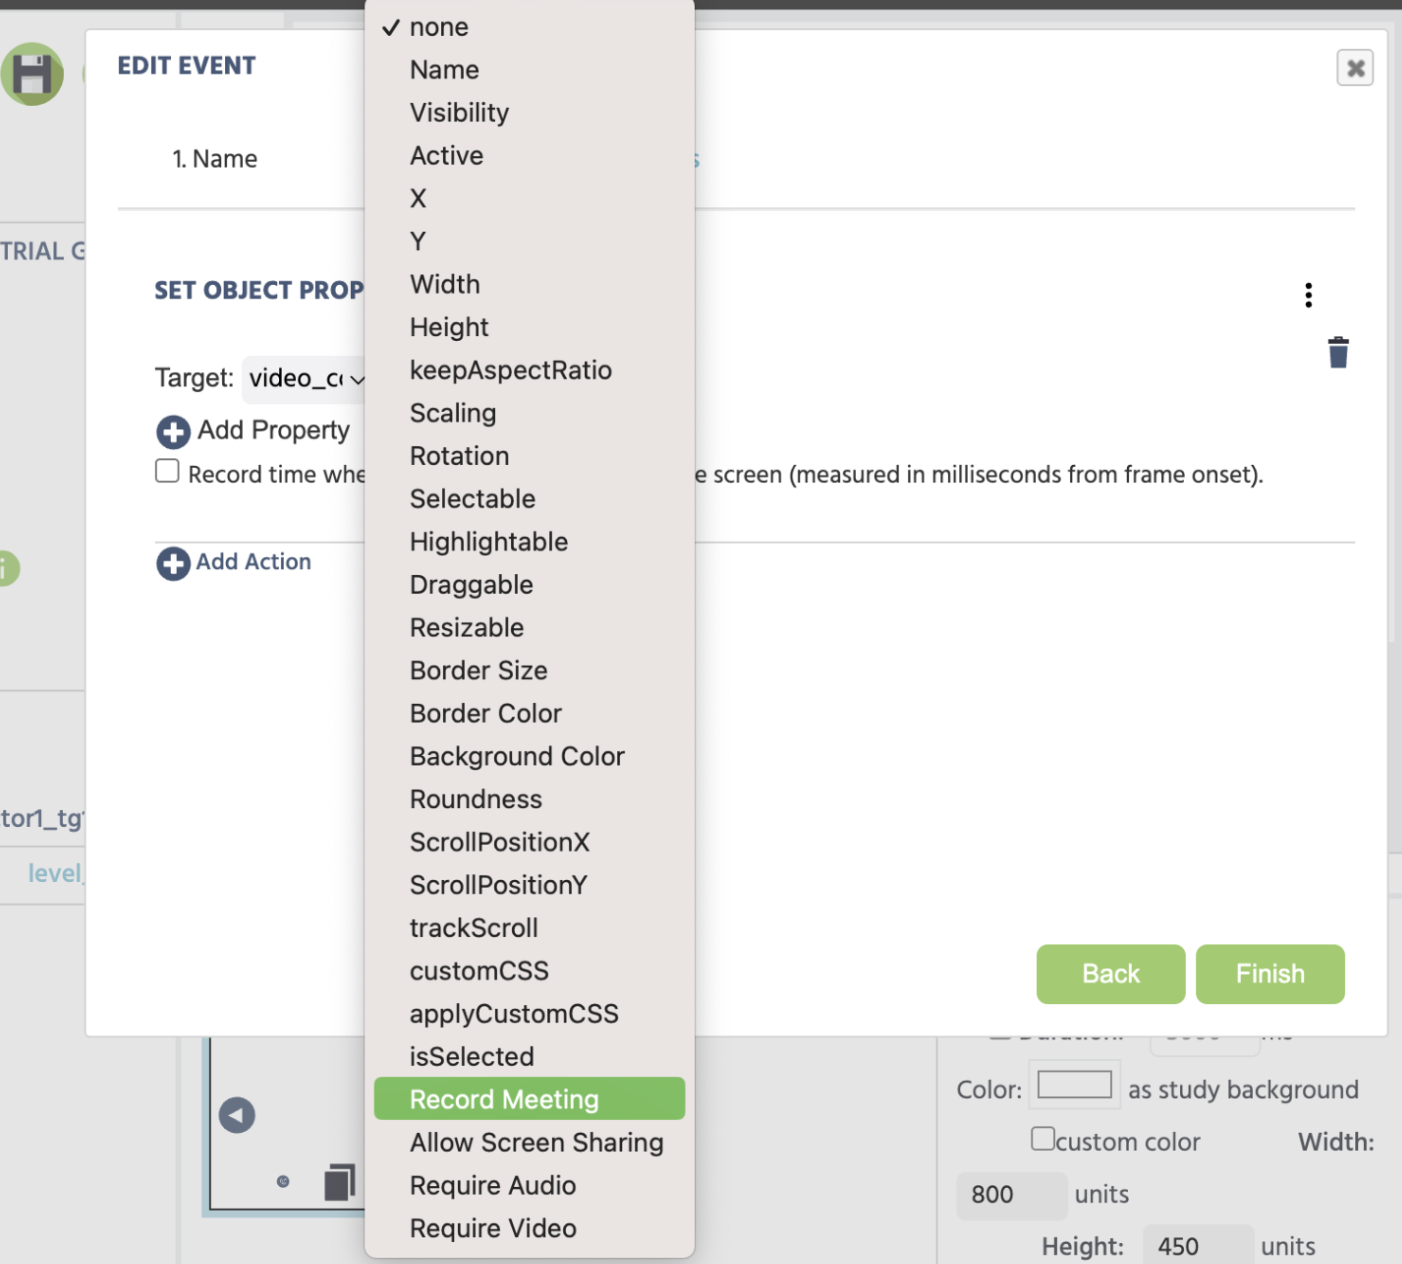
Set Object Property Action
From the Actions menu, you can select Object Actions → Set Object Property to control certain properties of the video conference object.
By specifying the video conferencing object as the Target, you can then point to any Object Property (see the drop-down menu in the image below) and modify it in the course of the experiment.
Control Media Object Action
From the Actions menu, you can select Object Actions → Control Media Object to control the functionalities of the video conferencing object.
With the object set at the Target, you can then indicate the desired effect to occur upon a trigger firing. For example, if someone clicks a button (Trigger) the Control the Media Object (the video conferencing object which is the target) such that the participant can join the call.
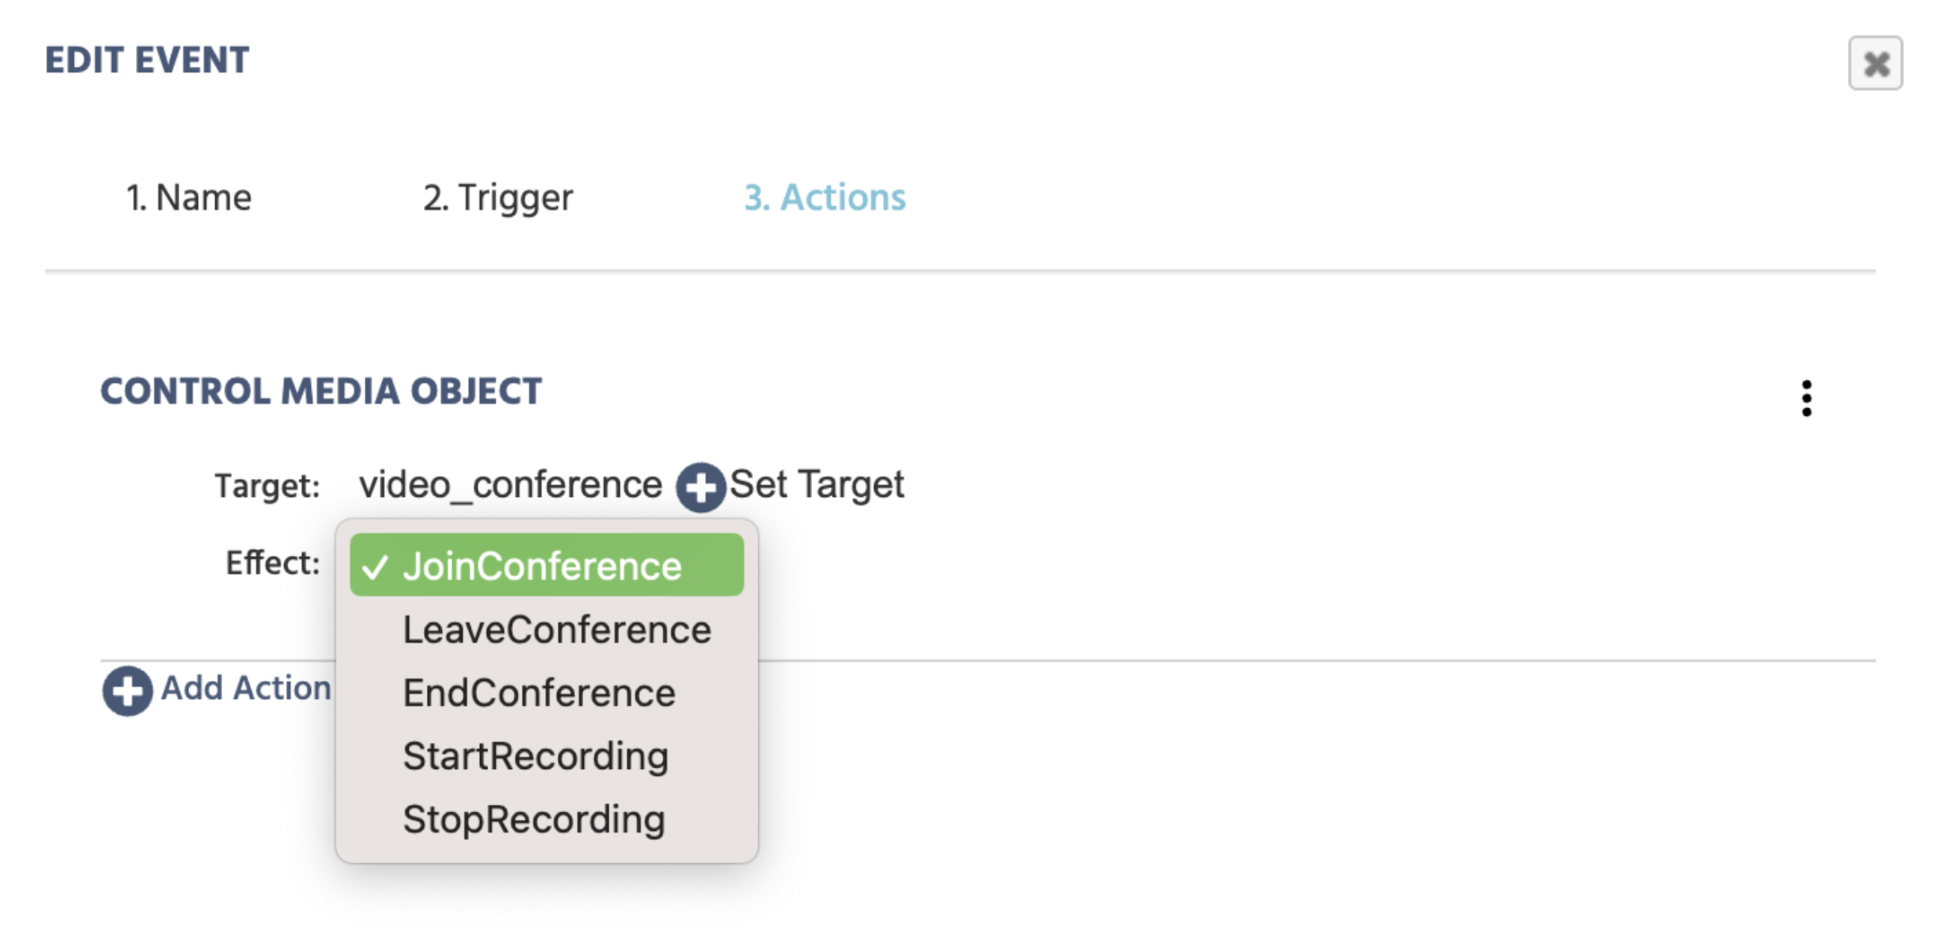
Note: Please note an important distinction between the ‘LeaveConference’ and ‘EndConference’ options. ‘LeaveConference’ is essentially like hanging up a call and allows the participant to leave the call. By contrast, the ‘EndConference’ has more impactful implications and closes the call permanently, making it unusable in the future.
Helpful Demos of the Video Conference Object (Importable)
Below are a few helpful studies that can be found in the Public Experiment Library. You can see how the objects and events are set up, demonstrating specific functionalities of the Video Conference Object.
In this demo, you can host a conference call with the participant before they fill the SCS-SF questionnaire and meet with them after they submit the questionnaire: https://www.labvanced.com/page/library/71890