labvanced logoLabVanced
  • Research
    • Publications
    • Researcher Interviews
    • Use Cases
      • Behavioral Psychology
      • Personality & Social Psychology
      • Cognitive & Neuro Psychology
      • Developmental & Educational Psychology
      • Clinical & Health Psychology
      • Sports & Movement Psychology
      • Marketing & Consumer Psychology
    • Labvanced Blog
  • Technology
    • Feature Overview
    • Desktop App
    • Phone App
    • Precise Timing
    • Experimental Control
    • Eye Tracking
    • Multi User Studies
    • More ...
      • Questionnaires
      • Artificial Intelligence (AI) Integration
      • Mouse Tracking
      • Data Privacy & Security
  • Learn
    • Guide
    • Videos
    • Walkthroughs
    • FAQ
    • Release Notes
    • Documents
    • Classroom
  • Experiments
    • Public Experiment Library
    • Labvanced Sample Studies
  • Pricing
    • Pricing Overview
    • License Configurator
    • Single License
    • Research Group
    • Departments & Consortia
  • About
    • About Us
    • Contact
    • Downloads
    • Careers
    • Impressum
    • Disclaimer
    • Privacy & Security
    • Terms & Conditions
  • Appgo to app icon
  • Logingo to app icon
Learn
Guide
Videos
Walkthroughs
FAQ
Release Notes
Classroom
  • 中國人
  • Deutsch
  • Français
  • Español
  • English
Guide
Videos
Walkthroughs
FAQ
Release Notes
Classroom
  • 中國人
  • Deutsch
  • Français
  • Español
  • English
  • Guide
    • GETTING STARTED

      • Objects
      • Events
      • Variables
      • Task Wizard
      • Trial System
      • Study Design
        • Tasks
        • Blocks
        • Sessions
        • Groups
    • FEATURED TOPICS

      • Randomization & Balance
      • Eye Tracking
      • Desktop App
      • Sample Studies
      • Participant Recruitment
      • API Access
        • REST API
        • Webhook API
        • WebSocket API
      • Other Topics

        • Precise Stimulus Timings
        • Multi User Studies
        • Head Tracking in Labvanced | Guide
    • MAIN APP TABS

      • Overview: Main Tabs
      • Dashboard
      • My Studies
      • Shared Studies
      • My Files
      • Experiment Library
      • My Account
      • My License
    • STUDY TABS

      • Overview: Study-Specific Tabs
      • Study Design
        • Tasks
        • Blocks
        • Sessions
        • Groups
      • Task Editor
        • Main Functions and Settings
        • The Trial System
        • Canvas and Page Frames
        • Objects
        • Object Property Tables
        • Variables
        • System Variables Tables
        • The Event System
        • Trial Randomization
        • Text Editor Functions
        • Eyetracking in a Task
        • Head Tracking in a Task
        • Multi-User Studies
      • Study Settings
        • Start Up and Main Settings
        • Browsers & Devices Settings
        • Experiment Features Settings
      • Description
        • More Details about Description Information
        • Images, Links, and References in Descriptions
      • Variables
      • Media
      • Translate
      • Run
      • Publish and Record
        • Requirements for Publishing a Study in Labvanced
        • Recruiting Participants and Crowdsourcing
        • License Selection and Confirmation
        • After Publishing Your Labvanced Study
      • Sharing
      • Participants
      • Dataview and Export
        • Dataview and Variable & Task Selection (OLD Version)
        • Accessing Recordings (OLD Version)
  • Videos
    • Video Overview
    • Getting Started in Labvanced
    • Creating Tasks
    • Element Videos
    • Events & Variables
    • Advanced Topics
  • Walkthroughs
    • Introduction
    • Stroop Task
    • Lexical Decision Task
    • Posner Gaze Cueing Task
    • Change Blindness Flicker Paradigm
    • Eye-tracking Sample Study
    • Infant Eye-tracking Study
    • Attentional Capture Study with Mouse Tracking
    • Rapid Serial Visual Presentation
    • ChatGPT Study
    • Eye Tracking Demo: SVGs as AOIs
    • Multi-User Demo: Show Subjects' Cursors
    • Gamepad / Joystick Controller- Basic Set Up
    • Desktop App Study with EEG Integration
  • FAQ
    • Features
    • Security & Data Privacy
    • Licensing
    • Precision of Labvanced
    • Programmatic Use & API
    • Using Labvanced Offline
    • Troubleshooting
    • Study Creation Questions
  • Release Notes
  • Classroom

Files

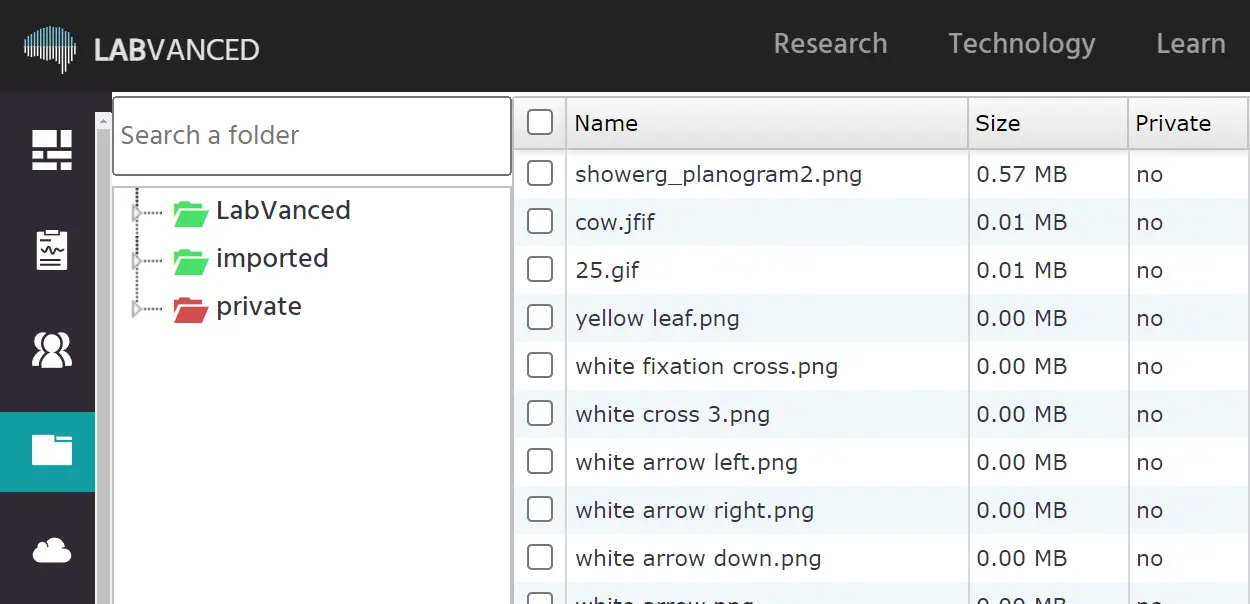
Every file you have uploaded—jpegs, jpgs, pngs, mp4s, and so on— within the experiment can be seen in the ‘Files’ tab, accessible from the main side menu when you are logged in.

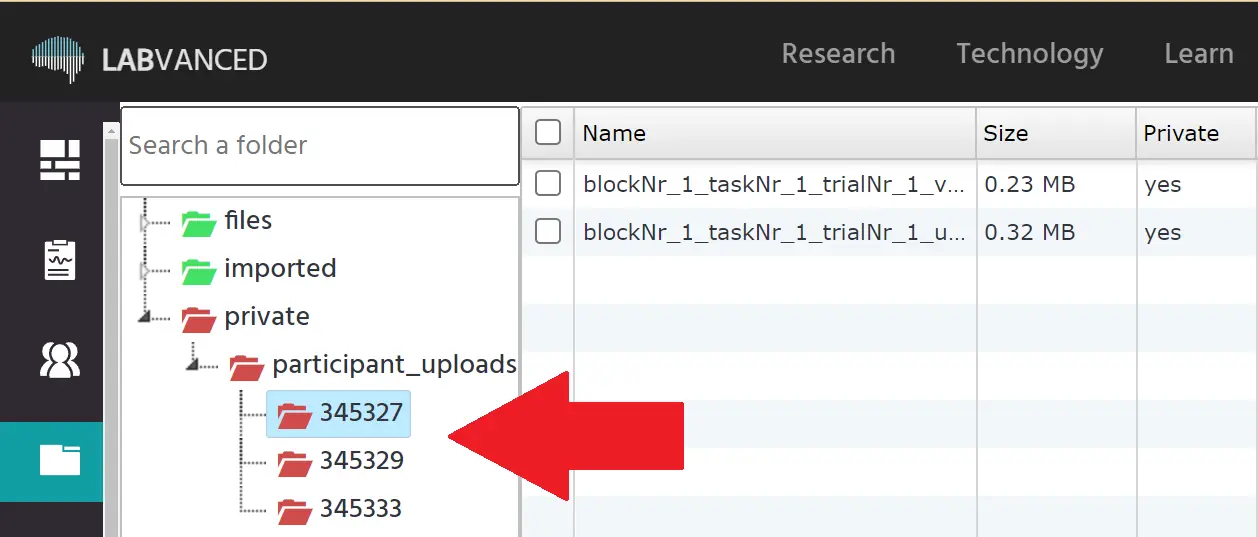
As shown below, there are three (3) main folders under the files tab: Files, Imported, and Private. The documents uploaded within the experiment/study design are listed under "files," the first in the list below. Next, the ‘imported’ files are the files that are linked to the studies you have requested a copy of or have been imported into your account. Additionally, all participant recordings—including voice and screen recordings—are kept in ‘private’ folders, colored red, and the account owner will only be the one to have access to these recordings.

Overview of the 'Files' page in Labvanced

The search bar allows you to look for specific folders with ease. Additionally, you will be able to determine whether a file is private or not and view its size (ie. how much storage space it takes up).

The search bar to locate a folder

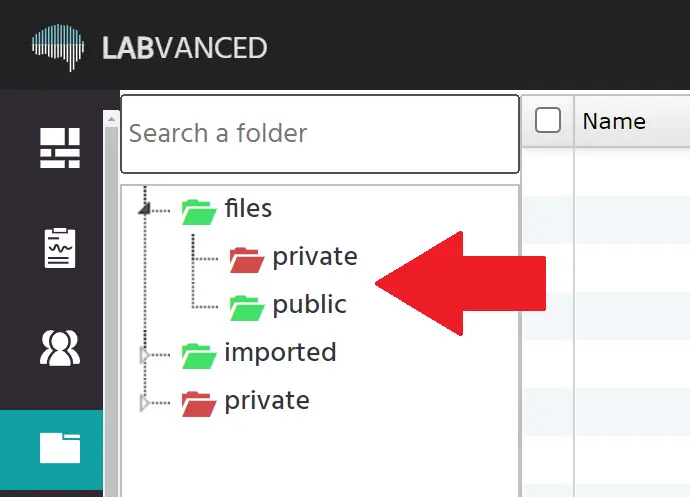
"Private" and "public" are the two automatically generated sub-folders that will appear under the "files" folder.

Example of a folders that are public or private

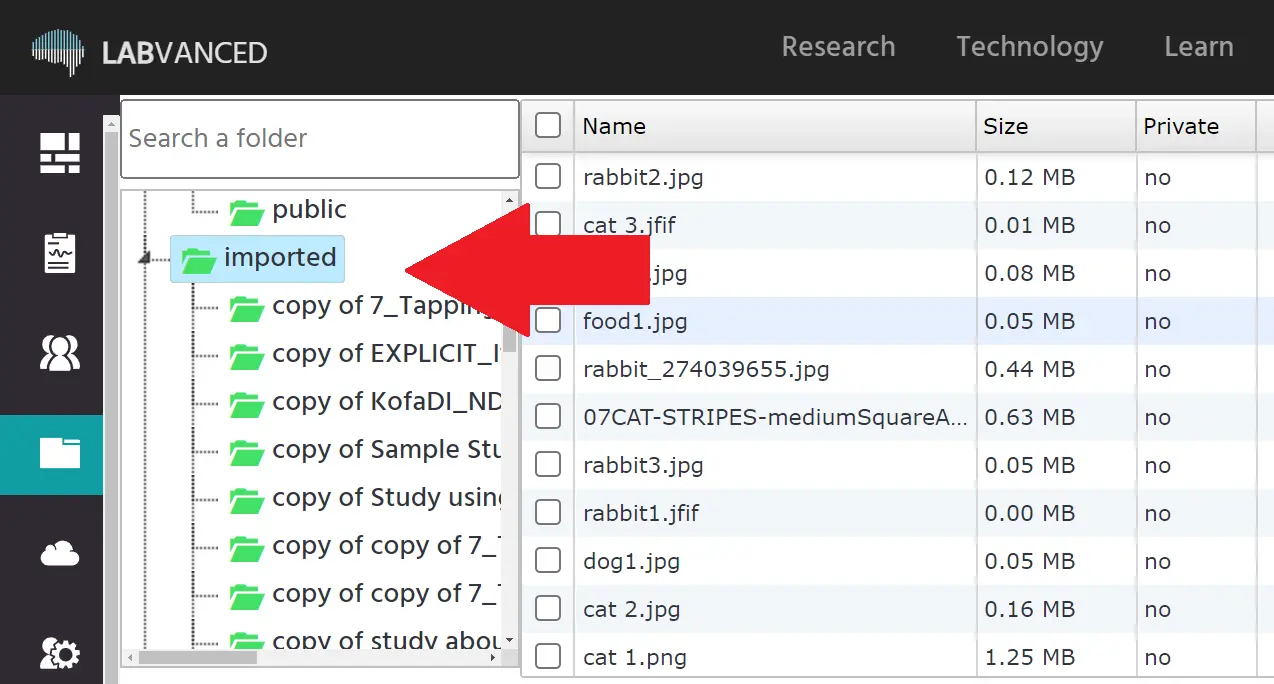
Moreover, the ‘imported’ files tab, is categorised based on the study you have imported on. Files related to the particular study will be created under a designated folder. Copied studies will be marked as “Copy of + specific study name” while imported studies will be marked as “imported + study name,” as shown below:

Example of a folder that was copied and its contents

In order to prevent any mix-ups, recordings from participants under the 'private' folder will be arranged according to the experiment ID. Also, a specific sub-folder will be created per experiment.

Example of a private folders with recorded experimental data

Organizing Files

  1. Please note that the recommended size for images is less than 100 KB and for videos less than 5 MB and the maximum size 100MB.

  2. To transfer or move folders, you can simply drag and drop.

  3. Instructions for file management are always available at the bottom of this main ‘files’ page for your convenience (see image below for your reference). With these instructions, you can always see how you can create, upload, download, rename, and delete folders correctly:

The instructions that are included in the files tab for organizing your folders

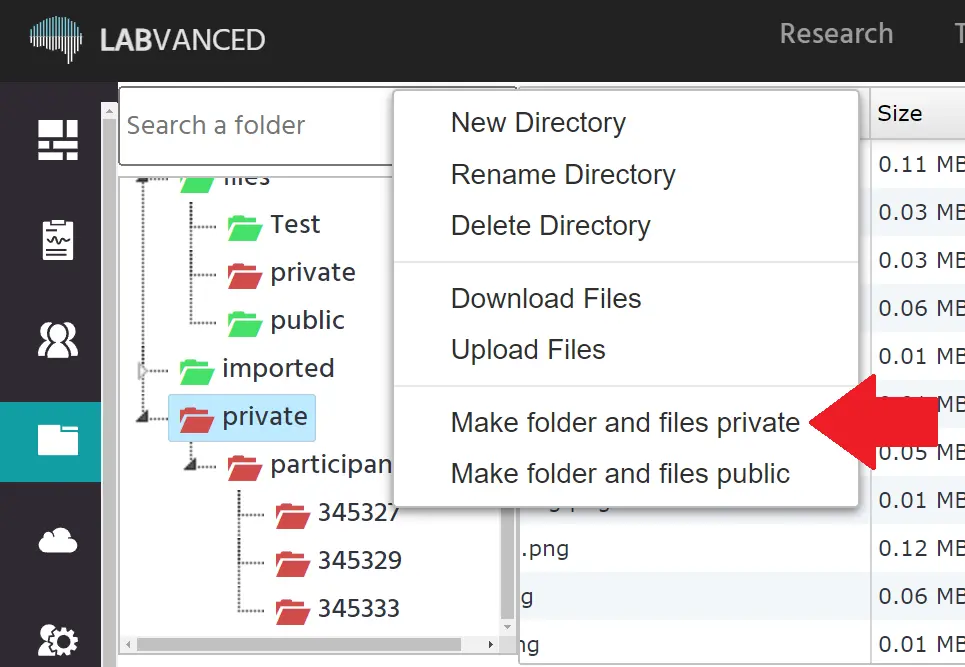
As you can see, the main action for organizing files is controlled by right clicking. By right clicking, a series of options will prompt on your screen:

The control menu that appears for organizing your folders when right clicking

Let’s go over all of these drop-down options that appear, one by one.

  • New Directory: Clicking this will create a new folder.
  • Rename Directory: An option that allows you to rename the folder.
  • Delete Directory: Used for removing / deleting a specific folder. Download Files: This option allows you to download the data found in the specific folder to your local device.
  • Upload Files: Allows you to upload any external file (such as images or audio or videos) into the specified folder.
  • Make folder and files private: This option enables the account holder to make the files private and not accessible to other users, indicated by a red color. Private folders are only available to the owner of the account. If you want image files to be shared with other users or to be importable, then they must be in a Public folder. However, private files (such as images) can be visible to your team members within the context of the player / app editor when designing the experiment study.
  • Make folder and files public: Enables the account holder to make the files public and be accessible to other users. The folder is then considered to be ‘Public’ and will have a green color.

Highlighting a selection from the menu to make folders public

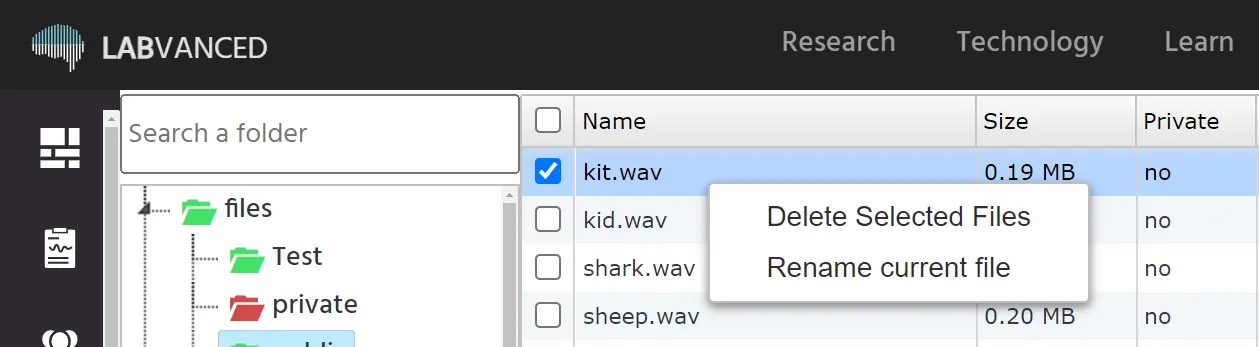
Moreover, you can also remove or rename specific files inside the folder. Simply click and highlight the file you want to take actions on, right click then choose the action that you want, as shown below:

Example right clicking in order to delete or rename files within a folder

Prev
Shared Studies
Next
Experiment Library