Video Recording Object
The Video Recording Object in Labvanced can be utilized for both video recordings of the participant and also for screen recordings.
Table of Contents
Overview
The Video Recording Object is quite useful if you want to capture a video of the participant, whether that’s a video of the participant, a recording of their screen, or both, is up to you! Using a video recording object also gives you the option to record audio from the participant. You can let the participant control when recording starts / stops or you can use events to specify exactly when and how recording should be executed.
This object is quite popular amongst developmental psychologists who for their research wish to capture infant and toddler looking behaviors and then code them.
Note: If you just want to take an image snapshot of the participant, this is done via the Camera Capture Object.
Adding the Video Recording Object
In the task editor toolbar, open the Media group and select Video Recording.
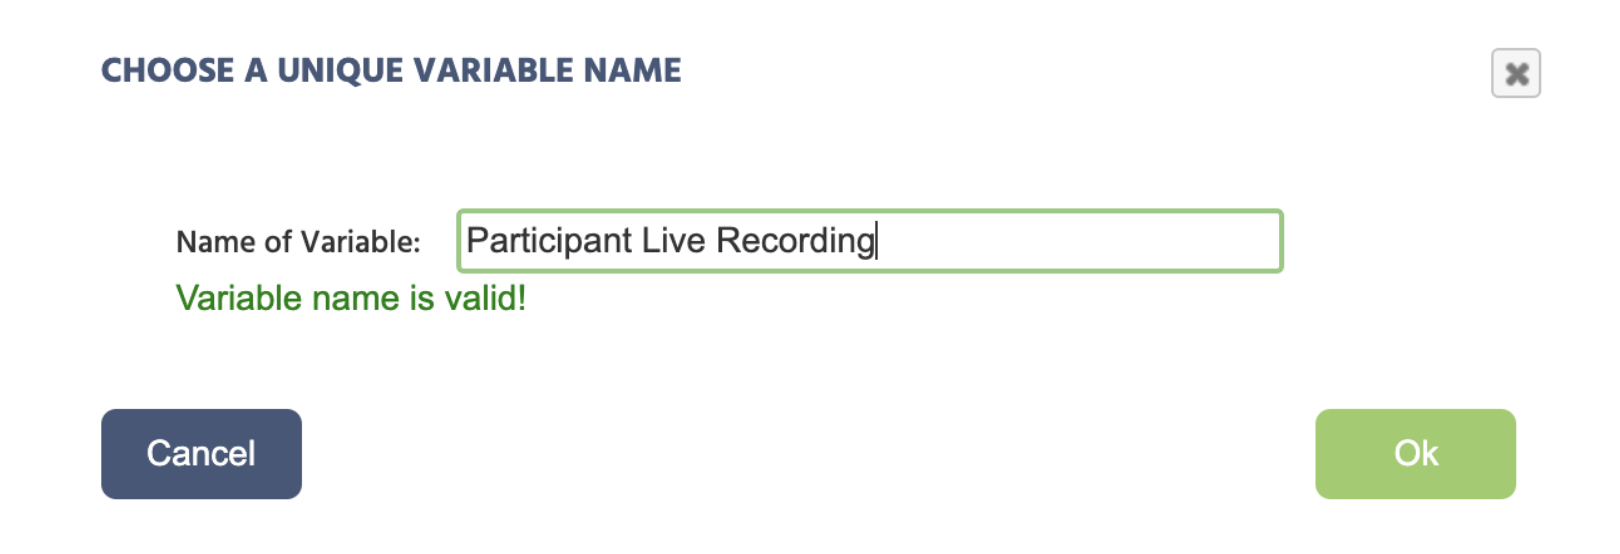
This will automatically prompt you to create a variable in which the recorded data will then be stored for later access. You can give the variable a descriptive name, something like Screen_Recording if you are recording the screen or Participant Live Recording if you plan on recording the participant.
If you have not already done so, the app will prompt you to activate the ‘Video Recording’ setting associated with the Study Settings tab. Any choices that you specify while using this object, such as whether you choose to capture audio or a screen recording will subsequently update these settings.
Options and Properties
Since every experiment is unique, it is important to be able to control the functionality and behavior of the video recording object. This is described in the upcoming sections, before moving on to discuss data collection.
Properties of the Video Recording Object
Under the Object Properties side panel, if you scroll all the way down, you can access the properties of the Video Recording Object:
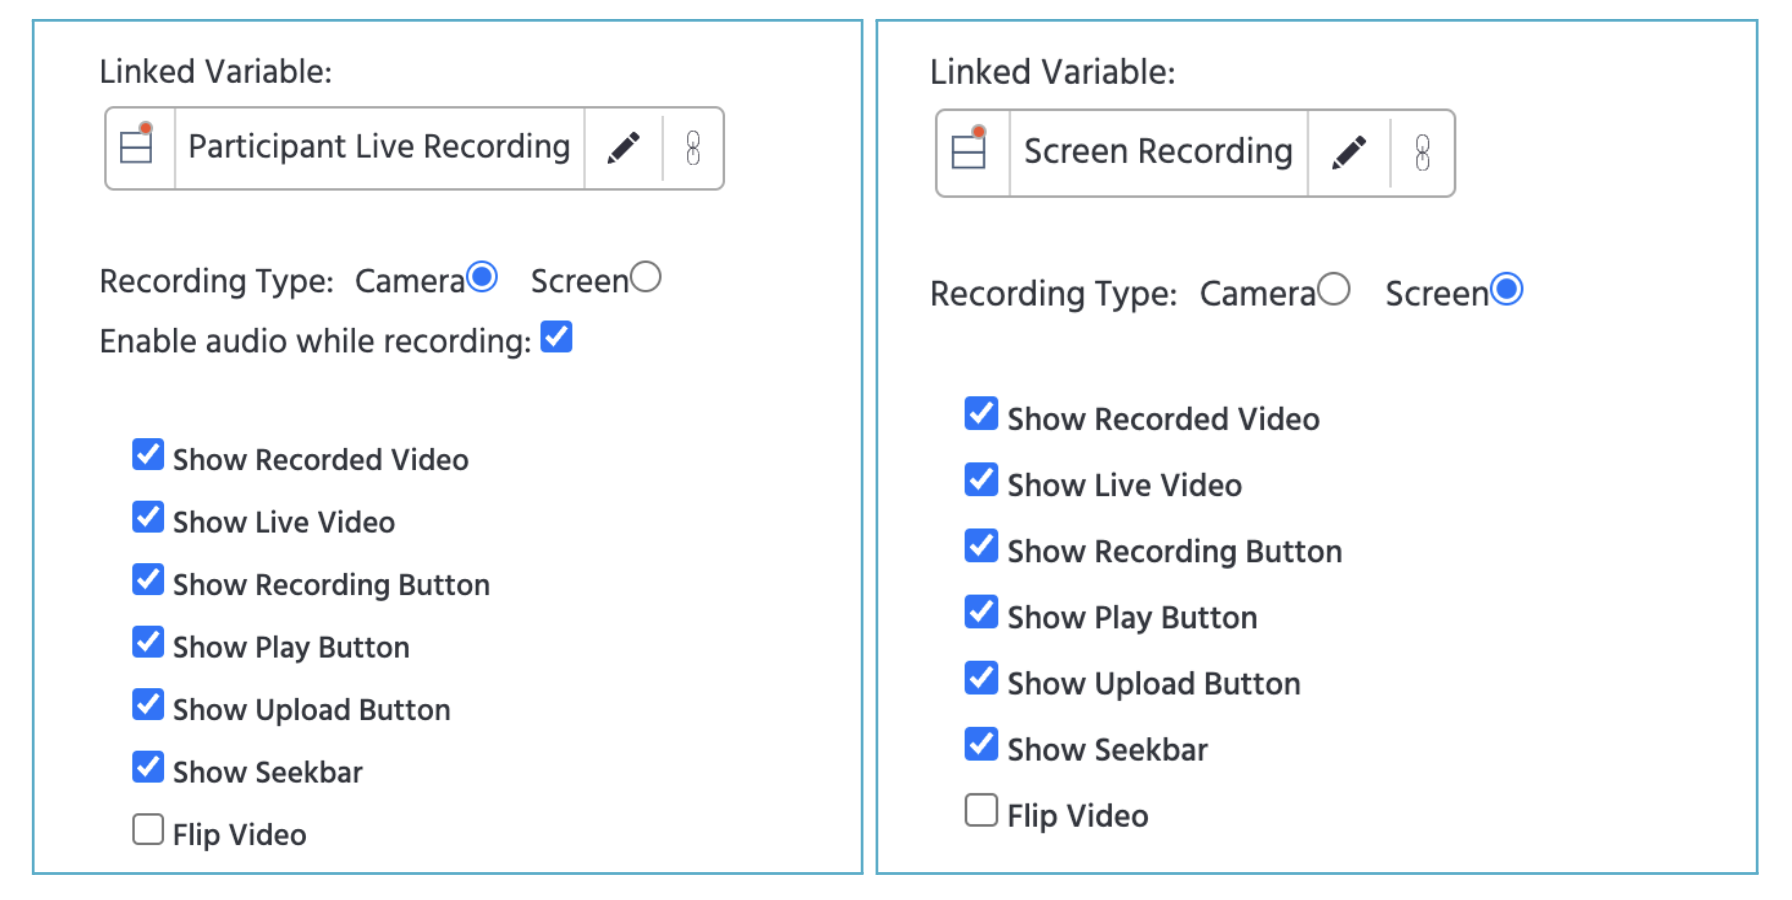
Camera to record the participant. Left Image: Selecting
Screen to make a screen recording. From these options, you can specify how you want this object’s properties and available functionalities to behave, such as whether you want the participant to see their recorded video of themselves or whether they have access to the ‘record’ button. If you want the recording to begin automatically, you specify how this ought to happen using Events.
| Option | Description |
|---|---|
Recording Type | Specifies whether the recording is from the participant’s camera or their screen. Camera: Uses the participant’s camera to record them while in recording mode. The Enable audio while recording records audio along with the video.Screen: Takes a fullscreen recording of the participant’s screen. |
Show Recorded Video | Allows the participant to see their recorded video. Disabling this also disables the play button. |
Show Live Video | Shows a live stream of the participant within the object’s bounding box. |
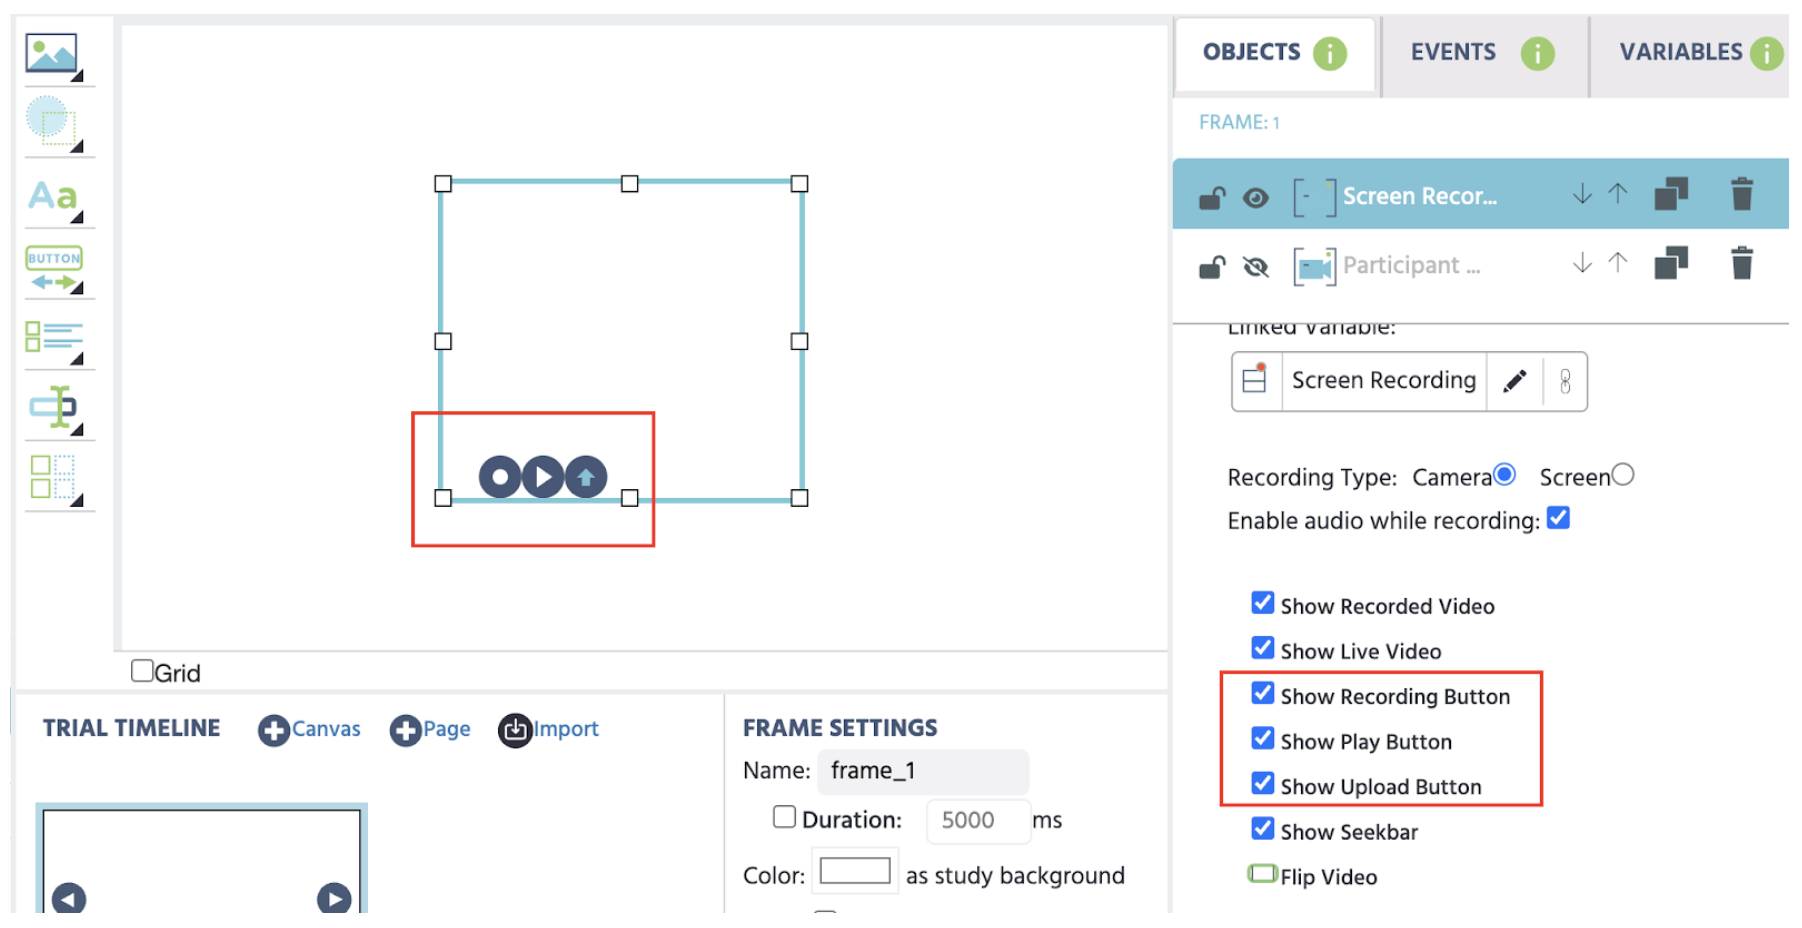
Show Recording Button | Displays the button to start recording. Clicking on it starts the recording. A ‘stop’ button will appear during recording to allow the participant to stop recording. All other buttons are automatically disabled while the video is being recorded. |
Show Play Button | Displays the play button. If the participant has access to this button, clicking on it will replay the video. |
Show Upload Button | The upload button initiates the uploading process. Without uploading the video, it does not get saved. |
Show Seekbar | Shows the video progress bar during playback. |
Flip Video | Flips the video horizontally so that the user can see themselves in an aligned way in the visual field. For example if the head tilts to the right, then in the flipped video on the screen, they can also see their head tilting towards the right. |
Capturing Screen Recordings
If you are interested in capturing screen recordings, this can be accomplished by choosing the Screen option as shown above.
Controlling the Video Recording Object
It is important to note that there are two main approaches to handling the video recording:
A.) The participant is in control: The participant uses the available object buttons to control the recording, ie. start and stop the recording, in which case the most or all of the buttons should be visible.
B.) The experiment handles the recording automatically: the recording should be controlled automatically by the experiment logic in which case none of the options should be shown.
Of course, Labvanced gives you fine grained options to show or hide each button/function individually and choose how to handle them with your experimental design. Let’s discuss the details in more depth behind each of these two options.
📌 Note: Video and screen recordings do not get saved automatically. A video neds to start and then stop recording, then be uploaded in order for it to be saved! See below for more details.
Controlling the Video Recording via Buttons
As mentioned previously, there are several options that can be enabled/disabled in order to control how the Video Recording Object behaves and to what extent the participant can actively interact with it. For example, showing the recorded video to the participant live or later in the experiment (or not at all), as well as allowing the participant to be responsible for starting, stopping, and/or uploading the video.
If you have limited options or entirely disabled the participant from starting / stopping / uploading the video, then you can handle this process with events in order for the data to be transmitted and stored, as described below.
Controlling the Video Recording Object Via Events
Using Events, it’s crucial to specify the entire process of when the video recording ought to start, stop, and upload, but also what happens when uploading is complete, in order for this object to work properly and for the data to be recorded. Below is an example of a structure for this, followed by visuals:
- Event 1: Start Recording
- Event 2: Stop Recording (a recording must be stopped in order to be uploaded)
- Event 3: Start Upload
Event 1: Start Recording Event
Here, we want the video recording to start as soon as the frame starts.
TRIGGER
Frame & Trial Triggers→On Frame Start.
ACTION
As soon as the frame starts, then we need to control the object so it will start recording:Object Action→Control Media Objectaction to specify the target (whatever you named the object eg:Screen Recording) so it willStartRecording.
Event 2: Stop Recording Event
Next, we want to specify when recording should stop. We will use a button click to stop the recording but you can use anything.
TRIGGER
User Input→Button-Clickthen select the target button.
ACTION
Upon clicking the button specified above, the recording will stop.Object Action→Control Media Objectaction to specify the targetScreen Recordingso it willStopRecording.
Start Upload Event
Next, we need the state of the video recording being finished to initiate the uploading process.
TRIGGER
Simply choose theMedia Object Triggerand indicate/set the target object and specify that you are calling on theVideoRecordingFinishedstate of the object.
ACTION
As soon as the video recording is finished, then the uploading will begin:Object Action→Control Media Objectaction to specify the targetScreen Recordingso it willStartUpload.
Data and Recordings from the Video Recording Object
Based on the variable you created upon adding the object to the editor, you can then access the recordings via the Dataview & Export tab. The image below shows a sample view of how this looks like with the right-most column representing the Screen Recording variable and its contents:
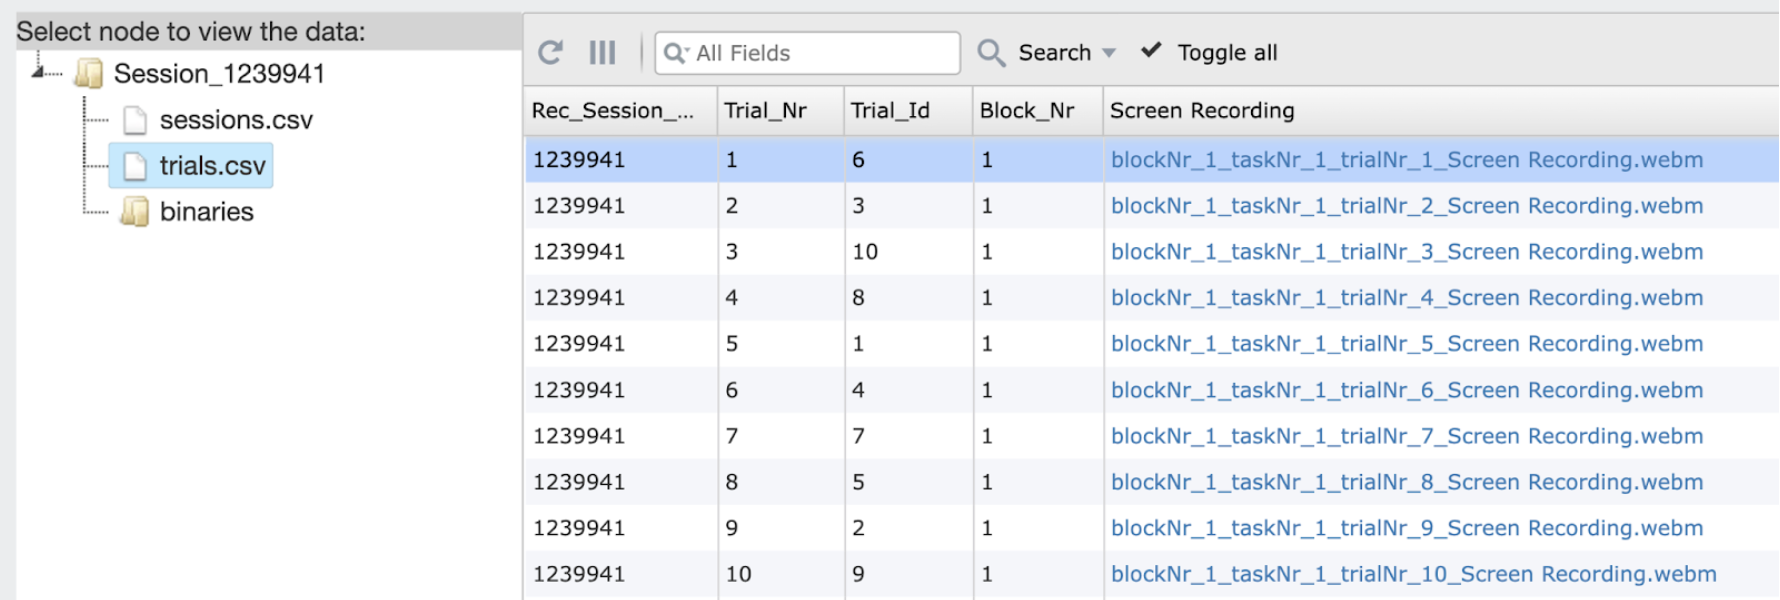
Downloading: Clicking on one of the files from the right-most column, you can download a file locally and preview it. For batch downloading, you can right-click on the binaries folder, as shown below and then download the videos as a .zip file.

Replaying a Recording in Your Experiment
If you want to play back a video captured by the Video Recording Object to the participant later in the experiment, use a standard Video element (found under Media in the Objects menu, not the Video Recording Object).
In the Video element's properties panel, set the source to Use video from a recording element (replay video recorded earlier in this experiment). Labvanced will automatically create a linked event that binds the recording variable to the Video element's source, so the recorded file plays back when the Video element is shown.
Similarly, if you recorded audio alongside the video and want to replay it independently, use an Audio element and click Use Recording in the element's properties to assign it the audio from a recording element.