Creating Variables
Variables in Labvanced are global to the study and can be created in four ways:
- Variables Tab: create variables in advance from the global variable list
- Task Editor Variables Panel: create a variable without leaving the editor
- Object Prompt: Labvanced prompts you automatically when adding a response-capturing object
- Event System: create and select a variable in one step while building event logic
Tip: Before building your study, write down the variables you need, what they should measure, and when they should be recorded. It is much easier to create variables with a clear plan than to add them incrementally as you go.
The Basic Idea
No matter which of the four paths above you use, they all lead, at some point, to the same Add / Select Variable dialog.
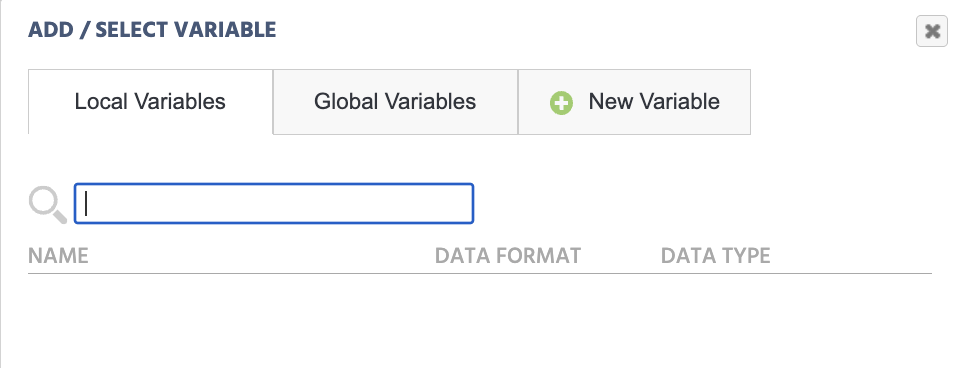
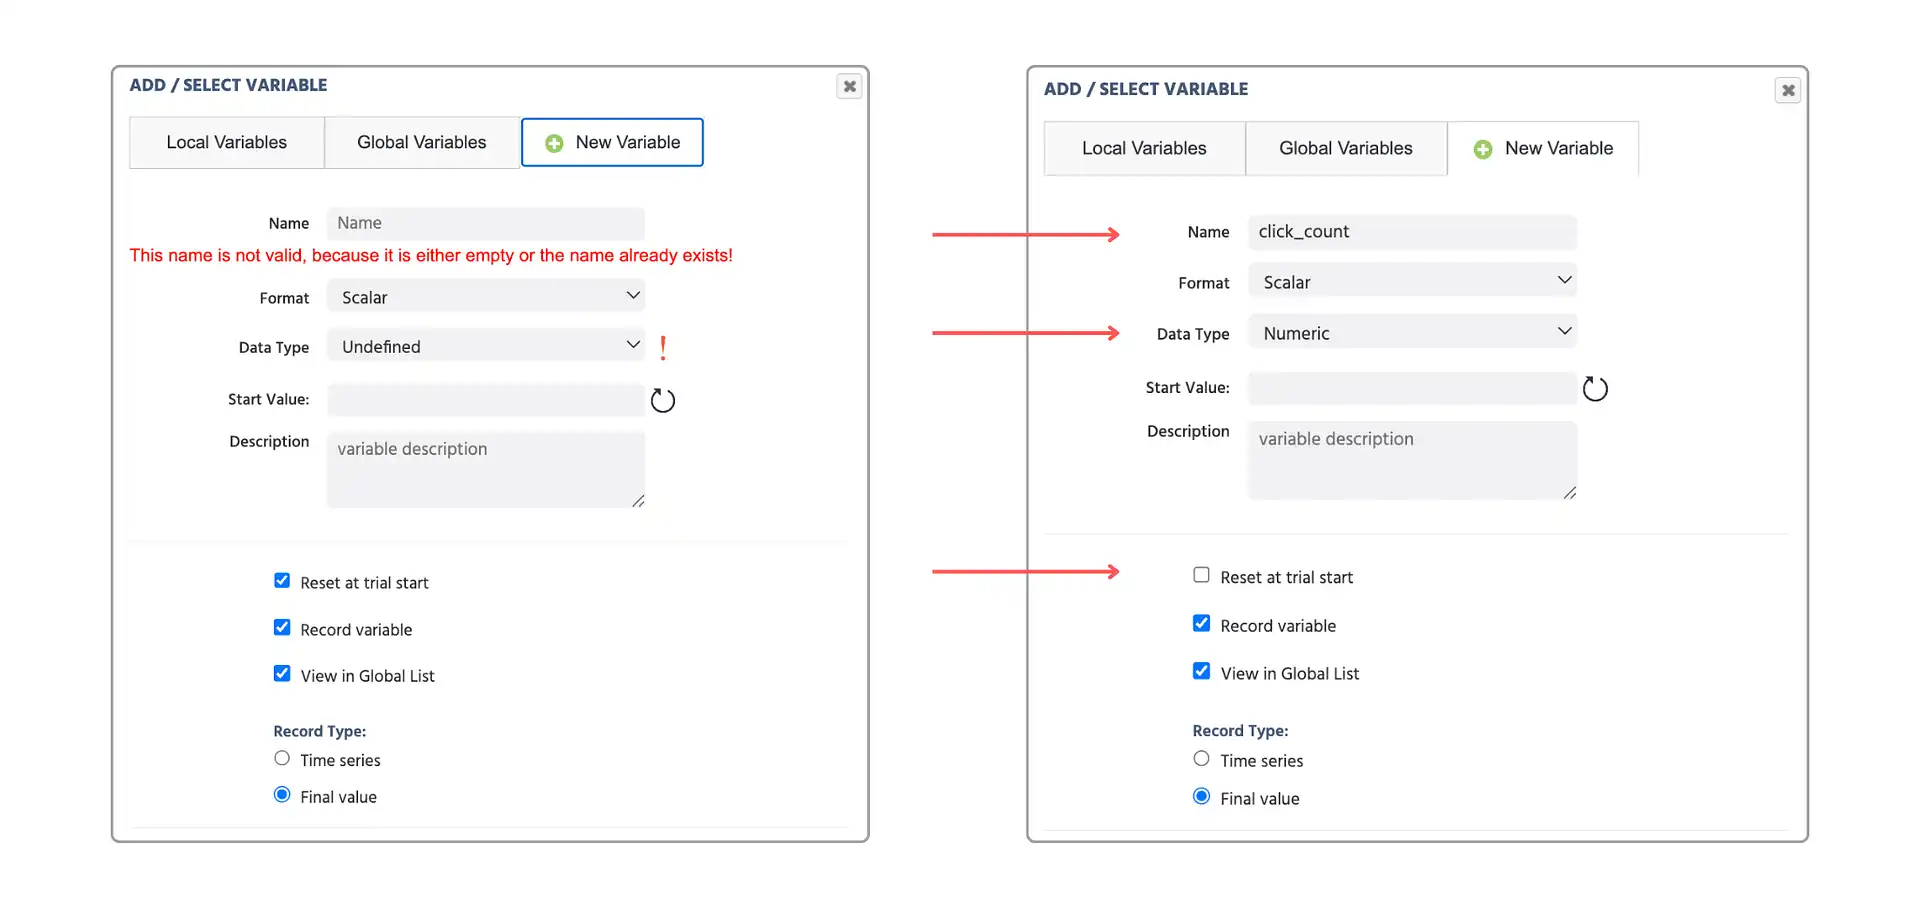
The + New Variable right-most tab is what this page focuses on: it lets you create a new variable, while the other two tabs just list which variables are already available, Local Variables at the task level, and Global Variables across the entire study. To create a new one, switch to the New Variable tab. Labvanced blocks an empty or duplicate name until you enter a valid one, then asks you to define a few more properties before the variable is ready to use.
Tip: Do not place periods (.) in the variable name and avoid special characters, it may cause issues during the experiment's run time. Stick to letters, numbers, and underscores.
The example below compares the empty form to a properly filled-in numeric variable named click_count, Data Type set to Numeric and Reset at trial start unchecked, since it is meant to keep counting across trials rather than reset to its start value each time:
From the Variables Tab
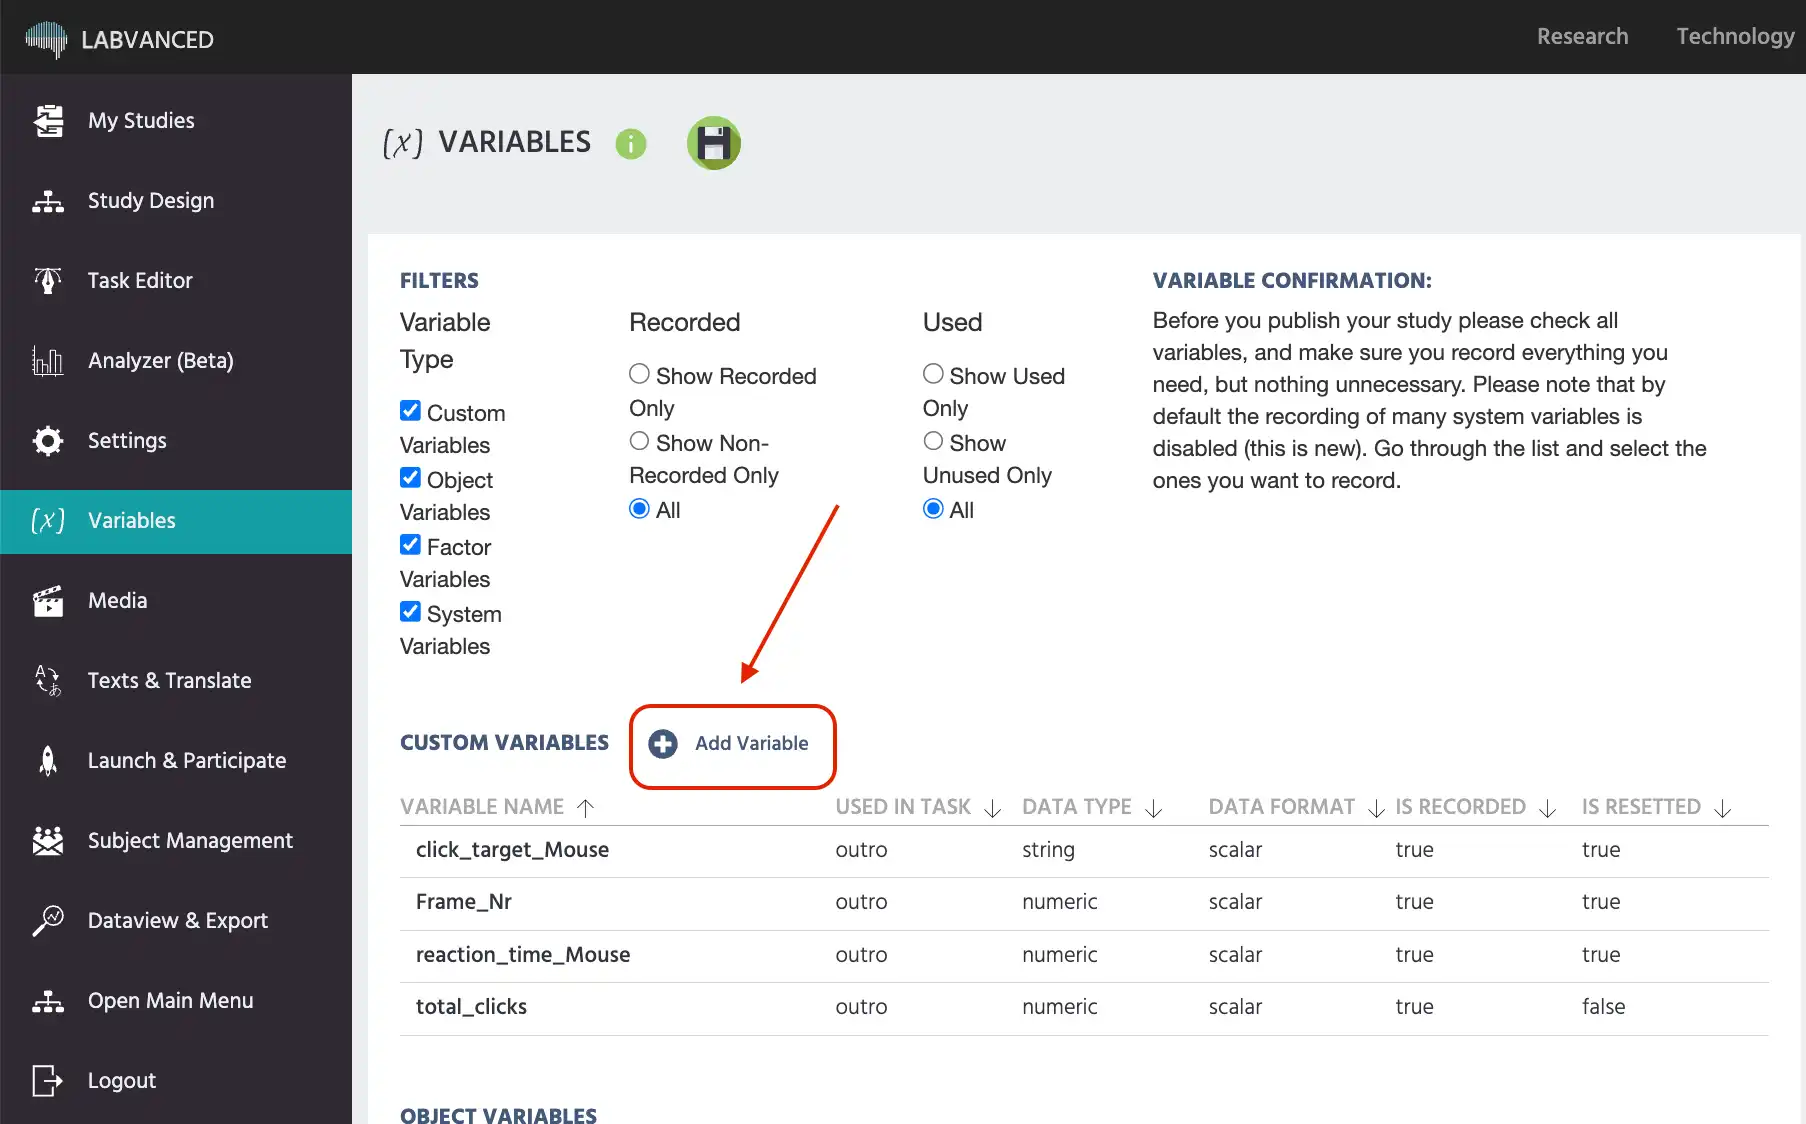
The Variables tab gives you a global view of all variables in the study. To create a variable here:
- Open your study and navigate to the Variables tab in the left panel.
- Click the
+ New Variablebutton. - Give the variable a name, set the
Data Type, and configure any other properties. - Click
Save.
This is the best place to create variables in advance before you start building tasks, or to review and edit all variables in one place. Clicking + New Variable opens the same New Variable tab covered in The Basic Idea above.
From the Task Editor Variables Panel
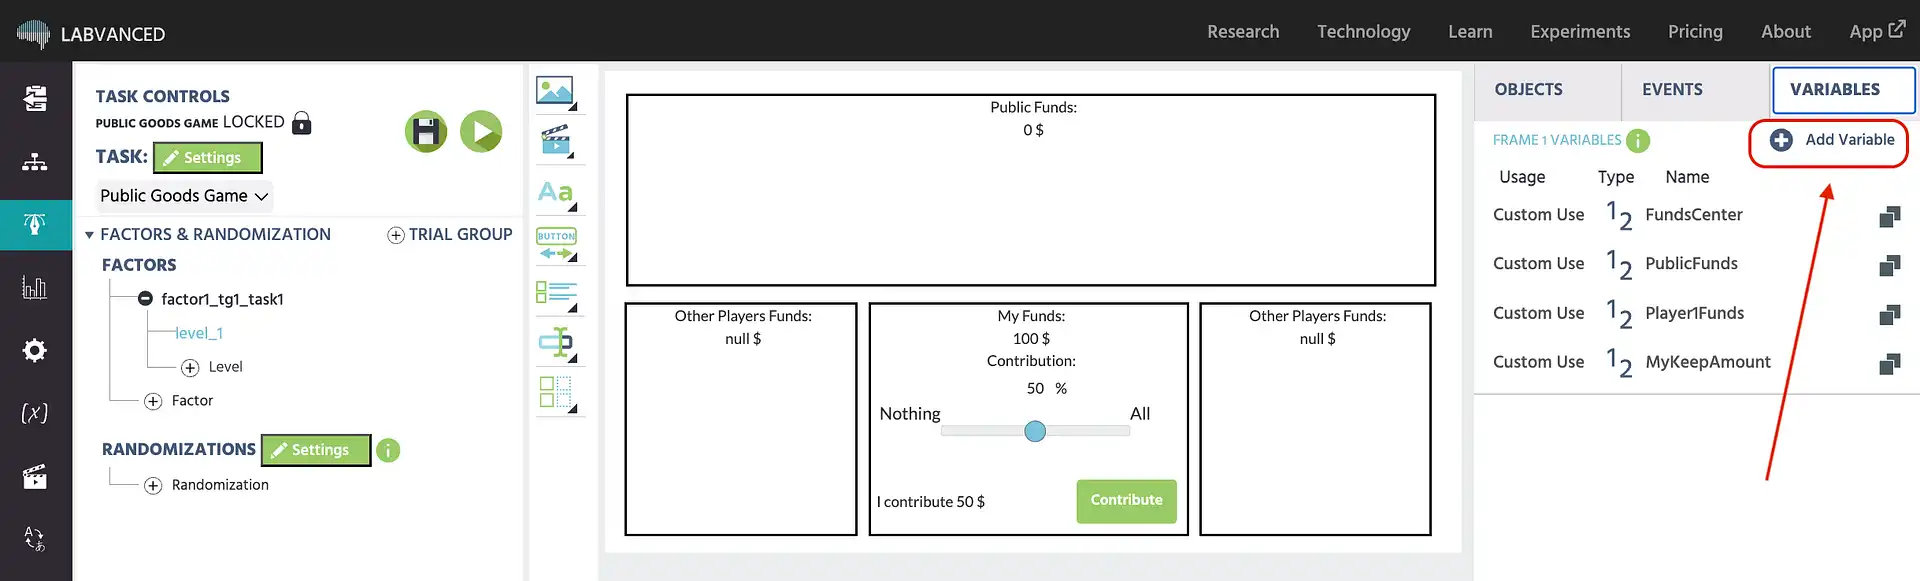
While working in the task editor, the Variables panel tab in the top-right corner lists all variables currently used on the selected frame. You can create a new variable directly from here without leaving the editor.
- Open a task in the task editor.
- Click the
Variablestab in the top-right panel. - Click
+ New Variable. - Name the variable and configure its properties.
This also opens the same New Variable tab covered in The Basic Idea above.
When Adding an Object
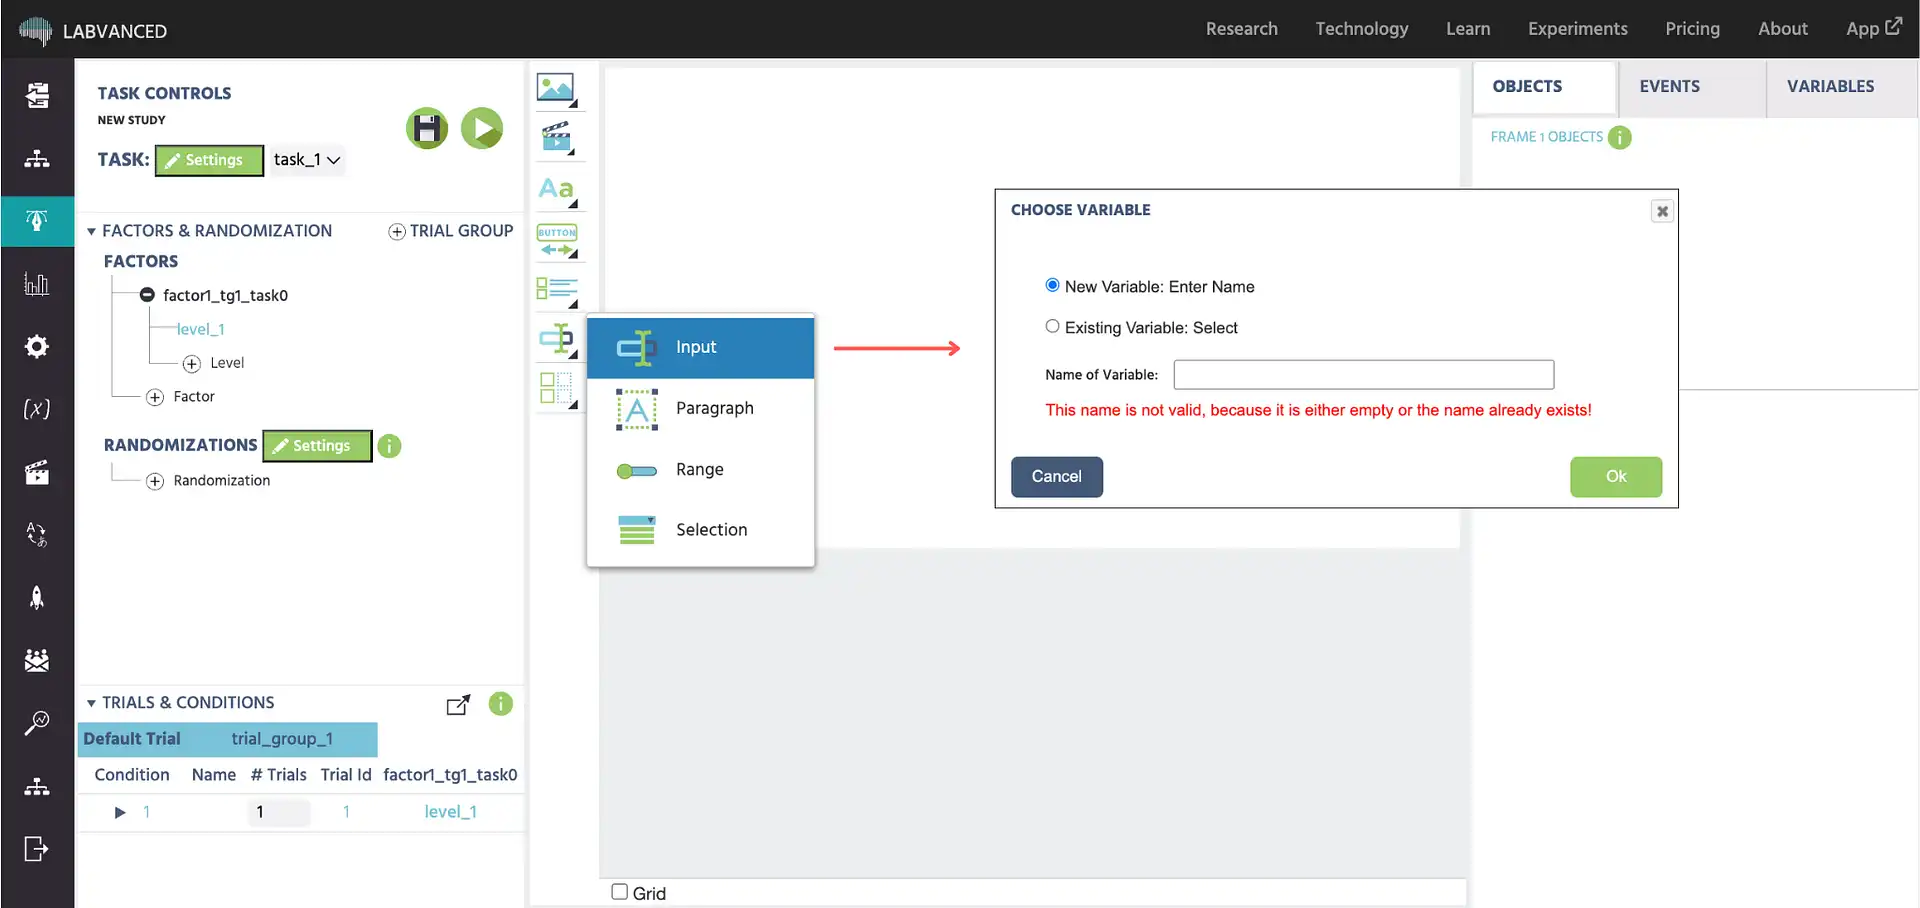
Certain objects require a linked variable to store participant responses. When you add one of these objects to a frame, Labvanced automatically prompts you to name a variable. The variable is created and linked to the object in one step.
Objects that trigger this prompt include: input fields, checkboxes, sliders, dropdowns, Likert scales, and other questionnaire elements.
If the variable already exists, you can select it from the list instead of creating a new one.
From the Event System
When setting up an event action that involves a variable, the Value Select Menu opens. This is common when configuring Set / Record Variable, one of the most frequently used actions in Labvanced. Go to the New Variable tab, fill in the name and properties, and click Ok. The variable is created and immediately selected for the action.
This is the most common way to create variables when you are building event logic and realize you need a new one mid-flow. It opens the same New Variable tab covered in The Basic Idea above.
Naming Variables
Variable names must be unique across the entire study. Two variables cannot share the same name. Use descriptive names that make clear what the variable measures and at what level, for example rt_image_click for a reaction time or correct_response for an accuracy flag.
Avoid periods (.) in variable names. Spaces and special characters may also cause issues: stick to letters, numbers, and underscores.
Further reading
Variable Properties
A full reference for every variable setting: data type, scale, format, start value, reset behavior, and recording options.
Time Series Variables
How to record continuous measurements like mouse position or physiological signals using the time series record type.
Working with Variables
The hub page for the working-with-variables section: types, properties, recording options, and data frames.