Timer Object
The Timer Object displays a visible countdown or count-up timer on screen during a trial. It integrates fully with the Labvanced event system: you control the timer using StartTimer, PauseTimer, and ResetTimer actions, and it fires triggers when it starts, pauses, ends, or crosses a whole-second boundary. The current time value is available as a readable and writable variable, making it straightforward to branch experiment logic based on elapsed or remaining time.
Table of Contents
Adding the Timer Object
In the task editor toolbar, open the Buttons & Navigation group and select Timer to add a Timer Object to the current frame.
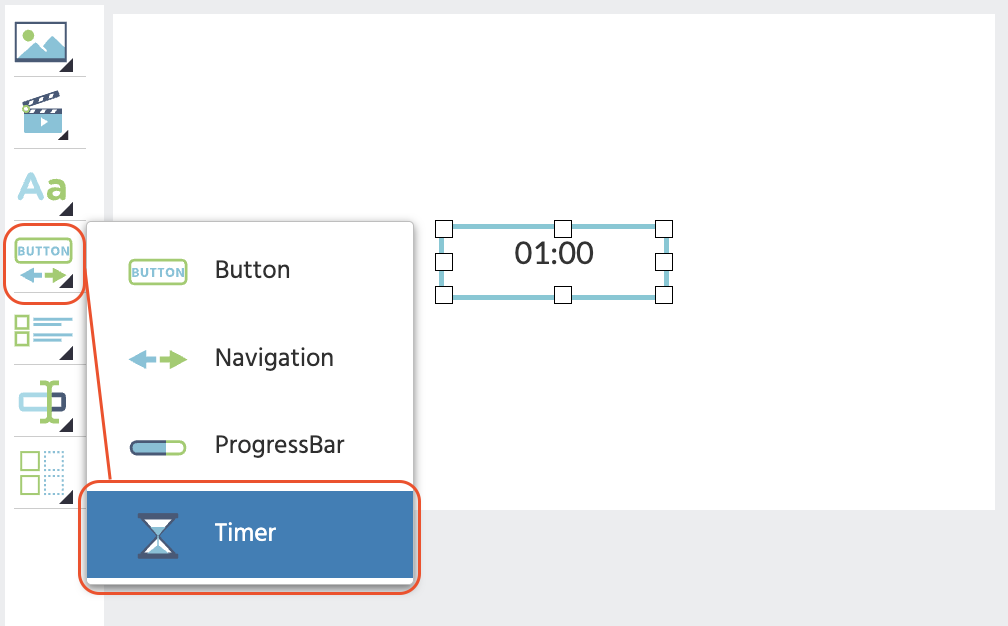
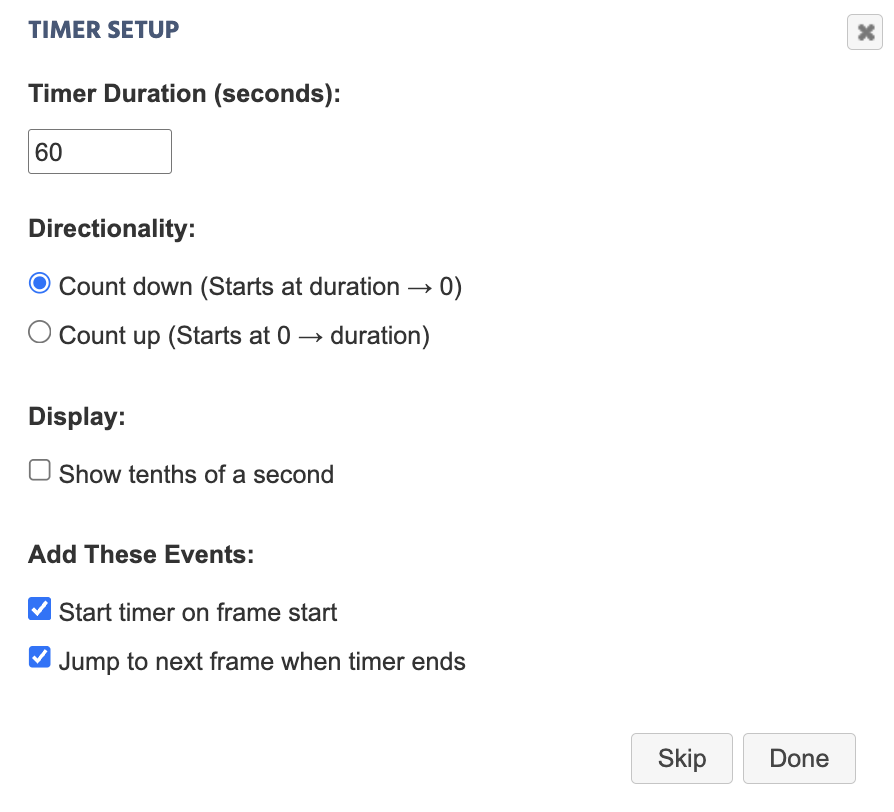
When you add the element, a Timer Setup Wizard opens automatically. You can complete the wizard to pre-configure the timer and add common events in one step, or click Skip to configure everything manually.
Timer Setup Wizard
The setup wizard covers the most common configuration choices and can optionally add starter events for you.
| Option | Description |
|---|---|
| Timer Duration (seconds) | Sets how long the timer runs. Enter a positive integer. Default is 60 seconds. |
| Directionality | Count down starts at the duration and counts toward 0. Count up starts at 0 and counts toward the duration. |
| Show tenths of a second | When checked, the timer displays in MM:SS.T format instead of MM:SS. |
| Start timer on frame start | Adds an event that fires StartTimer automatically when the frame begins. |
| Jump to next frame when timer ends | Adds an event that fires Jump to Next Frame when the TimerEnded trigger fires. |
You can skip any of the auto-events and configure them manually in the event editor instead.
Object Properties
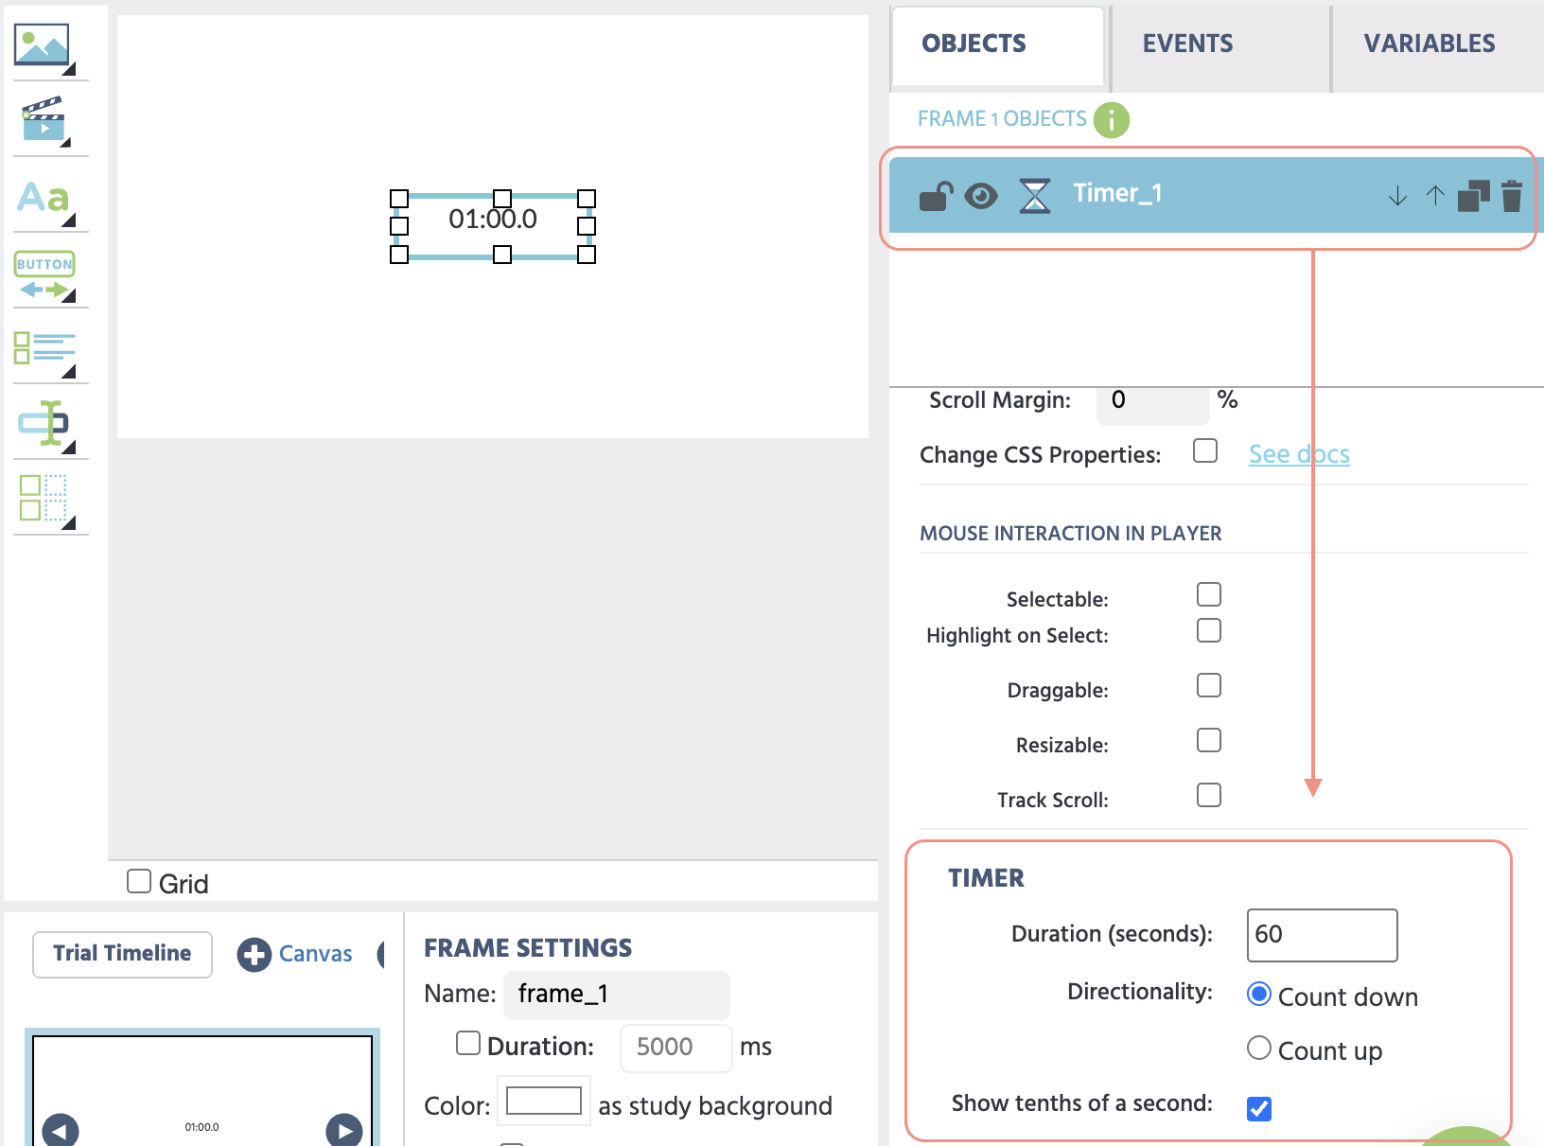
All settings below are found in the Object Properties panel when the Timer Object is selected.
Timer settings
| Property | Default | Description |
|---|---|---|
Duration (seconds) | 60 | The total duration the timer runs for, in seconds. |
Directionality | Count down | Count down starts at the duration and counts toward 0. Count up starts at 0 and counts toward the duration. |
Show tenths of a second | Off | When enabled, the timer displays in MM:SS.T format. When off, it displays in MM:SS format. Not modifiable via events at runtime. |
Note: Current Time (seconds) does not appear in the Properties panel, but it is readable and writable at runtime via the Set Object Property action in the event system. See Using Current Time as a Variable.
Style
| Property | What it controls |
|---|---|
Visibility | Opacity from 0 (invisible) to 1 (fully visible). |
Border-Size | Border width in pixels. Default is 0 (no border). |
Border-Color | Border color. Has no visible effect when Border-Size is 0. |
BG-Color | Background fill of the bounding box. Enable Transparent to remove the fill. |
Roundness | Corner rounding from 0 (sharp corners) to 1 (maximum rounding: an ellipse on rectangular elements, a circle on square elements). |
Custom CSS
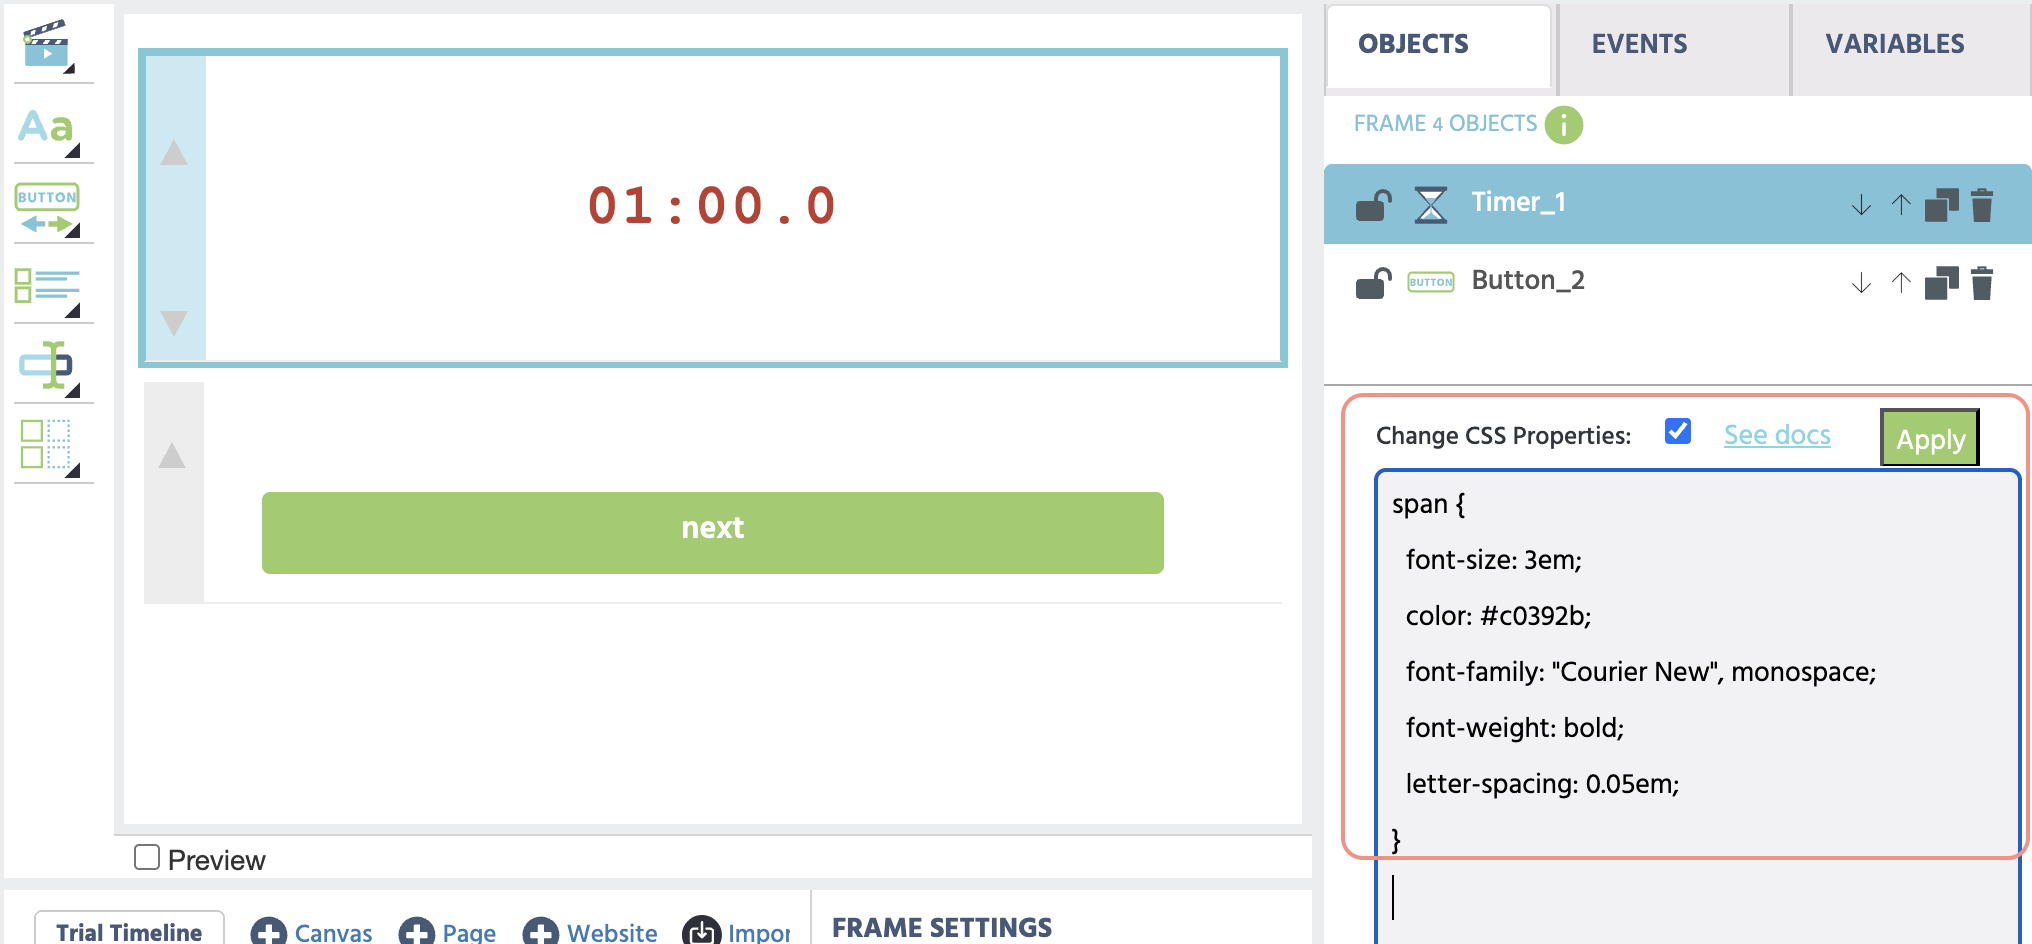
Check Change CSS Properties in the Style section to reveal the CSS textarea. Write standard CSS rules there. Labvanced automatically scopes each rule to the selected object, so your selectors only affect that element's internal DOM.
Styling the time display
Target span to change the font, color, size, or weight of the time readout:
span {
  font-size: 3em !important;
  color: #c0392b;
  font-family: "Courier New", monospace;
  font-weight: bold;
  letter-spacing: 0.05em;
}
Note on property precedence
Background color, border, and border-radius set in the Style panel are applied as inline styles on the element, which take precedence over custom CSS rules. If you need custom CSS to override a Style panel value, add !important to your rule. For these three properties, using the Style panel controls is generally simpler.
Controlling the Timer with Actions
Use the Control Media Object action in the event system to control the timer programmatically.
| Action | What it does |
|---|---|
StartTimer | Starts the timer from its current position. If the timer was paused, it resumes from where it stopped. |
PauseTimer | Pauses the timer at its current position without resetting it. |
ResetTimer | Stops the timer and resets Current Time to its starting position: duration for count-down, 0 for count-up. |
Example: start the timer automatically when the frame begins
Trigger:
On Frame Start
Action:Control Media Object→Set Target: your Timer Object →StartTimer
Example: pause the timer when a button is clicked
Trigger:
On Mouse Click→Set Target: your pause button
Action:Control Media Object→Set Target: your Timer Object →PauseTimer
Triggering Events from the Timer
The Timer Object fires the following triggers, which you can use as the "when" condition in any event.
| Trigger | When it fires |
|---|---|
TimerStarted | When StartTimer is called and the timer begins running. |
TimerPaused | When PauseTimer is called and the timer stops. |
TimerEnded | When the timer reaches its end: 0 for count-down, or the duration for count-up. |
TimerThreshold | Fires once each time the timer crosses a whole-second boundary while running. Use this to execute logic at regular one-second intervals. |
Example: advance to the next frame when the timer ends
Trigger:
Media Object Trigger→Set Target: your Timer Object →Execute on:TimerEnded
Action:Jump to Next Frame
Example: record a variable every second
Trigger:
Media Object Trigger→Set Target: your Timer Object →Execute on:TimerThreshold
Action:Set / Record Variable→ your recording variable
Using Current Time as a Variable
The Current Time (seconds) property is a readable and writable runtime value. You can use the Set Object Property action to read the current time into another variable, or to seek the timer to a specific position.
This makes it possible to:
- Record the exact time remaining when a participant responds
- Branch experiment flow based on how much time has elapsed
- Synchronize two timers by writing the same value to both
Example: record time remaining at response
Trigger:
On Key Press→Set Target: your target key
Action 1:Set / Record Variable→ create a variable (e.g.time_at_response), value source:Object Property→Set Target: your Timer Object →Current Time (seconds)
Action 2:Jump to Next Frame

Further Reading
Event System
How triggers and actions are structured in Labvanced. Essential for wiring StartTimer, PauseTimer, and ResetTimer actions and responding to TimerEnded or TimerThreshold triggers.
Working with Variables
How to create, configure, and record variables. Covers the recording options you need when reading Current Time into a response variable.
All Objects
A full index of all objects available in the Labvanced experiment editor, including display, input, media, and recording elements.