Eye Tracking on an Embedded Website: A Web Bridge Walkthrough
This walkthrough covers the full path for tracking webcam-based gaze, clicks, and scroll behavior on a real external website inside a Labvanced study, from installing the required extension through to reading your exported data. It uses the same peer-reviewed webcam eye tracking pipeline validated in Kaduk et al., 2024, applied to a live website instead of stimuli built directly in Labvanced.
Watch the full walkthrough in this video:
1. Is This the Right Approach?
Use this walkthrough if your study embeds a real, live external website (a product page, a news article, a client's own interface) and you need to measure how participants look at, click, and scroll through it. If you're tracking gaze on stimuli built directly in Labvanced instead (images, text, shapes), see the Webcam Eye Tracking Guide instead. For the full picture of both paths, see Eye Tracking in Labvanced.
2. Install the Extension First: Every Participant Needs It
Labvanced Web Bridge is a live, generally available Chrome extension, and it must be installed by you and every participant, not just by whoever builds the study. Skip this and your first sign that something is wrong will be a failed pilot session, not a build-time warning. Always test with the extension installed before circulating a study link.
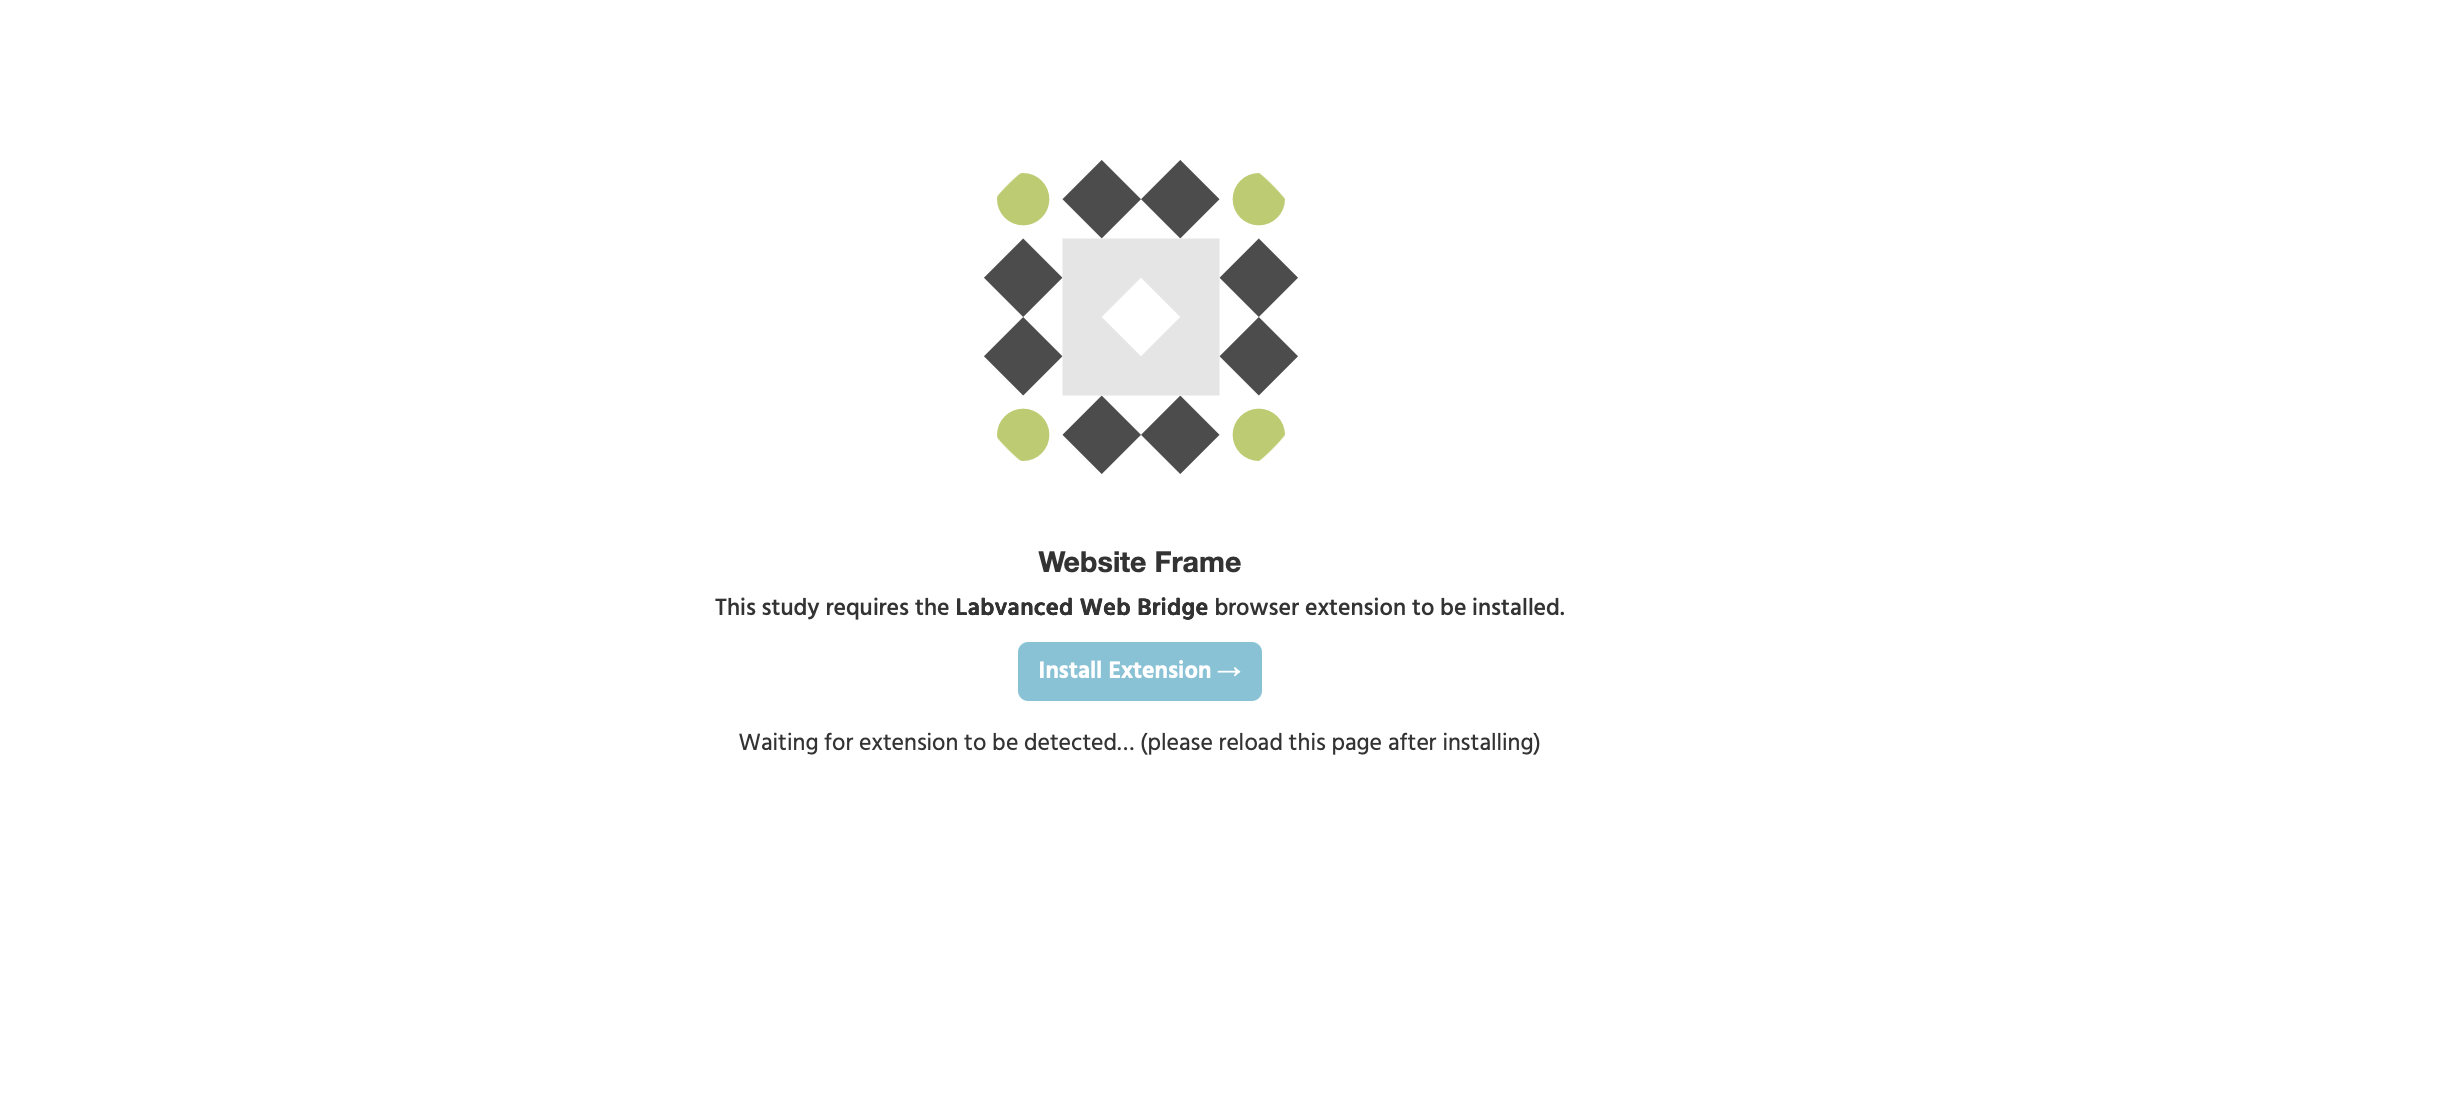
Install it from the Chrome Web Store, following Installation in the full Web Bridge guide. A participant who hasn't installed it yet sees a prompt like this instead of the study:
3. Create the Study and Add the Website Frame
Website Frame is a real, third frame type in Labvanced, alongside Canvas Frame and Page Frame, added the same way.
- Open your experiment in the editor.
- Under
Trial Timeline, click+ Website. - Name the frame and enter the target website's URL, then confirm the extension shows its green confirmation message. If it doesn't appear, revisit step 2 before continuing.
- The embedded website now displays live inside the frame in the editor.
4. Select Your AOIs: This Is a Manual Step
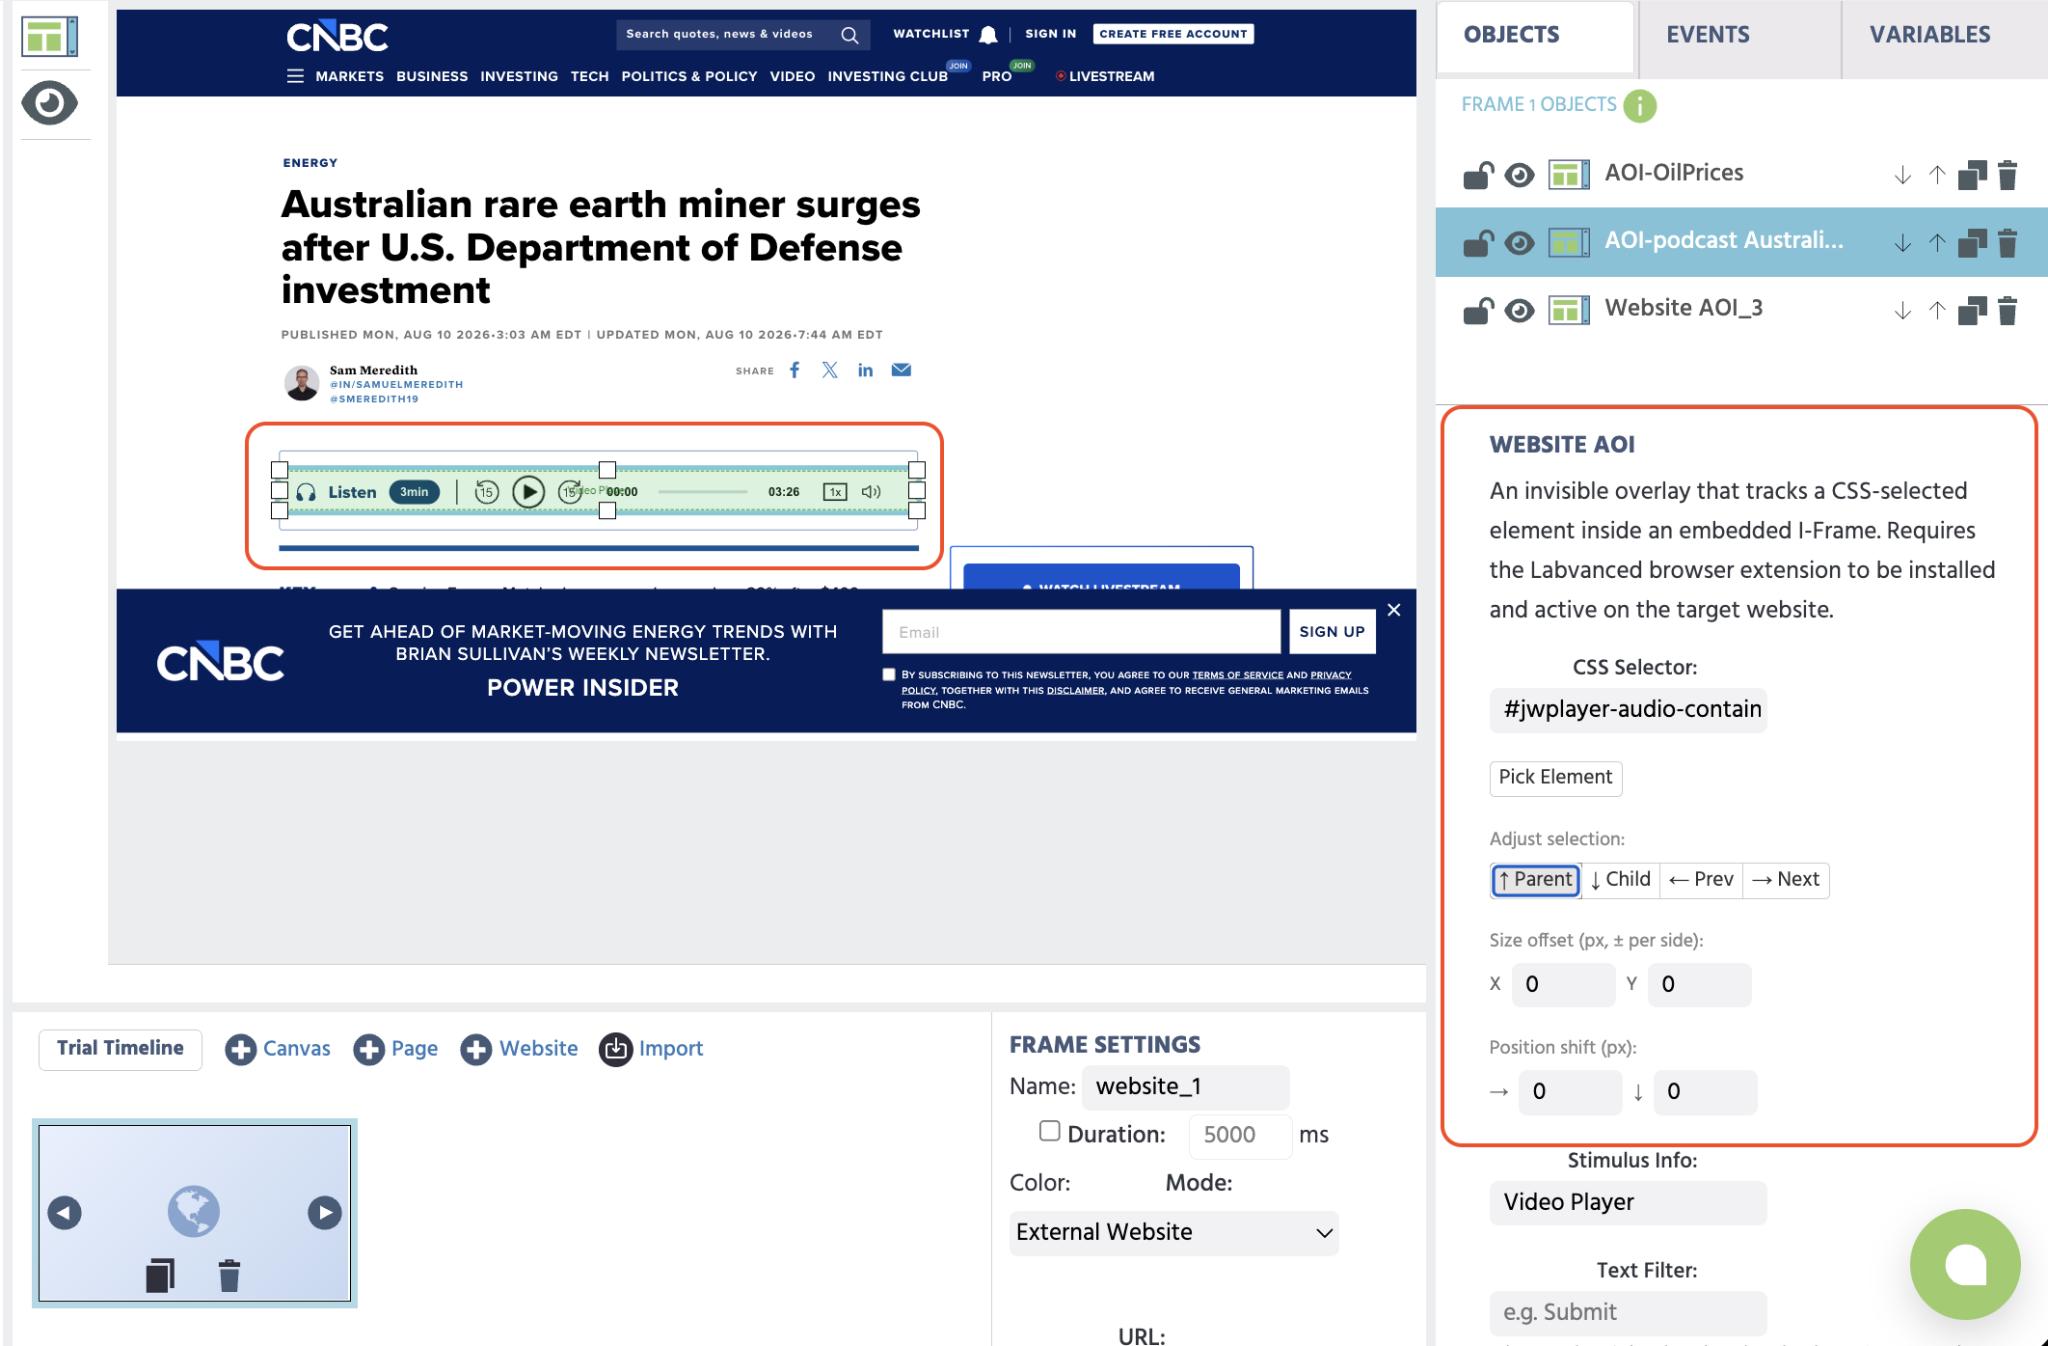
There is no auto-detection. Labvanced never reads a website's own markup to guess which containers matter to your study, every Area of Interest (AOI) is a container you click and anchor by hand.
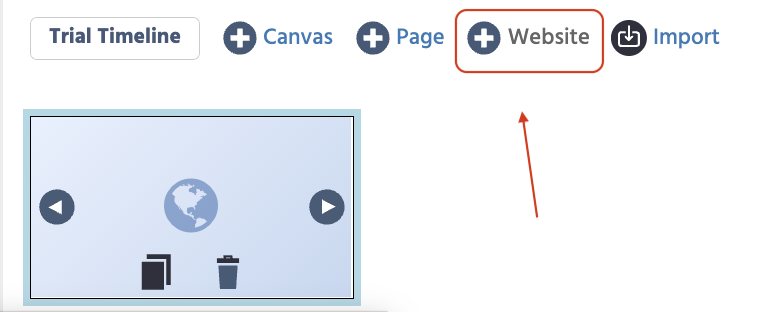
- With the Website Frame open and the embedded site interactive, click the AOI icon, the top icon in the toolbar that appears when a Website Frame is selected (tooltip:
Add Website AOI). - The AOI appears in red. Click your target element on the embedded website (a product image, a headline, a button). The selection turns green once anchored.
- Use
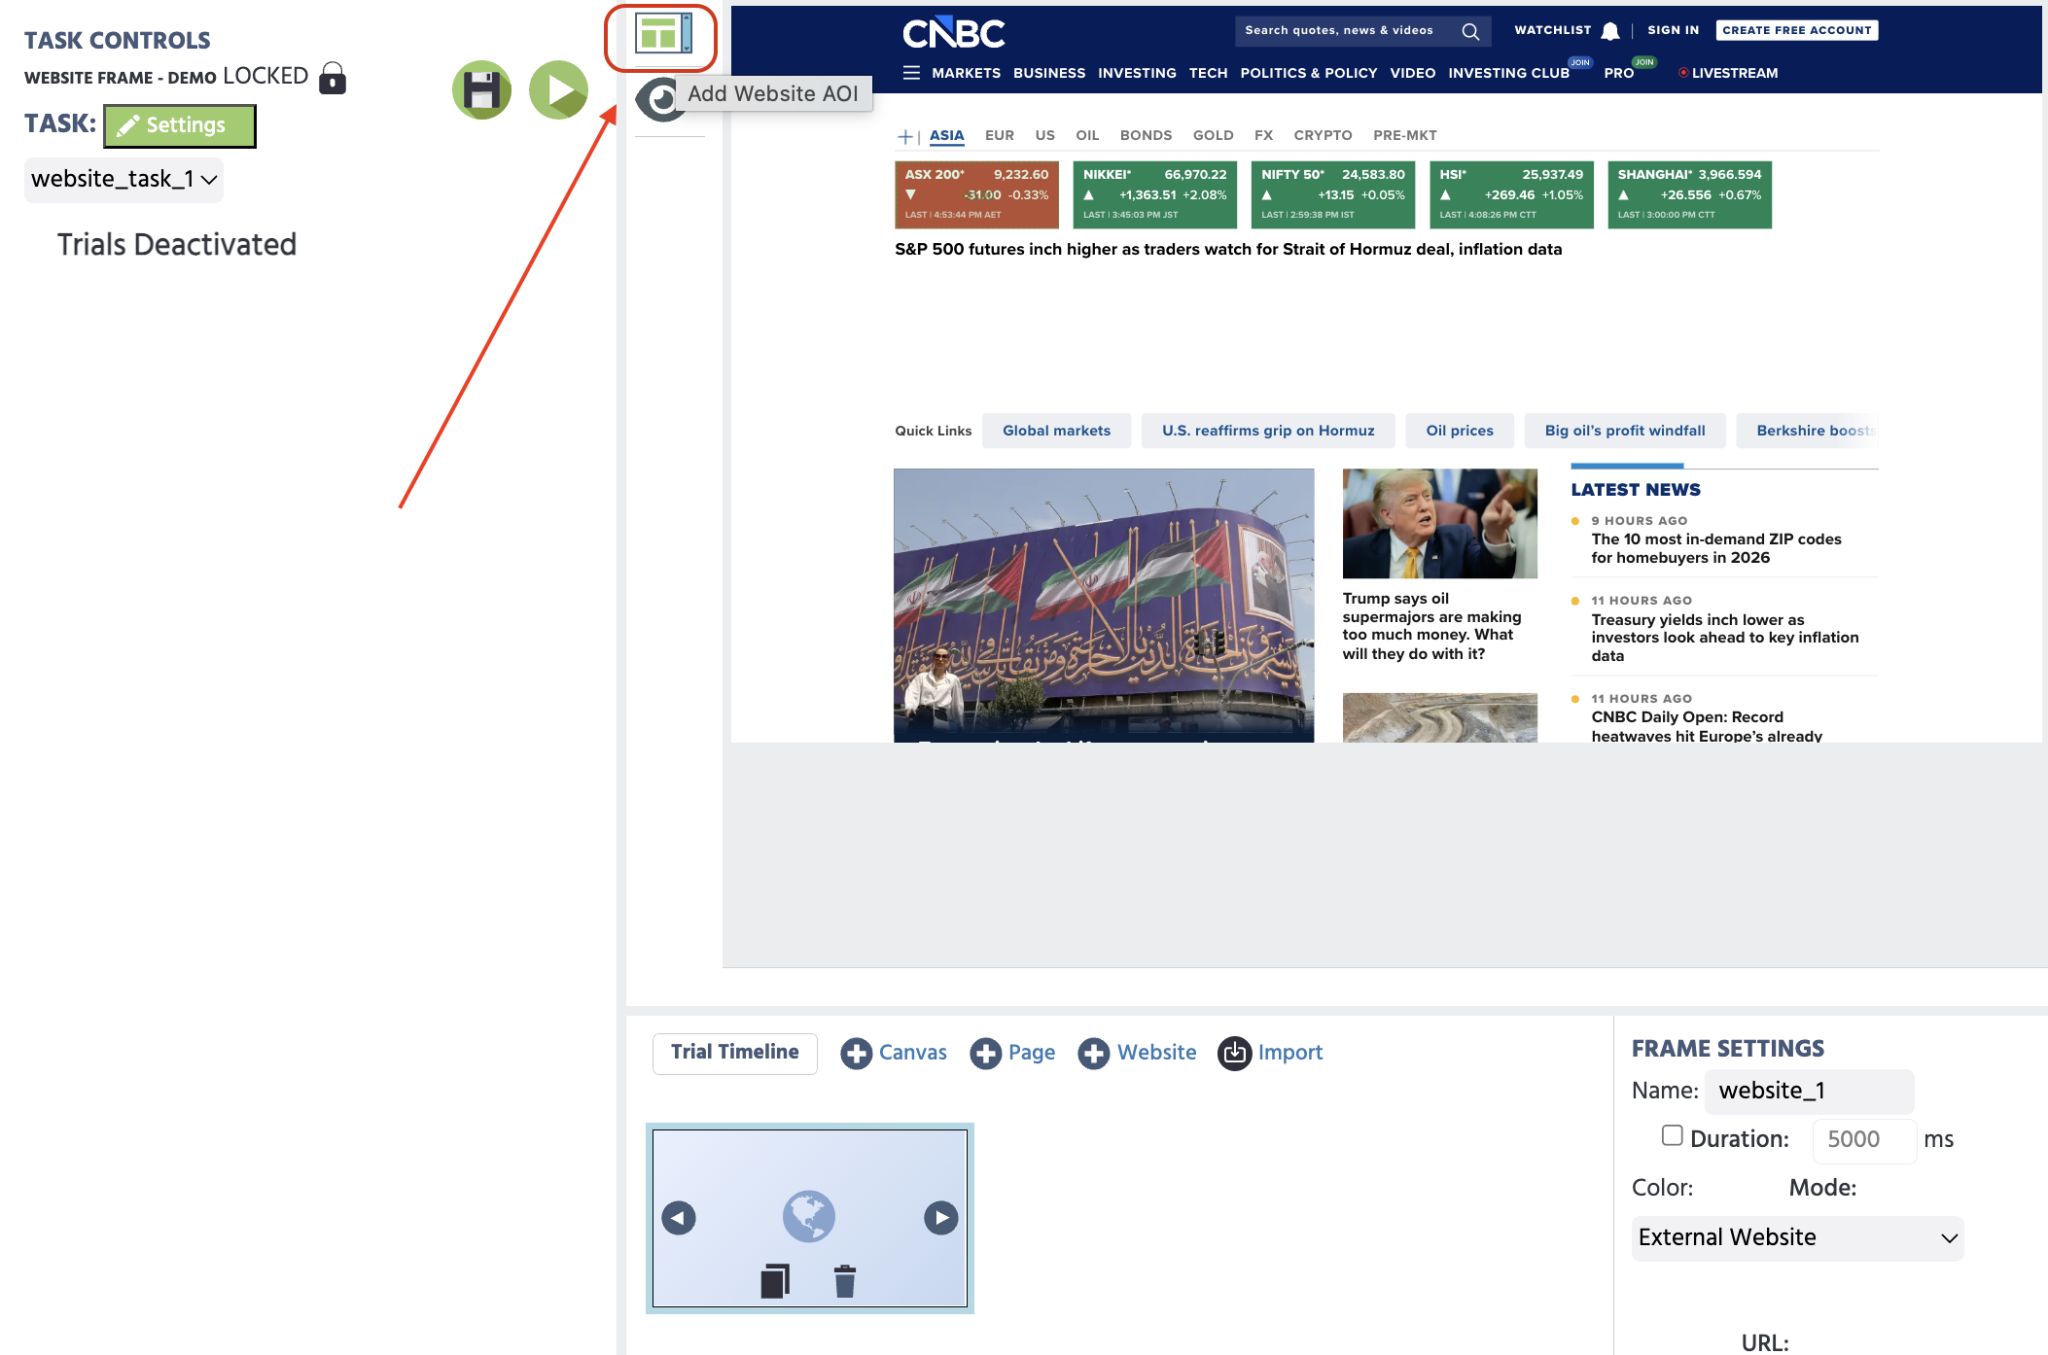
Parent,Child,Prev, andNextin theObject Propertiespanel to move the selection up, down, or sideways through the page's element tree if the anchored area is too broad, too narrow, or off by one element. See Selecting and Adjusting Website AOIs for the full mechanics of these controls, plusText Filter,Scrollable container, and how to verify an AOI is actually anchored before publishing.Resolution(desktop vs. mobile) lives on the Website Frame's own properties, not the AOI's, use it to preview whether your anchored AOIs still land correctly at a different screen size.
- Repeat for each element you want to track.
If the AOI Is on a Different Page Than the One You Loaded
A Website Frame only has one starting URL. If the element you need is on a different page of the site, for example an "Add to Cart" button that only exists on a product page, navigate the embedded site to that page first (or point the frame's own URL setting at it directly), then anchor the AOI there the same way. All AOIs you've added to the frame are listed in the side panel.
5. Record the Gaze Data: Add Events
An AOI by itself records nothing. Gaze on it only becomes data once you build an event that captures it into a variable:
- Add a new event from the events editor.
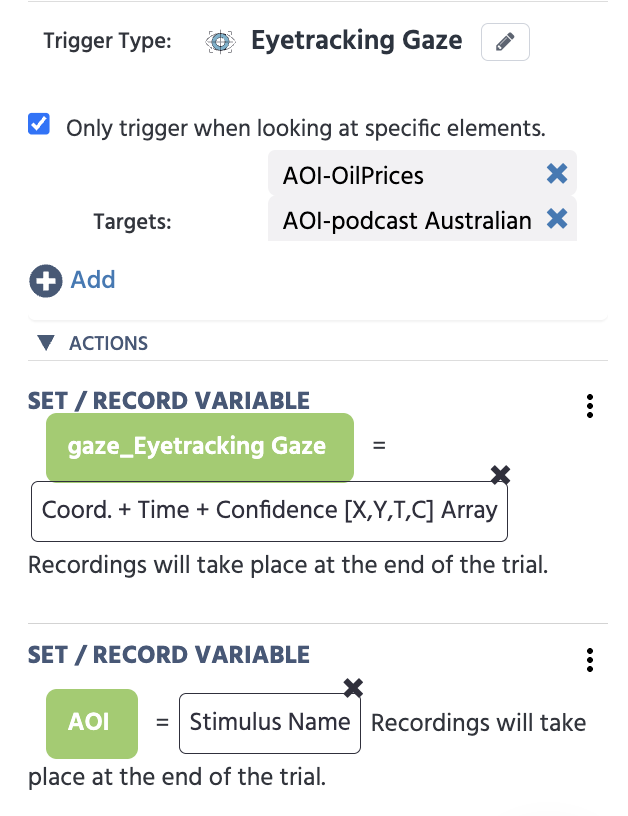
- For the trigger, select
Physiological Signal Triggers→Eyetracking Gaze. - Select the option to only trigger on specific elements, then add your AOI as a target.
- Name the event. An
Eyetracking Gaze Event Setupdialog appears automatically at this point, offering to build the recording action for you, acceptRecord gaze timeseries [X,Y,T,C](checked by default) and Labvanced creates theSet / Record Variableaction below for you, targeted at your AOI. - If you skip or close that dialog, build it manually instead: action
Variable Actions→Set / Record Variable, with a variable set to FormatArrayand Record TypeAll changes / time series, then in the value select menu chooseCoord. + Time + Confidence [X,Y,T,C] Arrayfrom theTrigger (Eyetracking Gaze)options.
This is the same trigger-and-action pattern used for eye tracking on Labvanced-built stimuli, applied to a Website AOI target instead. See Recording and Exporting Gaze Data and the Eyetracking Gaze Trigger reference for the full detail on this event, the automated setup dialog, and calibration-error recording.
Web Bridge also reports non-gaze behavioral data for the same AOI: element position, clicks, hover, mouse movement, and scroll position. See What Gets Tracked in the full guide for how to record each.
6. Optional: Add a Gaze Indicator for Piloting
The toolbar that appears when a Website Frame is selected has a second icon right next to Add Website AOI, called Add Gaze Indicator. Click it and Labvanced adds a small red circular marker to the frame, along with an automatically created update gaze position event that keeps the marker's position updated to the current gaze coordinates during playback.
This is a piloting aid: it lets you watch where your own gaze lands while you test the study. It doesn't get recorded as data and isn't something participants need.
7. If You Also Need to Split Participants Before the Camera Prompt
If your study needs to send only some participants into a webcam eye tracking flow at all, before any camera-access prompt appears, whether by participant choice, task performance, automatic group assignment, or splitting your recruitment links, that's a separate, general branching-study pattern, not specific to Website Frame. See Conditional Webcam Eye Tracking for how to set it up.
8. Test and Read Your Export
Preview your task with the extension installed and confirm the website loads and your AOIs anchor as expected. Publish once you're satisfied, following Publishing and Sharing in the full guide.
Your gaze data exports the same way as any other webcam eye tracking data: as timeseries rows in the Dataview & Export tab. See Exporting Gaze Data for how to read the X, Y, T, and C columns.
For everything else, installation details for both researchers and participants, full use cases, data and privacy specifics, and troubleshooting, see the complete Labvanced Web Bridge guide linked below.
Frequently Asked Questions
Add to Chrome, then Add extension in the confirmation dialog, then return to the experiment and refresh the page to begin the study. See Installation in the full Web Bridge guide for the full participant steps. Further Reading
Labvanced Web Bridge | Support & Guide
The full reference: installation, use cases, data and privacy, troubleshooting, and FAQ.

Recording and Exporting Gaze Data
The full reference for the Eyetracking Gaze trigger, calibration error recording, and data export format.
Eyetracking Gaze Trigger
Full reference for this trigger, including the automated Eyetracking Gaze Event Setup dialog and trigger-specific values.
Eye Tracking in Labvanced
Deciding between webcam eye tracking, in-lab hardware, and tracking an embedded website.