Participant Recruiting for your Study
Presented here are instructions for linking your study in Labvanced with an external crowdsourcing service. You should only choose one service to use at a time. Payments should be made to the external service directly, not through Labvanced.
This guide is for researchers who want to set up and manage crowdsourcing recruitment themselves through one of the external platforms below. If you would rather have Labvanced handle the entire recruitment process for you, from sourcing participants to compensation, see Subject Recruitment Services.
All of the integrations below are managed from the Crowdsourcing tab, under Launch & Participate:
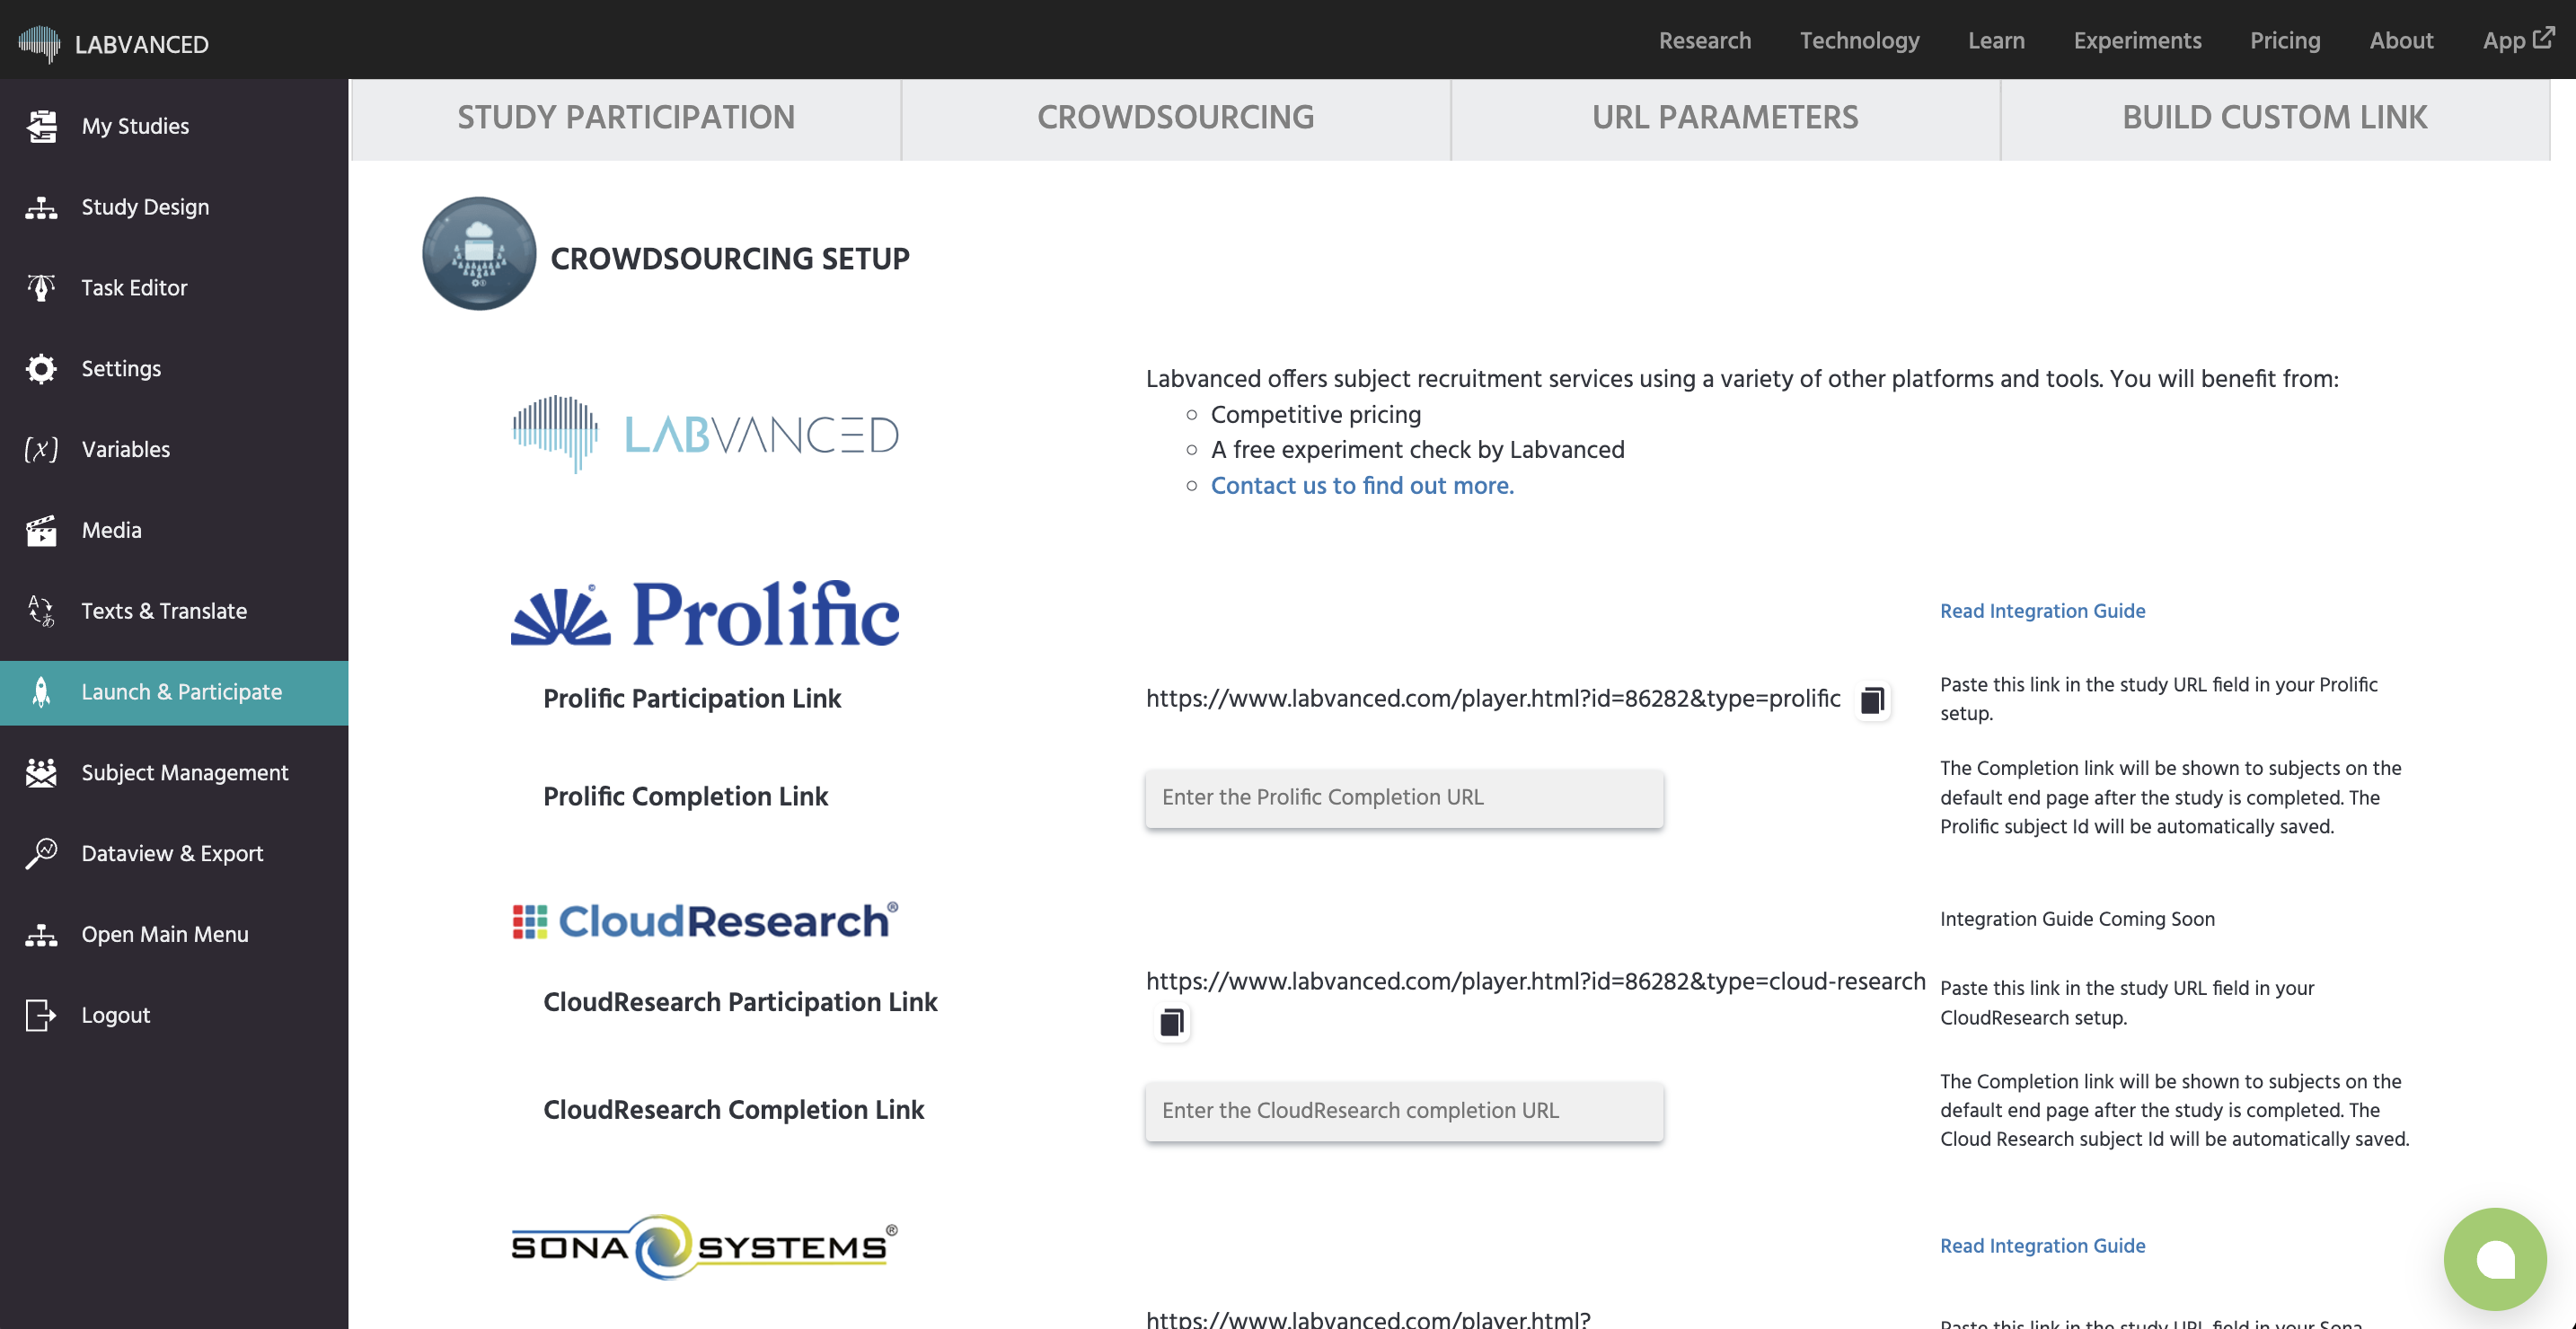
Table of Contents
Integrating Prolific
- Publish your study on Labvanced.
- On the
Launch & Participatetab, go to theCrowdsourcingtab and find the Prolific section. Copy theProlific Participation Link.
- Go to app.prolific.co (and to your study's page on Prolific). Paste the link from Labvanced as the study URL. The URL should end with "&type=link"
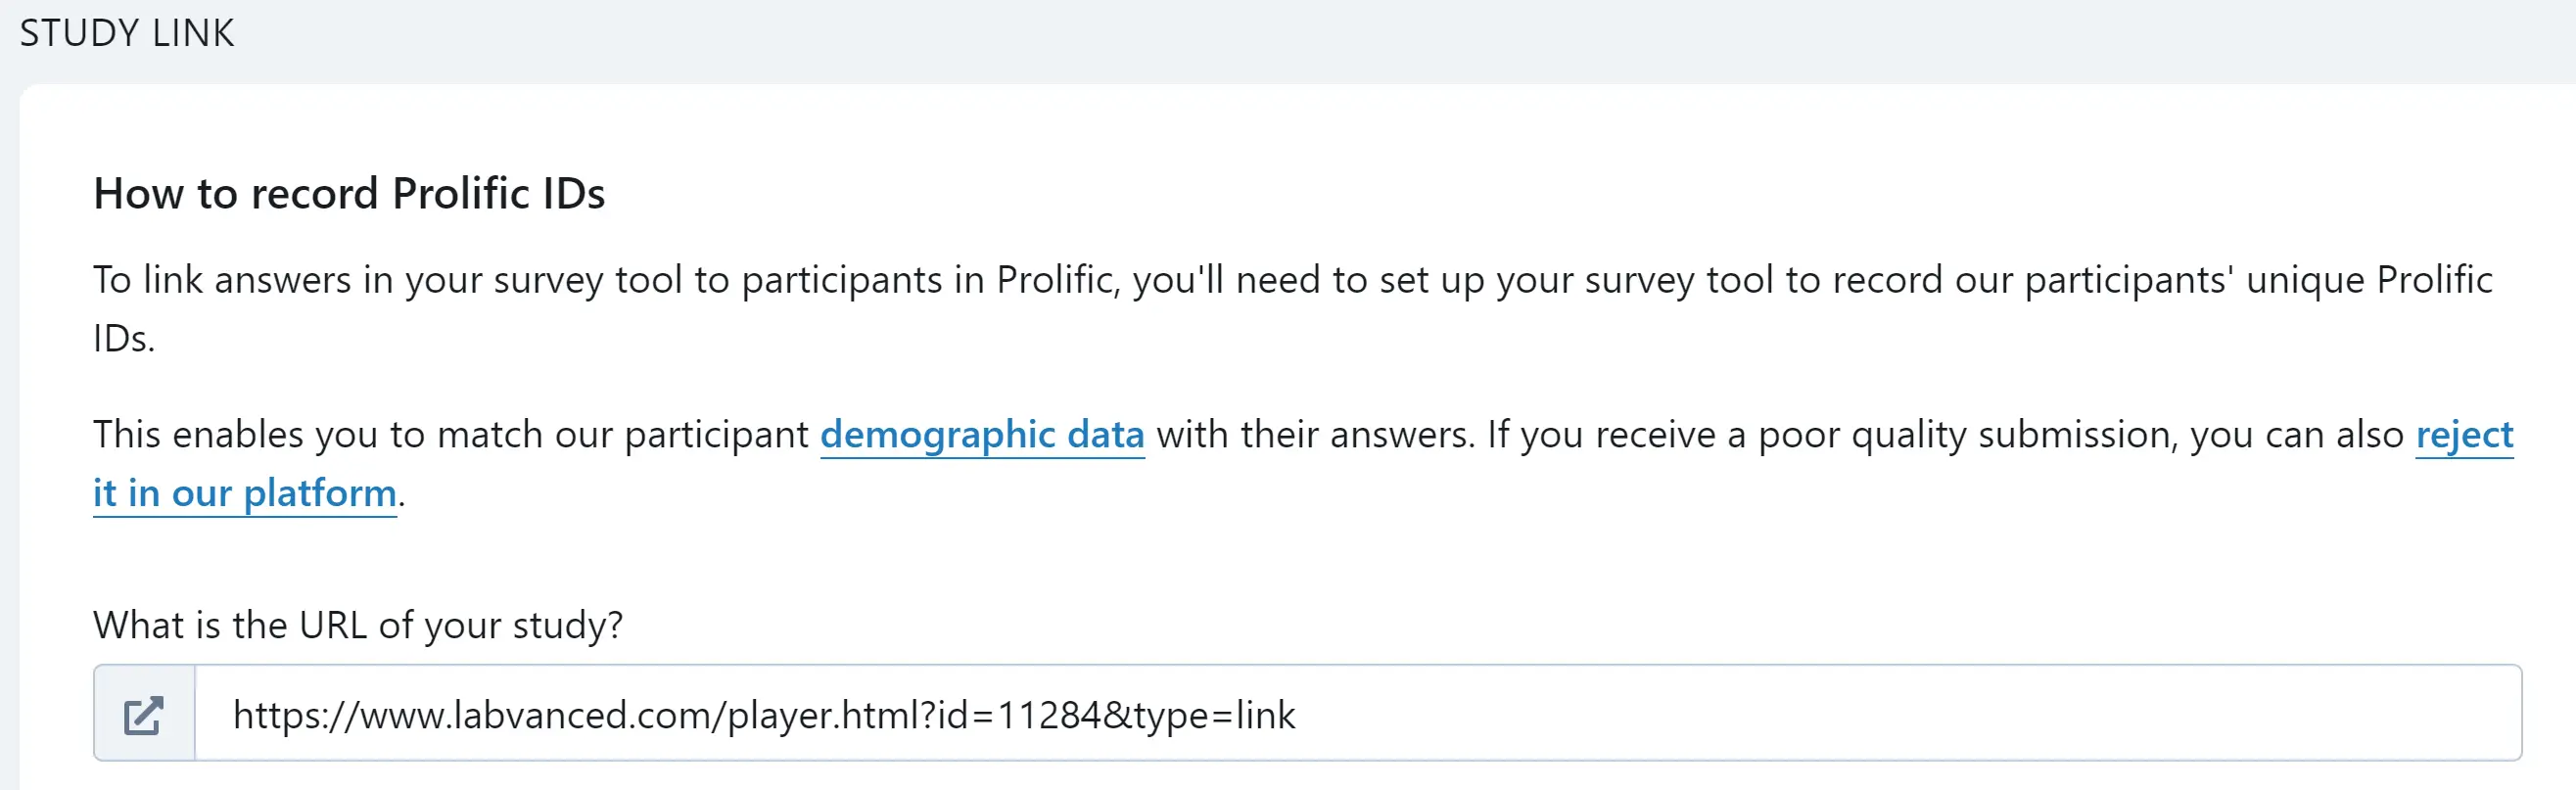
- The next question Prolific will ask is "How do you want to record Prolific IDs?" Choose either:
I'll add a question to my study: On the very first frame of your experiment, add an Input text object and ask participants to copy and paste their Prolific ID into the text box.I'll use URL parameters: A new option will appear below your selection. Chooseconfigure parametersand a dialog box will appear. Chooseadd parameters.
- Next is to choose how you will confirm that participants have completed the study. Select "I'll redirect them using a URL." Copy the URL that appears in the gray box below your choice.
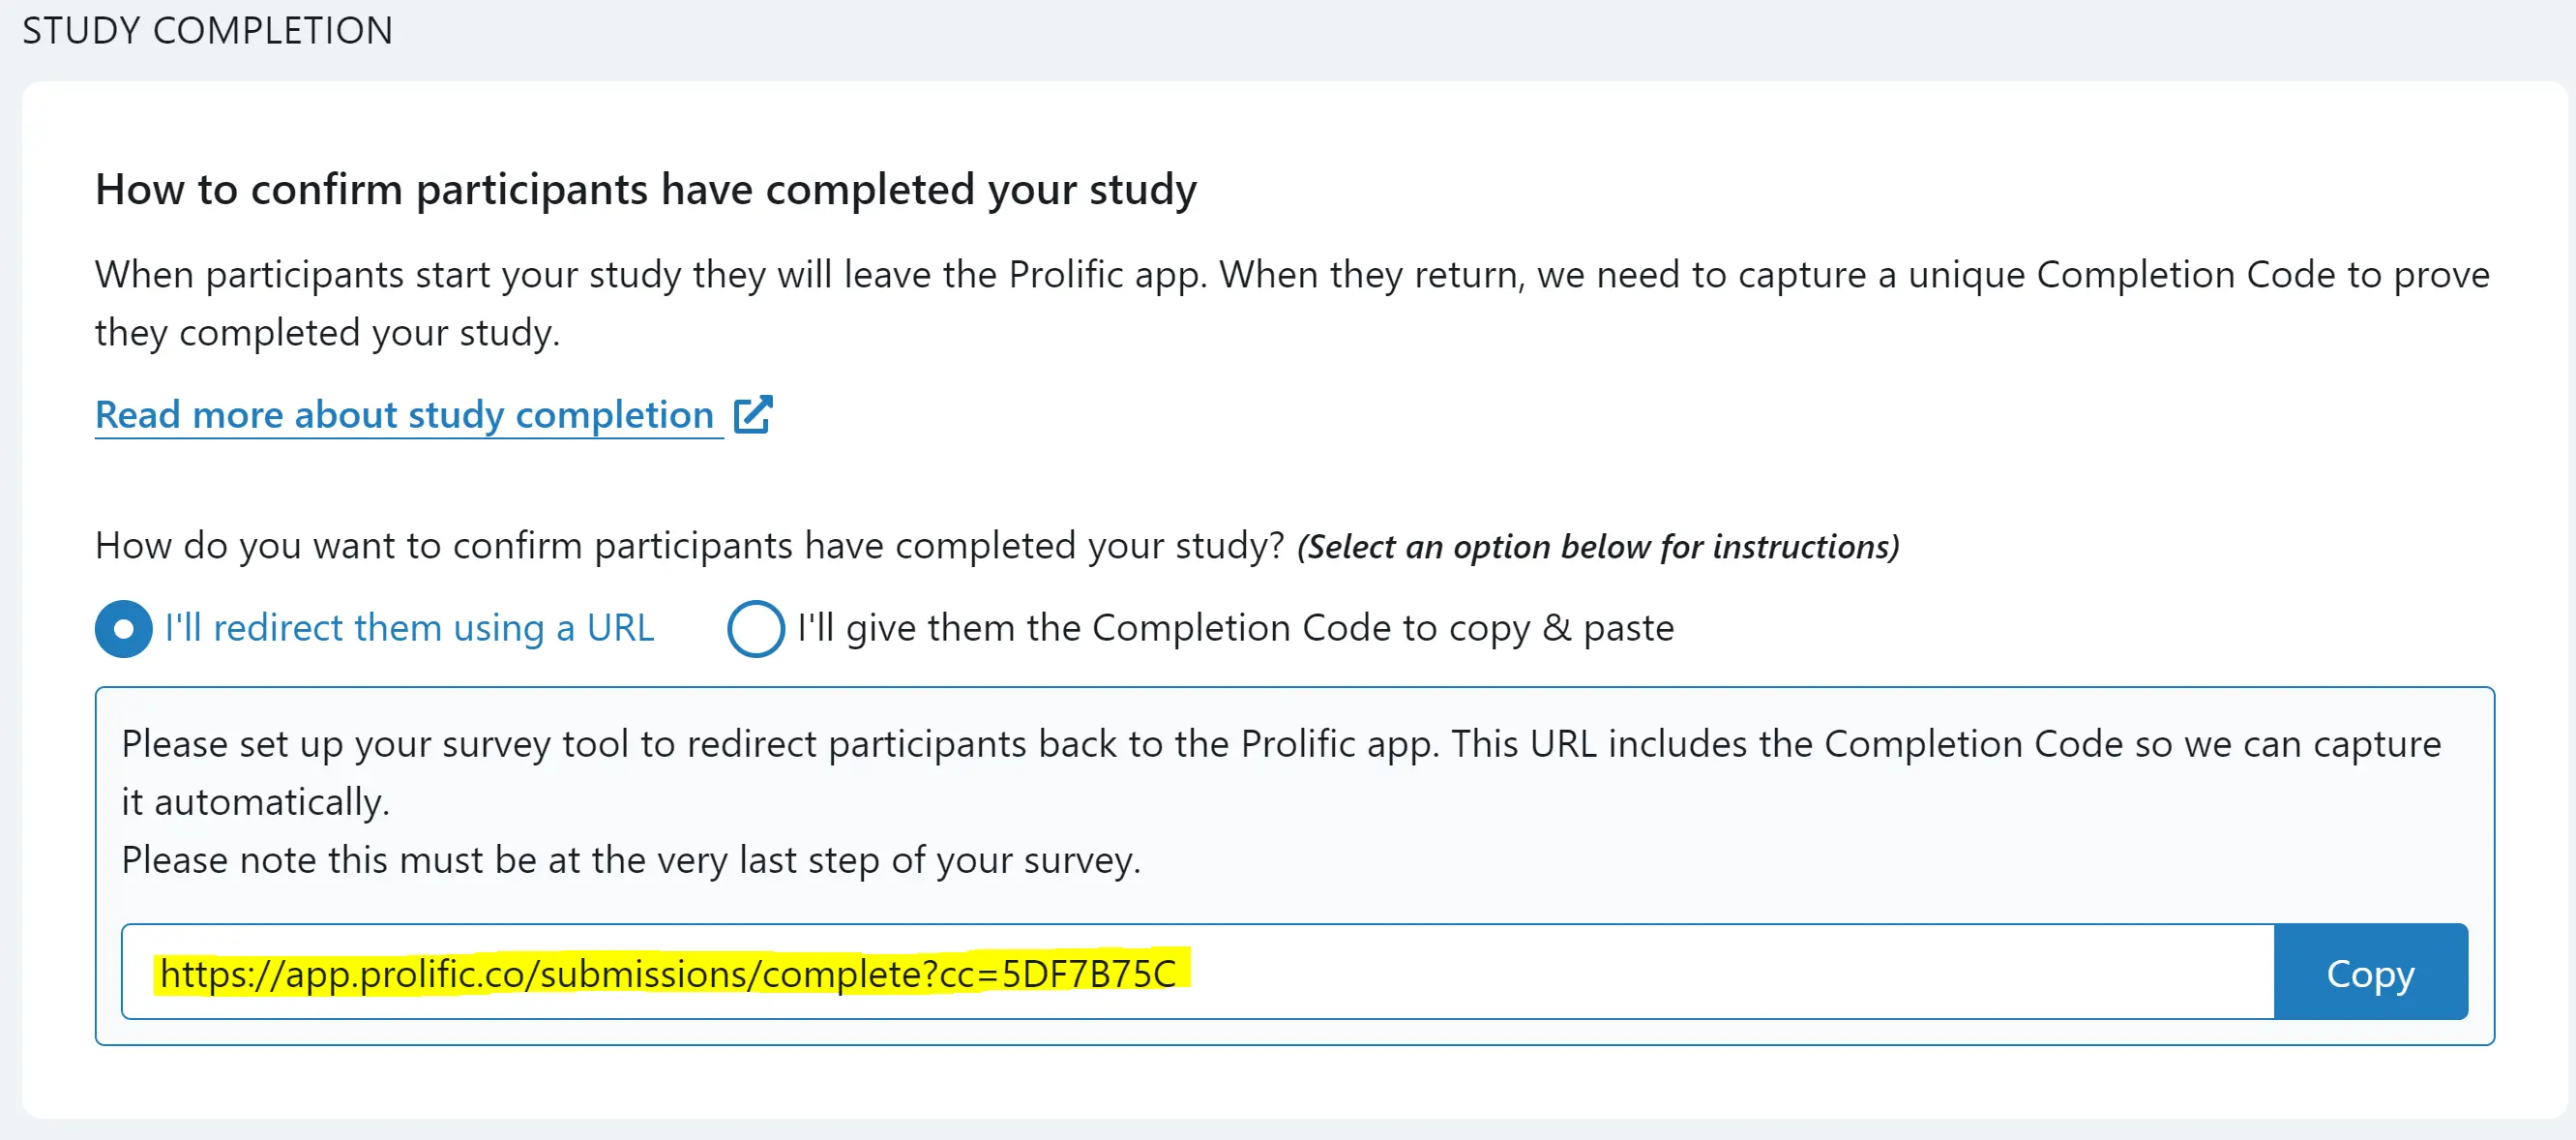
- Paste this URL into the
Prolific Completion Linkfield on theLaunch & Participatetab (same panel shown in step 2) and save.
When the experiment is finished, the participant should see the completion link/URL to Prolific. They can click the link to be redirected back to Prolific to receive their payment and be marked as having completed the study. Please ensure that this works as expected. 
Integrating CloudResearch
- Publish your study on Labvanced.
- On the
Launch & Participatetab, go to theCrowdsourcingtab and find the CloudResearch section. Copy theCloudResearch Participation Linkand paste it as the study URL in your CloudResearch setup. - In the
CloudResearch Completion Linkfield, enter the completion URL from your CloudResearch study and save.
Labvanced automatically saves each participant's CloudResearch participant ID.
[needs source: step-by-step instructions for configuring the study URL and generating a completion URL on CloudResearch's own platform]
Integrating Sona Systems
- Publish your study on Labvanced.
- On the
Launch & Participatetab, go to theCrowdsourcingtab and find the Sona Systems section. Copy theSona Participation Link.
- Go to sona-systems.com and paste the link as the study URL for your experiment. Note: This URL must end with: “&type=sona&subject_code=%SURVEY_CODE%”
- Copy the Sona “completion URL” which should be shown to you in your experiment settings. This url should look roughly like this:
“https://yourschool.sona-systems.com/webstudy_credit.aspx?experiment_id=123&credit_token=hq8dhd2”
Note: This completion URL MUST NOT contain the subject_code or survey_code URL parameter.
- Paste this completion URL into the
Sona Completion Linkfield (same panel shown in step 2) and save.
When the experiment is finished, the participant should see the back-link to Sona. They can click the link to get rewarded. Please ensure that this back-link works as expected. 
Integrating Besample
Labvanced computes the participant's completion code for Besample automatically, no custom event or variable setup required.
- Publish your study on Labvanced.
- On the
Launch & Participatetab, go to theCrowdsourcingtab and find the Besample section. Copy theBesample Participation Linkand paste it into the study URL field in your Besample setup. - In the
Besample IDfield, enter your bkey from Besample and save.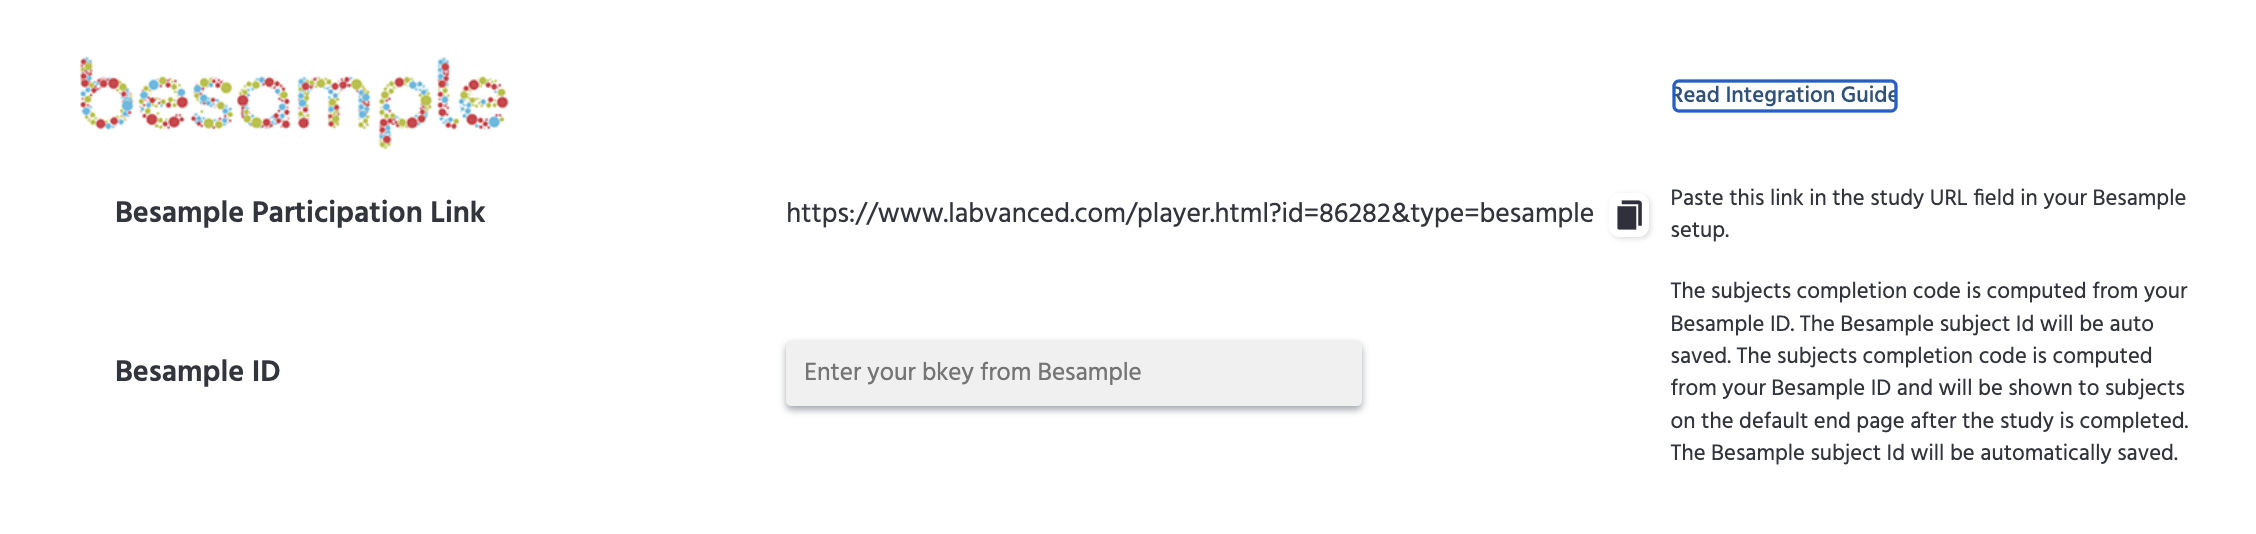
Labvanced calculates each participant's completion code from the response id Besample sends and your Besample ID. The code is shown to the participant automatically on the default end page after the study is completed.
Test: When the experiment is finished, the participant will see their individual completion code on the end page next to the message "Please enter the following code back on Besample to claim your reward," along with a copy icon so they can copy it in one click without selecting the text manually. The same code is saved in Labvanced for each subject, so you can compare submitted and saved codes before approving payment.
Note: If you already set up the older manual event for this (an event reading response_id from the URL and computing a code from a besample_id variable), you do not need to migrate. Labvanced still recognizes that setup as a fallback, so it will keep working alongside the newer Besample ID field.
Integrating Panelabs
- Publish your study on Labvanced.
- On the
Launch & Participatetab, go to theCrowdsourcingtab and find the Panelabs section. Copy thePanelabs Participation Linkand paste it into the study URL field in your Panelabs setup. - In the
Panelabs Completion Linkfield, enter the completion URL from your Panelabs study and save.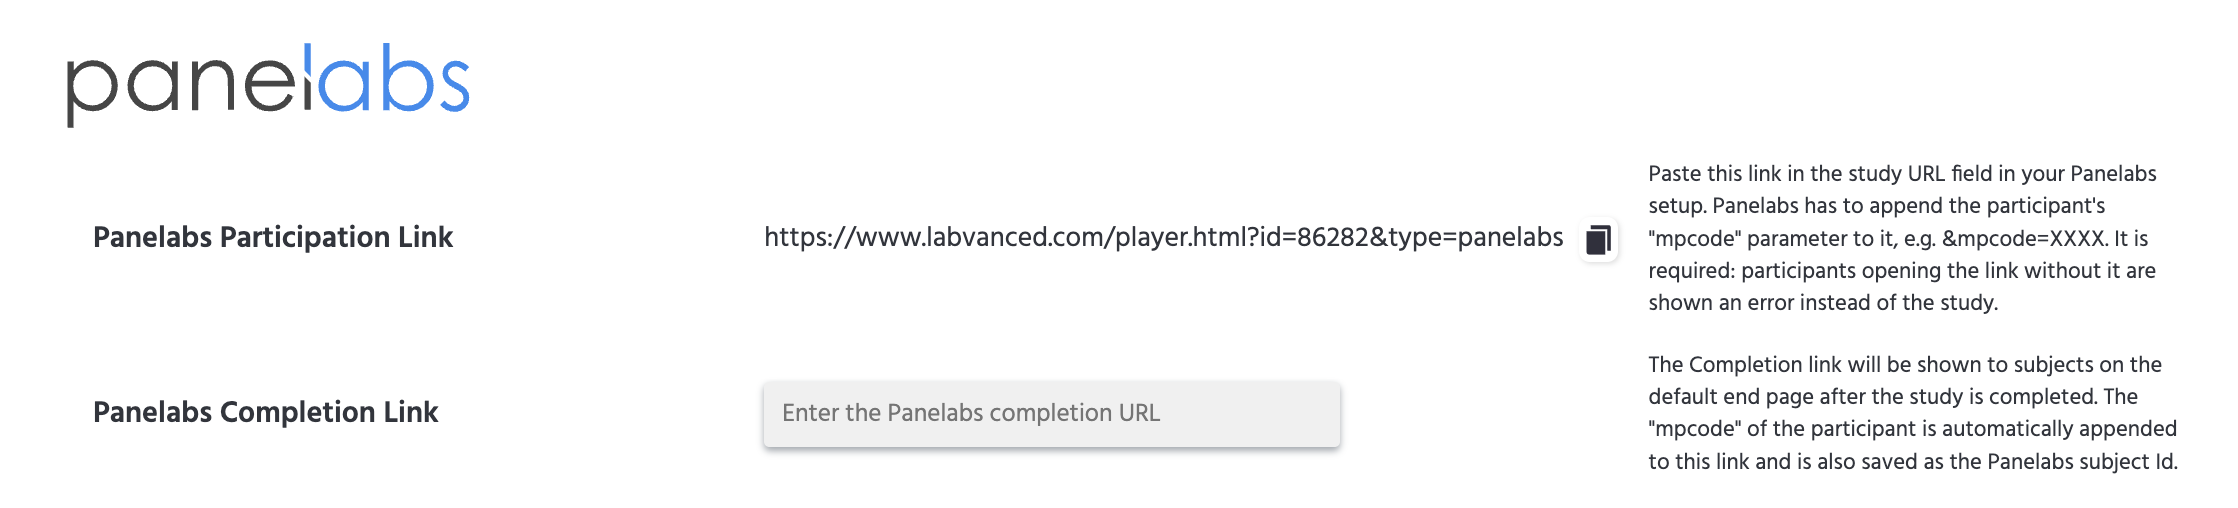
Important: Panelabs must append the participant's mpcode parameter to the participation link (for example &mpcode=XXXX). This is required: a participant who opens the link without an mpcode value sees an error instead of the study. Labvanced automatically appends that same mpcode to the completion link and saves it as the participant's Panelabs subject ID.
When the experiment is finished, the participant sees a link ("Please follow this link to claim your reward back on Panelabs") rather than a code to copy. Clicking it takes them back to Panelabs with their mpcode already attached.
Integrating with Amazon Mechanical Turk
These are the steps in order to run a study created on Labvanced via Amazon Mechanical Turk:
Go to https://requester.mturk.com/ and create a new Project of type "Survey Link"
Enter all the required information such as title demographic criteia, reward per response, etc.
On page 2 "Design Layout" copy the mTuk Link at the right place inside the HTML. Make surethe link end with &type=code
On the
Launch & Participatetab, theCrowdsourcingtab's Mechanical Turk section shows this same link and confirms that Labvanced generates an individual completion code per subject: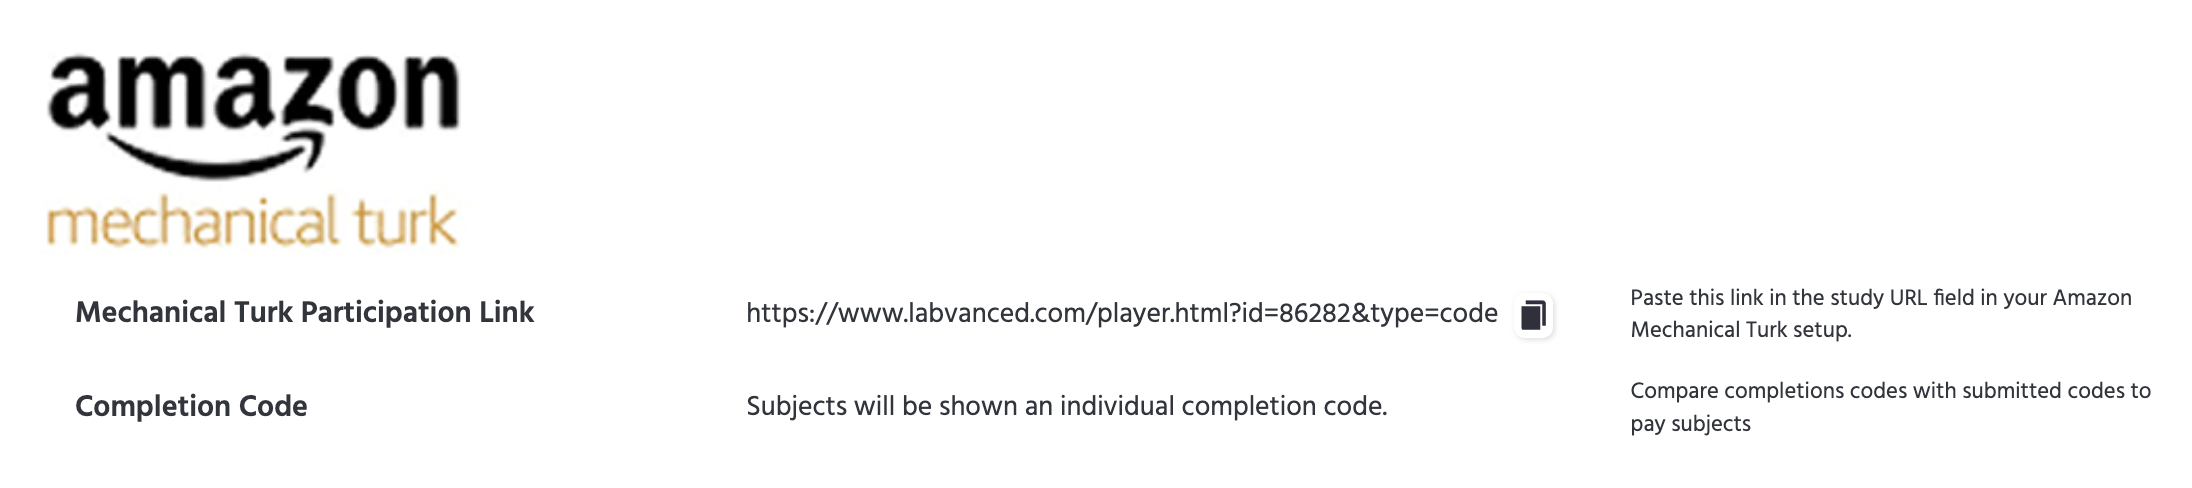
Instruct subjects to copy the completion code they will see on Labvanced and tell them to paste it into the respective input field on mTurk.
Test: When the experiment is finished the participant will see an individual completion code, which he/she can copy and paste back into mTurk to complete the task. The correct completion code will also be saved in Labvanced for each subject. Hence, you can compare the completion codes that were submitted and the ones saved in Labvanced and only pay the worker if those are matching.
Important: To achieve best results in terms of balancing we recommend to recruit subjects in several batches!
Integrating Clickworker
- Publish your study on Labvanced.
- On the
Launch & Participatetab, go to theCrowdsourcingtab and find the Clickworker section. ClickGenerate Links, enter the number of subjects you want to recruit, and clickGenerateto download the CSV file.
Or, enter the following URL:
https://www.labvanced.com/publishing/csv_codes?expId=EXP_ID&numSubj=NUMBER_SUBJECTS
Note:
EXP_ID here must be replaced with your experiment Id and NUMBER_SUBJECTS with the number of subjects you want to recruit. Make sure that the downloaded CSV file contains exactly as many rows plus header (custom links plus completion code) as the number of subjects you want to recruit.
- Go to www.clickworker.com and create a new "Survey Order" with type "Extended Survey." Set "Add unique ID of the Clickworker" to "yes." Set the number of participants, demographic criteria, description, and other required settings.
- On page 2, load the data and choose ";" (semicolon) as a Columns Separator. Click the browse button, select the file you downloaded in step 2, and click Upload. You should see 2 columns for each subject, an individual participation link, and a completion code. Note: If the CSV contains a different number of links than you entered in step 3 for the number of subjects, a warning will pop up.
- On page 3, "Preview Order" and confirm all settings are correct. Then submit the order.
When the experiment is finished, the participant will see the individual completion code that they can copy into Clickworker to receive compensation. You can test this by using one of the generated individual participation links.
Panels/Other
Any other platform or panel can also integrate with Labvanced. In most cases, this means reading out specific URL parameters (such as a subject or completion code) to build a participation and completion link for your subjects. Contact Labvanced if you need help setting up a platform not listed above.