Set / Record Variable Action
The Set / Record Variable action writes a value into a variable the moment the event containing it fires. It sits in the Variable Actions category of the event system, and it is the single most common action in Labvanced: almost every recorded behavioral measure and almost every variable-driven condition in a study passes through it at some point.
Table of Contents
Overview
Once a variable exists, Set / Record Variable is how it actually gets a value: a reaction time, a participant's choice, a running score, a coordinate pair from a mouse movement. Without it, a variable stays at its start value for the whole study.
Common Use Cases
Set / Record Variable shows up across almost every category of study, from simple button-press tasks to full physiological recordings.
- Recording a behavioral measure: save a reaction time, an accuracy score, or a typed response into a variable so it appears in the exported data.
- Building a counter: increment a variable by 1 each time a trigger fires, to count trials completed, errors made, or button clicks.
- Capturing trigger-specific values: write values a trigger provides, such as mouse X/Y coordinates or a gaze position, directly into a variable.
- Driving conditional logic: set a variable that a later
Requirement Actionchecks to decide which branch of the study runs next.
Required Background Knowledge
Before diving into this action, it's recommended to understand the basic functionalities of variable creation and their properties, as described in these pages:
Creating Variables
The different ways to create a variable in Labvanced, from the Variables tab, the task editor, an object prompt, or the event system.
Variable Properties
The settings that define a variable: name, data type, scale, and the record variable toggle.
How It Works
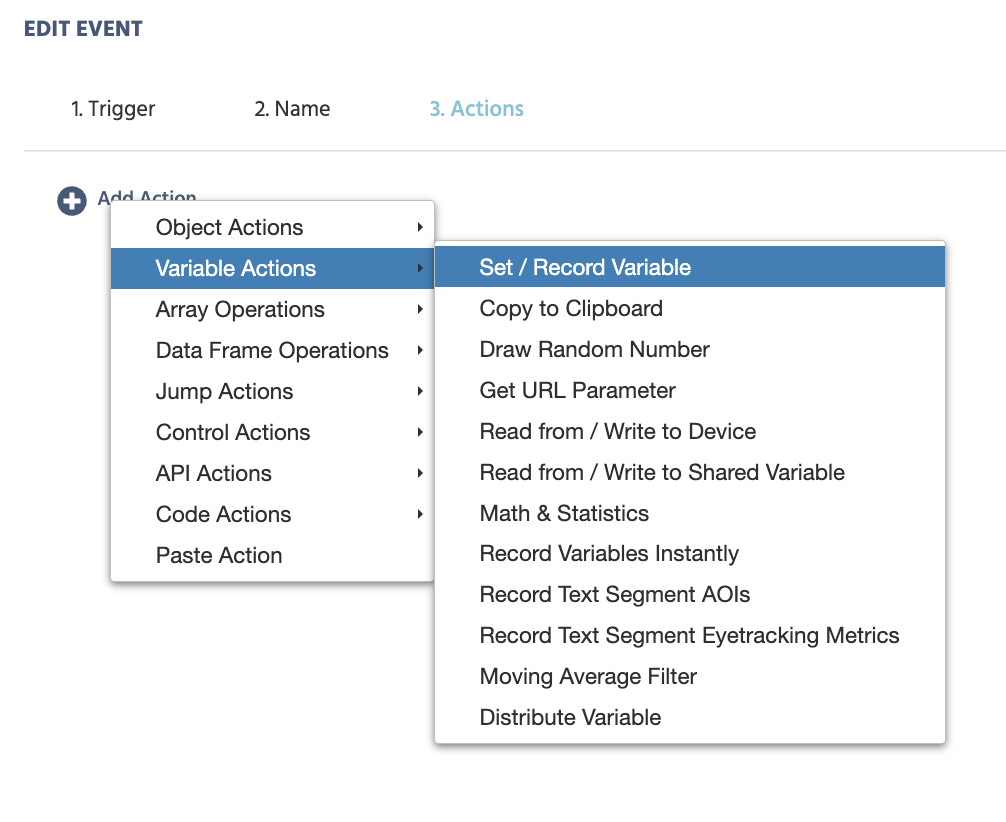
To access Set / Record Variable, open the Event System in the Task Editor and create a new event. Under Add Action → Variable Actions, select Set / Record Variable.
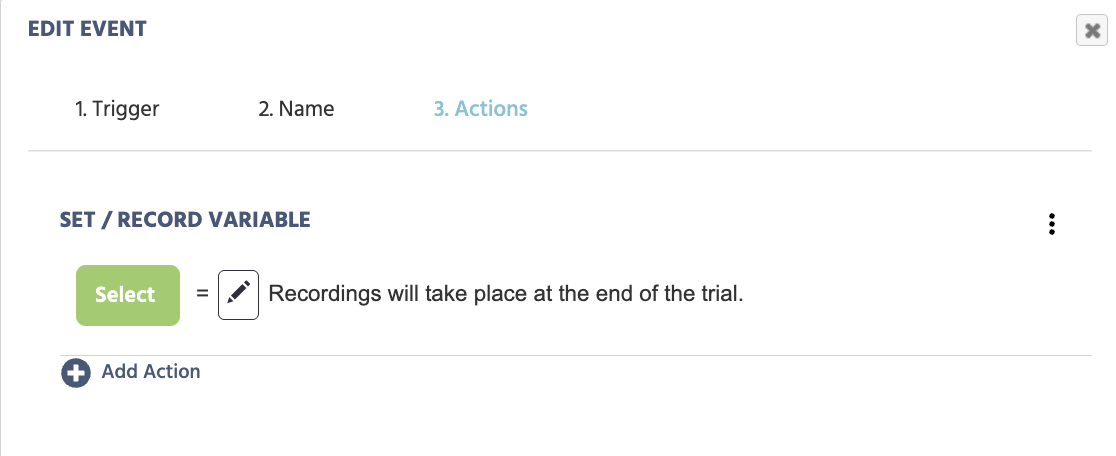
A simple dialog appears with two parts, read as an equation:
| Option | Description |
|---|---|
Select (green button) | Choose the variable that should store the value, on the left of the equals sign. You can also create a new variable here without leaving the dialog. |
| Pen icon | Opens the Value Select Menu, on the right of the equals sign, to define what the new value actually is: a constant, another variable's current value, a trigger-specific value, or an arithmetic expression. |
That's the whole action: pick a variable, define its new value, done. The dialog also shows a fixed line, "Recordings will take place at the end of the trial": the variable's value updates on the client immediately when the action runs, but that value is only sent to the server and recorded at the end of the trial, not on every individual change.
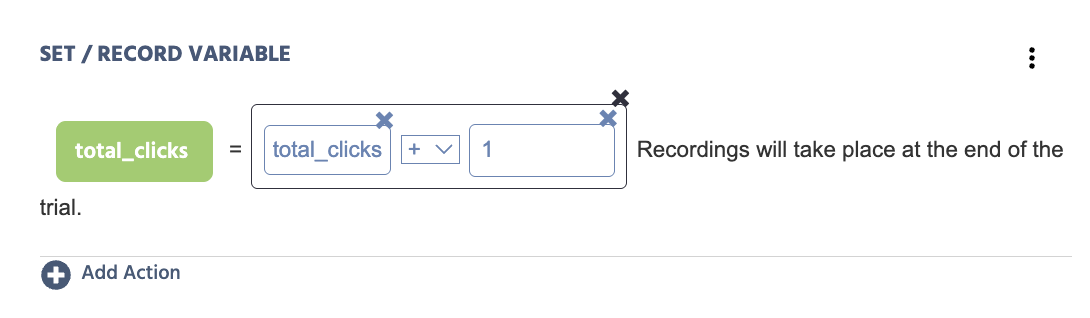
A practical scenario: building a counter. There is no special "counter" variable built into Labvanced, any variable can act as one. Create a numeric variable with whatever name fits your study (for example trial_count or error_count), then use the Value Select Menu's Arithmetic option to set that variable's new value to itself plus one, each time the relevant trigger fires. This is the same mechanism behind trial counters, error counters, and click counters across Labvanced tasks, so it's important to understand how such a setup works in order to get a sense of the capabilities behind this action.
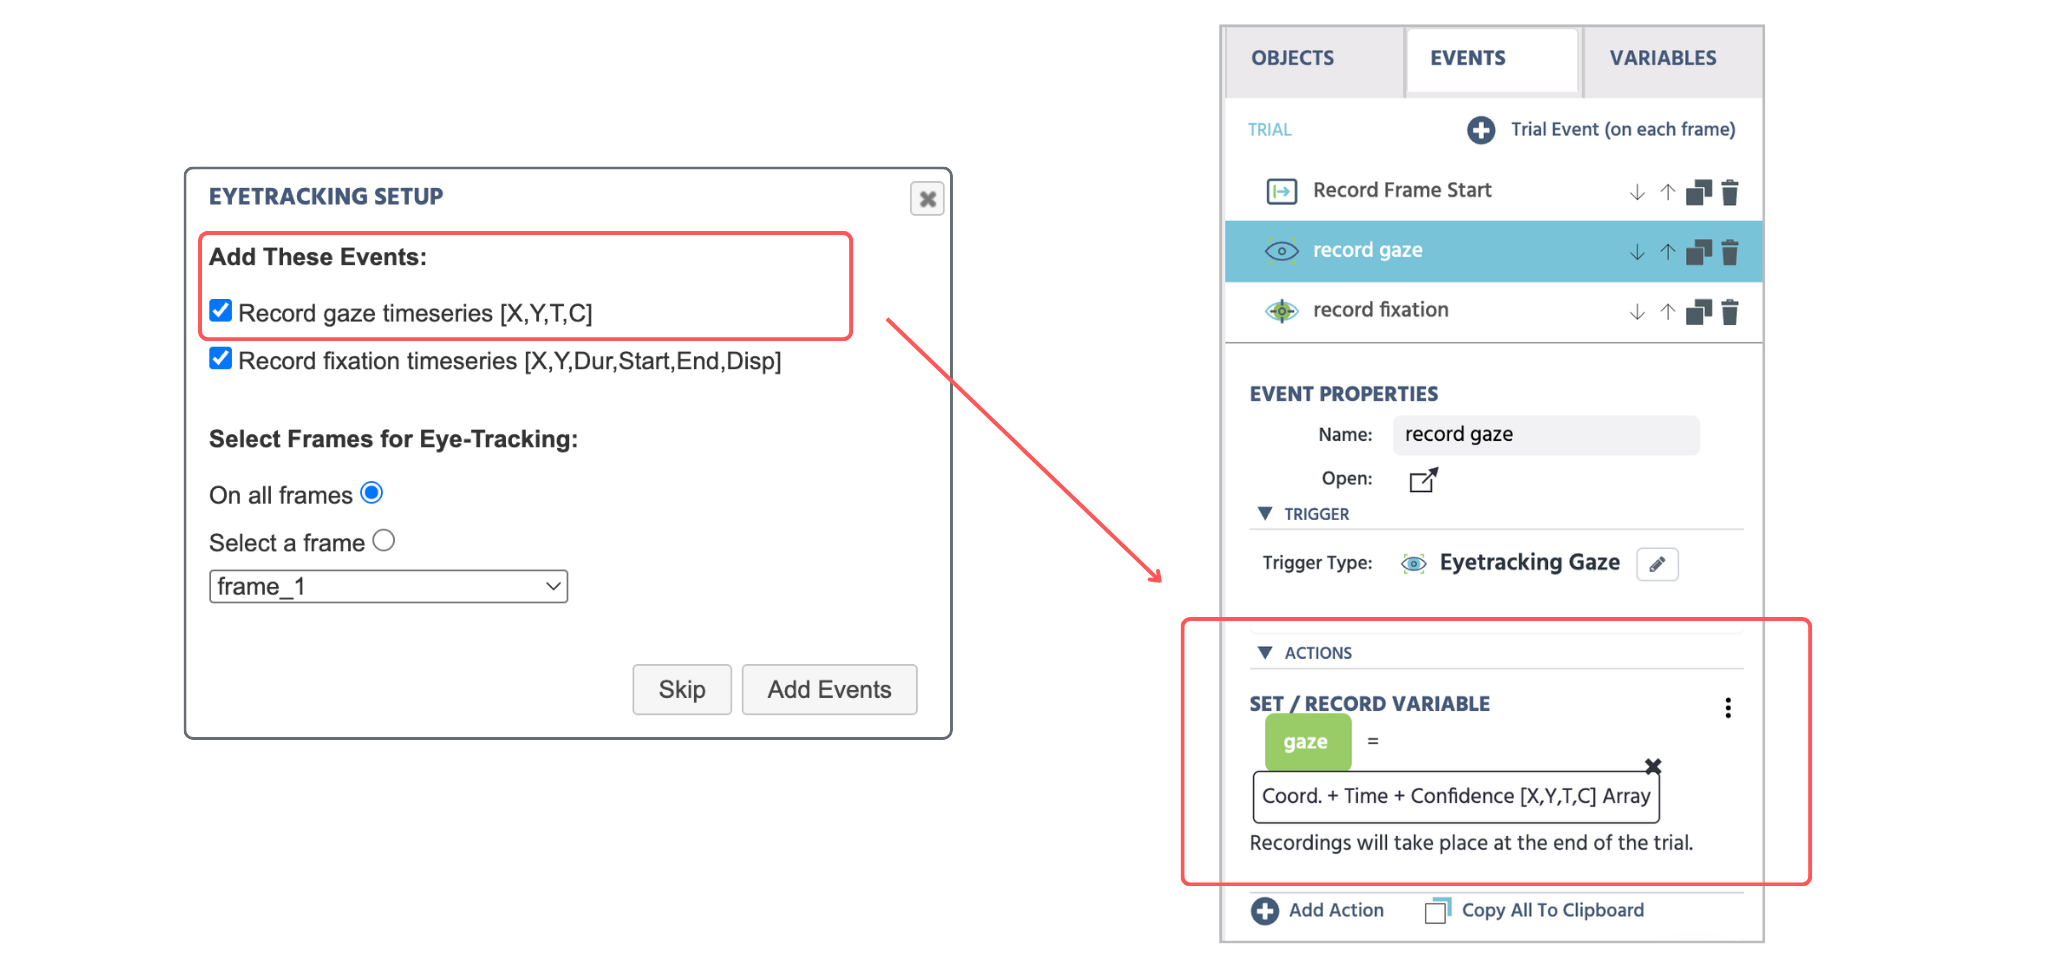
In some cases, while building your task, you may be prompted with a dialog box asking if you want events created automatically to capture certain types of data, such as eye tracking. Accepting this builds both the trigger and a Set / Record Variable action for you, already configured, the exact same action and dialog covered above.
Workflow Tips
- Plan your variables before you build: before starting to build, make sure you know all the data you need to capture in your study, and have a general idea of which variables will need to be created to store that data.
Set / Record Variableis where that plan gets executed, so deciding it upfront avoids restructuring events mid-build. - Reuse a similar action instead of rebuilding it: if you already have a similar
Set / Record Variableaction under the same trigger or elsewhere in the study, useCopy to Clipboardand paste it where needed, then edit the target variable or value slightly, rather than clicking throughSelectand the Value Select Menu again from scratch. - Group actions that belong together: if multiple
Set / Record Variableactions typically go together, plan your event design around anAction Groupthat houses them. Moving or copying the whole set later is faster than handling each action individually. - Check for Automated Event Setup first: in some cases, such as eye tracking, emotion detection, or heart rate, Labvanced can offer to build the trigger and its
Set / Record Variableaction for you. Check whether that dialog is available before setting the same thing up by hand.
Studies & Example Scenarios
Two real examples from published Labvanced tasks, one scoring a single response and one recording continuous movement.
Scoring accuracy in the Flanker Task
In the Flanker Task's Main_task_desktop_Flanker task, Frame 3 (Response Window), a Requirement Action inside the Response Recording & Progression event checks whether the pressed key matches the target direction. When it does, Set / Record Variable sets the accuracy variable to 1.
Recording mouse trajectory data
The Web Bridge mouse-tracking setup uses Set / Record Variable to write the Mouse [Name, Info, X, Y] Array trigger-specific value into a variable on every mouse movement. It sets Format to Array, Record Type to Time series, and Sampling method to record all (allow repeated duplicates), so every movement is captured rather than just the latest one.
Further Reading and Open Materials
Event System
The full reference for every trigger and action in Labvanced.
Value Select Menu
How to define constants, variables, trigger-specific values, and expressions as the value assigned by this action.
Requirement Action (If... Then... Else If)
The conditional logic block that most commonly triggers Set / Record Variable inside its Then and Else branches.
Creating Variables
How to create a variable and set its data type, format, and recording options before or while using this action.