Building a Study with the AI Assistant
This walkthrough follows the prompts used to build a real demo study with the Labvanced AI Assistant: a consent page, two questionnaire frames, and a result frame that classifies a participant from their earlier answers. Each step shows the prompt, what the assistant built, and what to check before moving on. For an overview of the feature, see Build with AI.
The library study this walkthrough builds: four frames created with the AI Assistant. Import it into your account to inspect every element and event.
Table of Contents
Prerequisite Knowledge
Building with the AI Assistant requires no technical knowledge, though some familiarity with the platform and its terminology is useful. Naming the frame type, the elements, and the variables in your prompt gives the assistant the vocabulary of your study and leads to more accurate results. The assistant also answers questions about how Labvanced works, so you can ask it whenever a term is unfamiliar. The pages below cover the three concepts this walkthrough uses most.
Frames
The building block that holds what participants see at each moment in a trial.
Events
The trigger and action logic that controls what happens in a study.
Working with Variables
How data is recorded, stored, and reused across frames.
Opening the AI Assistant
- Open your study and select the task you want to build in.
- In the bottom left of the task editor, open the
AI Assistantsection. - Click the
Open in separate windowicon in the section header if you want a larger chat. Close the window with thexin its top corner to return the chat to the panel. - Type your prompt in the
Ask a question...field and clickSend.
The assistant answers questions without changing anything. It changes your study only after you ask for a change and allow it, which the first step shows. The AI Assistant guide describes the panel in full.
Building the Study
Step 1: The Consent Page
Start with the first frame of an empty task. The prompt asks for the content, the frame type, and the navigation in one request, because stating the purpose lets the assistant fill the gaps sensibly.
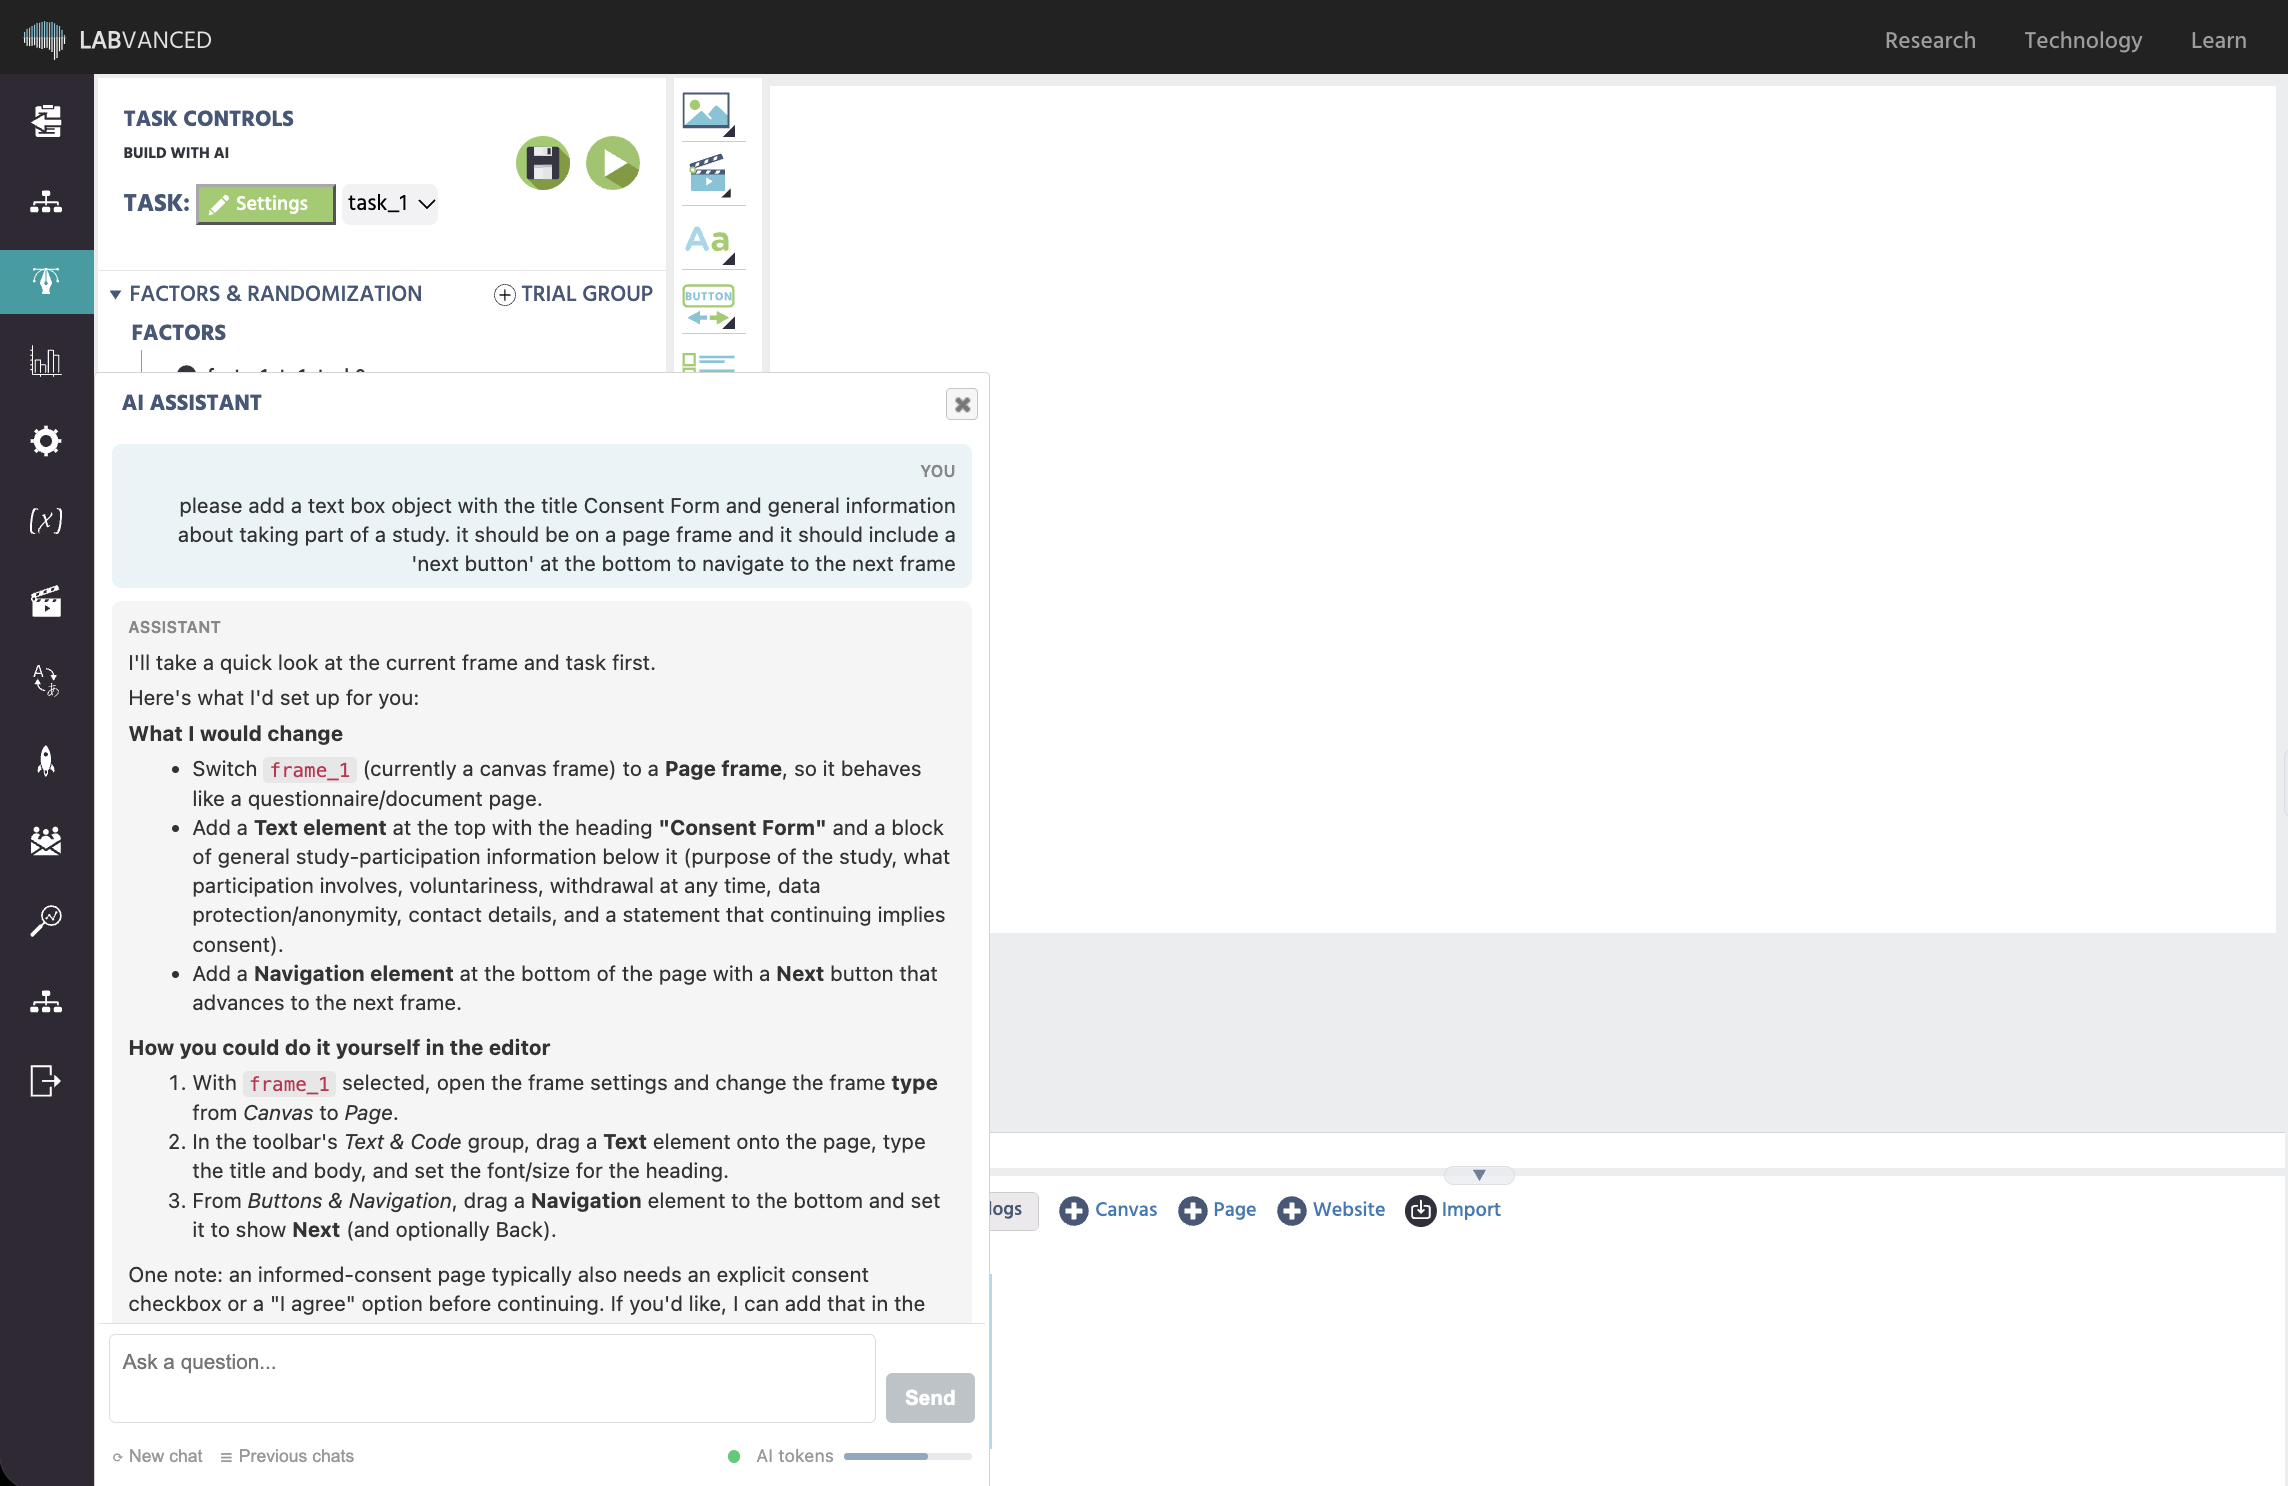
Please add a text box object with the title Consent Form and general information about taking part in a study. It should be on a page frame and include a 'Next' button at the bottom to navigate to the next frame.
- Send the prompt.
- Read the plan. The assistant describes what it would change and how you could do it by hand.
- Review the
Allow AI changes?card that appears. It repeats the change in one sentence and carries thebetabadge. - Click
Allow AI changes (beta).
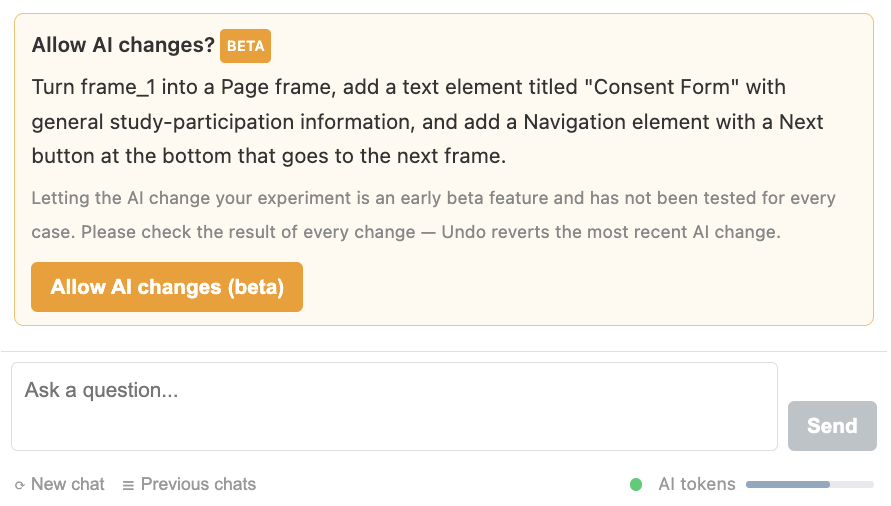
Note: the permission card appears once per chat. After you allow changes, a bar above the input shows AI changes allowed, with the Undo and Turn off buttons.
The assistant then builds the page and reports back. Frame 1 is now a page frame with a text element named consent_text and a navigation element named consent_nav with a Next button. The navigation element created its own event, Go Forward, which jumps to the next frame, so no extra wiring is needed.
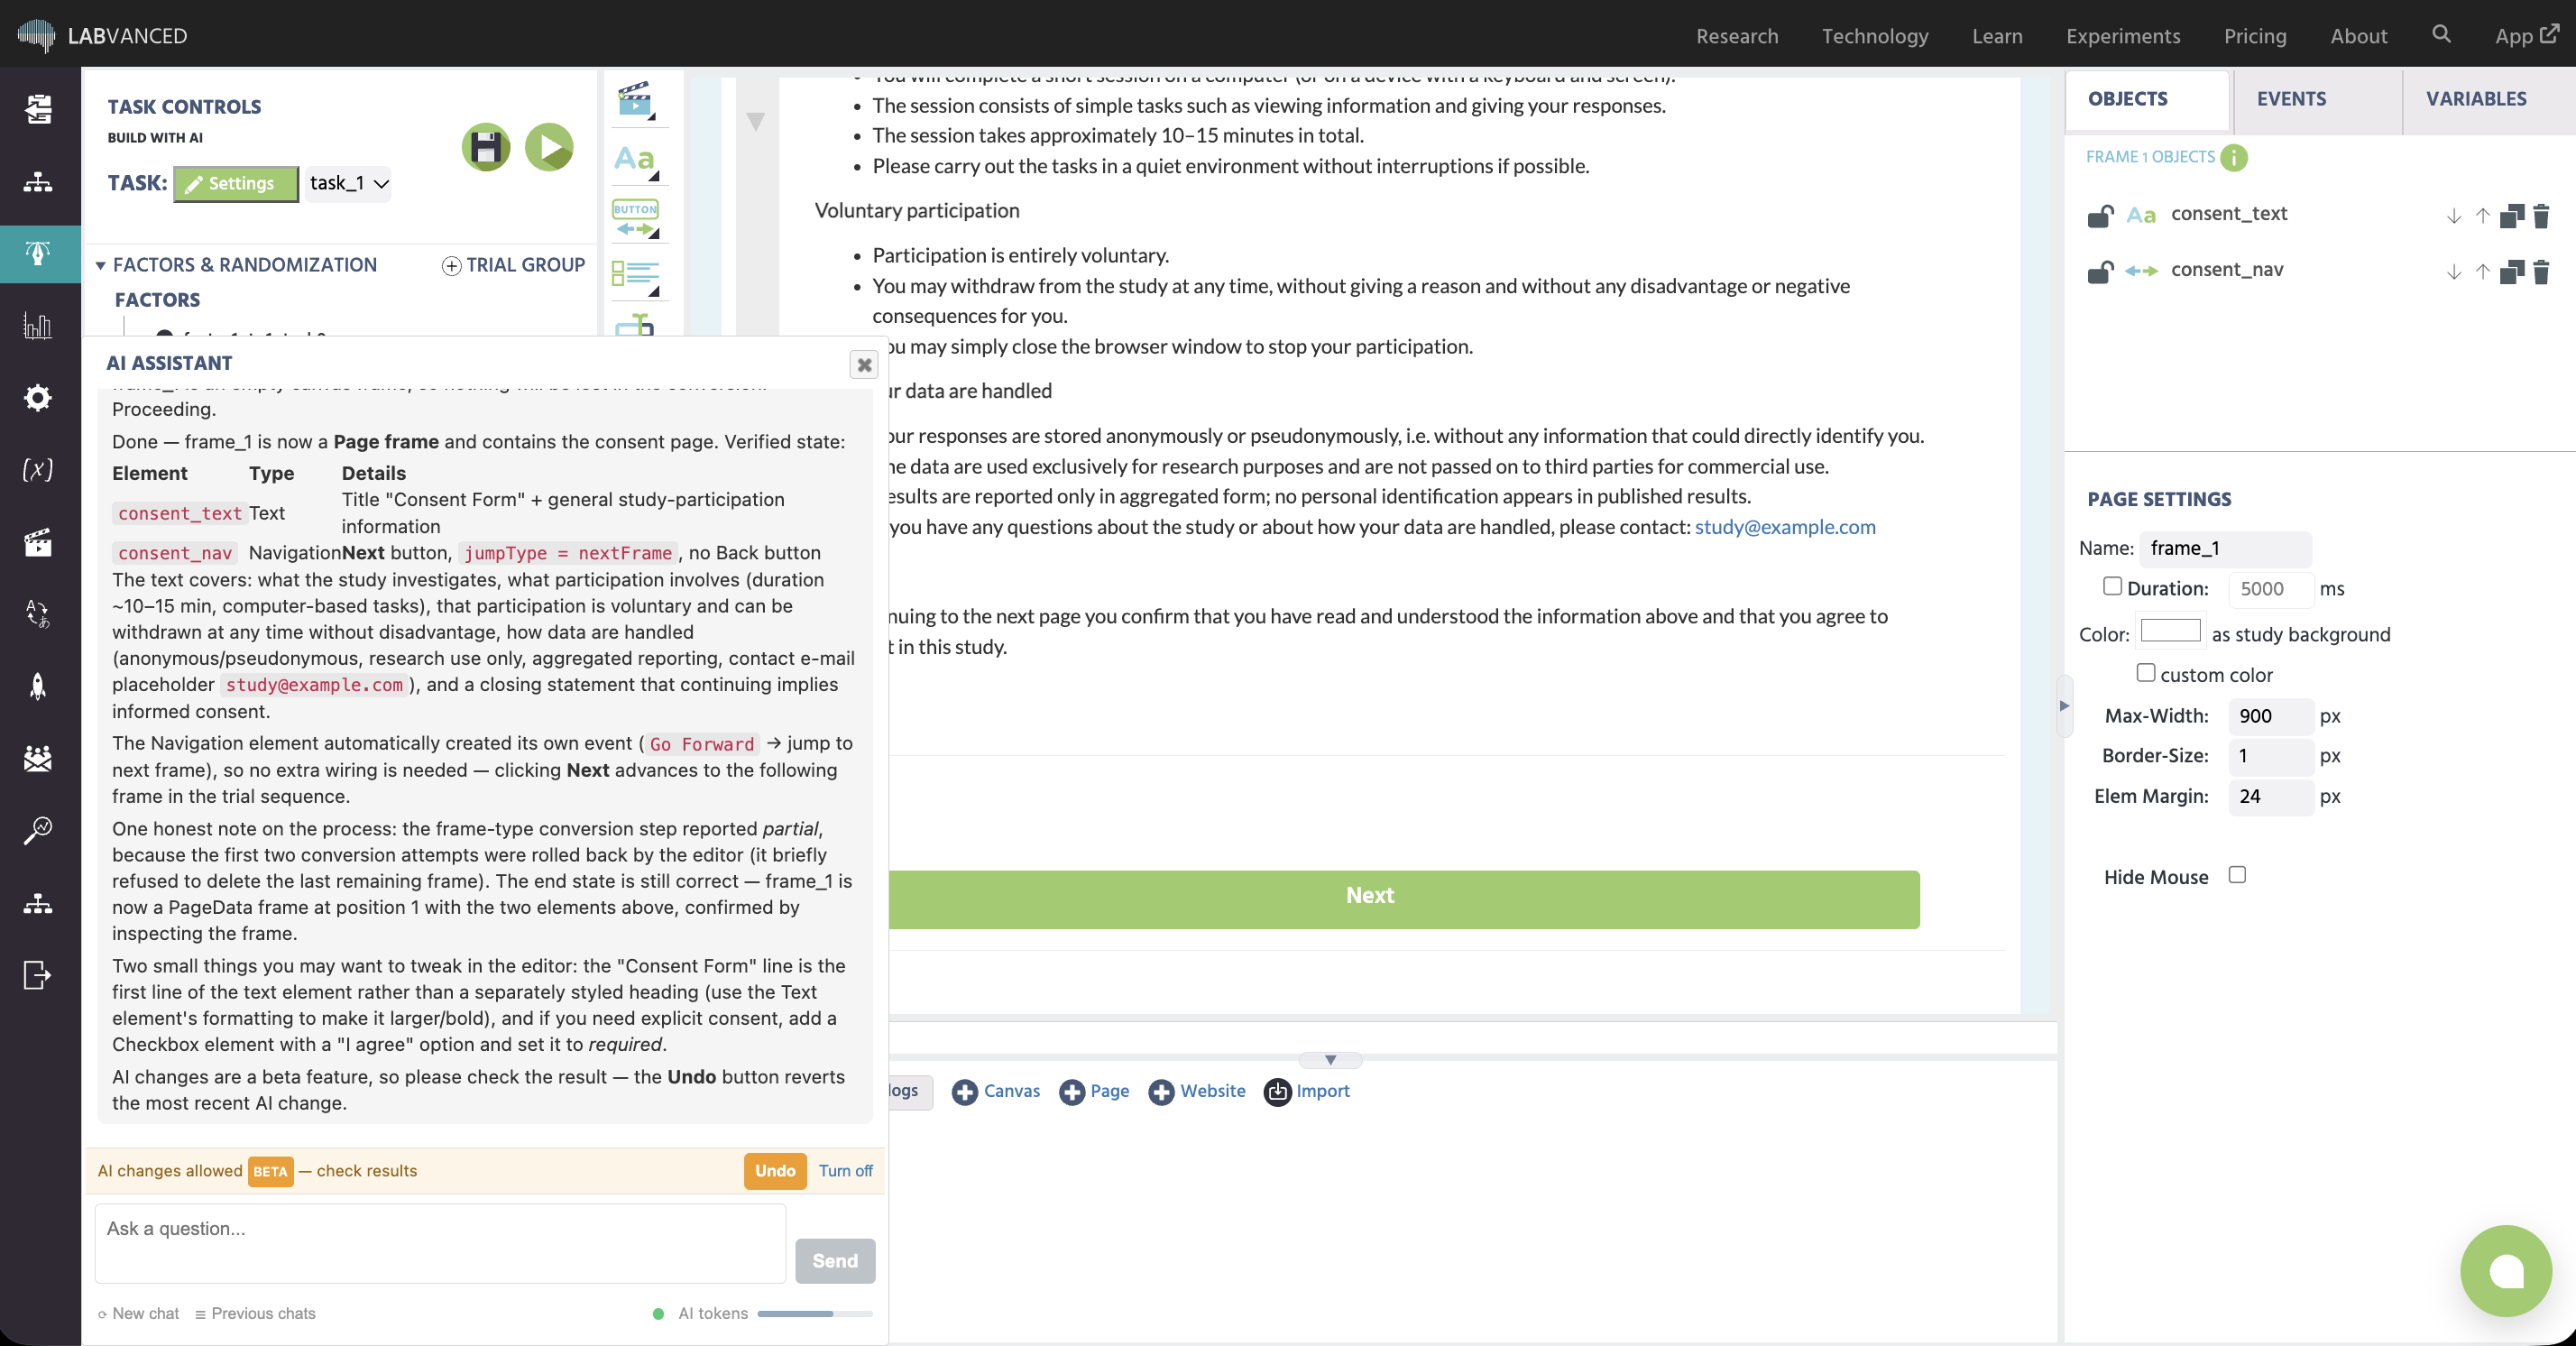
Check the following before moving on:
- Open the consent text and replace the placeholder contact address with your own.
- Have your ethics board approve the final wording.
- Style the
Consent Formline as a heading if you want it larger, because the assistant wrote it as the first line of the text element. - Ask for an explicit consent checkbox if your protocol requires one. The assistant suggests this in its report.
Step 2: A Demographics Questionnaire
Ask the assistant for ideas before you ask it to build.
what can i add as a second frame now?
The assistant lists options for the next frame. This study continues with a demographics page, requested by pasting the chosen option into a follow-up prompt.
can you please apply Demographics / screening page: age, gender, handedness, prior experience (Input, Selection, Likert elements).
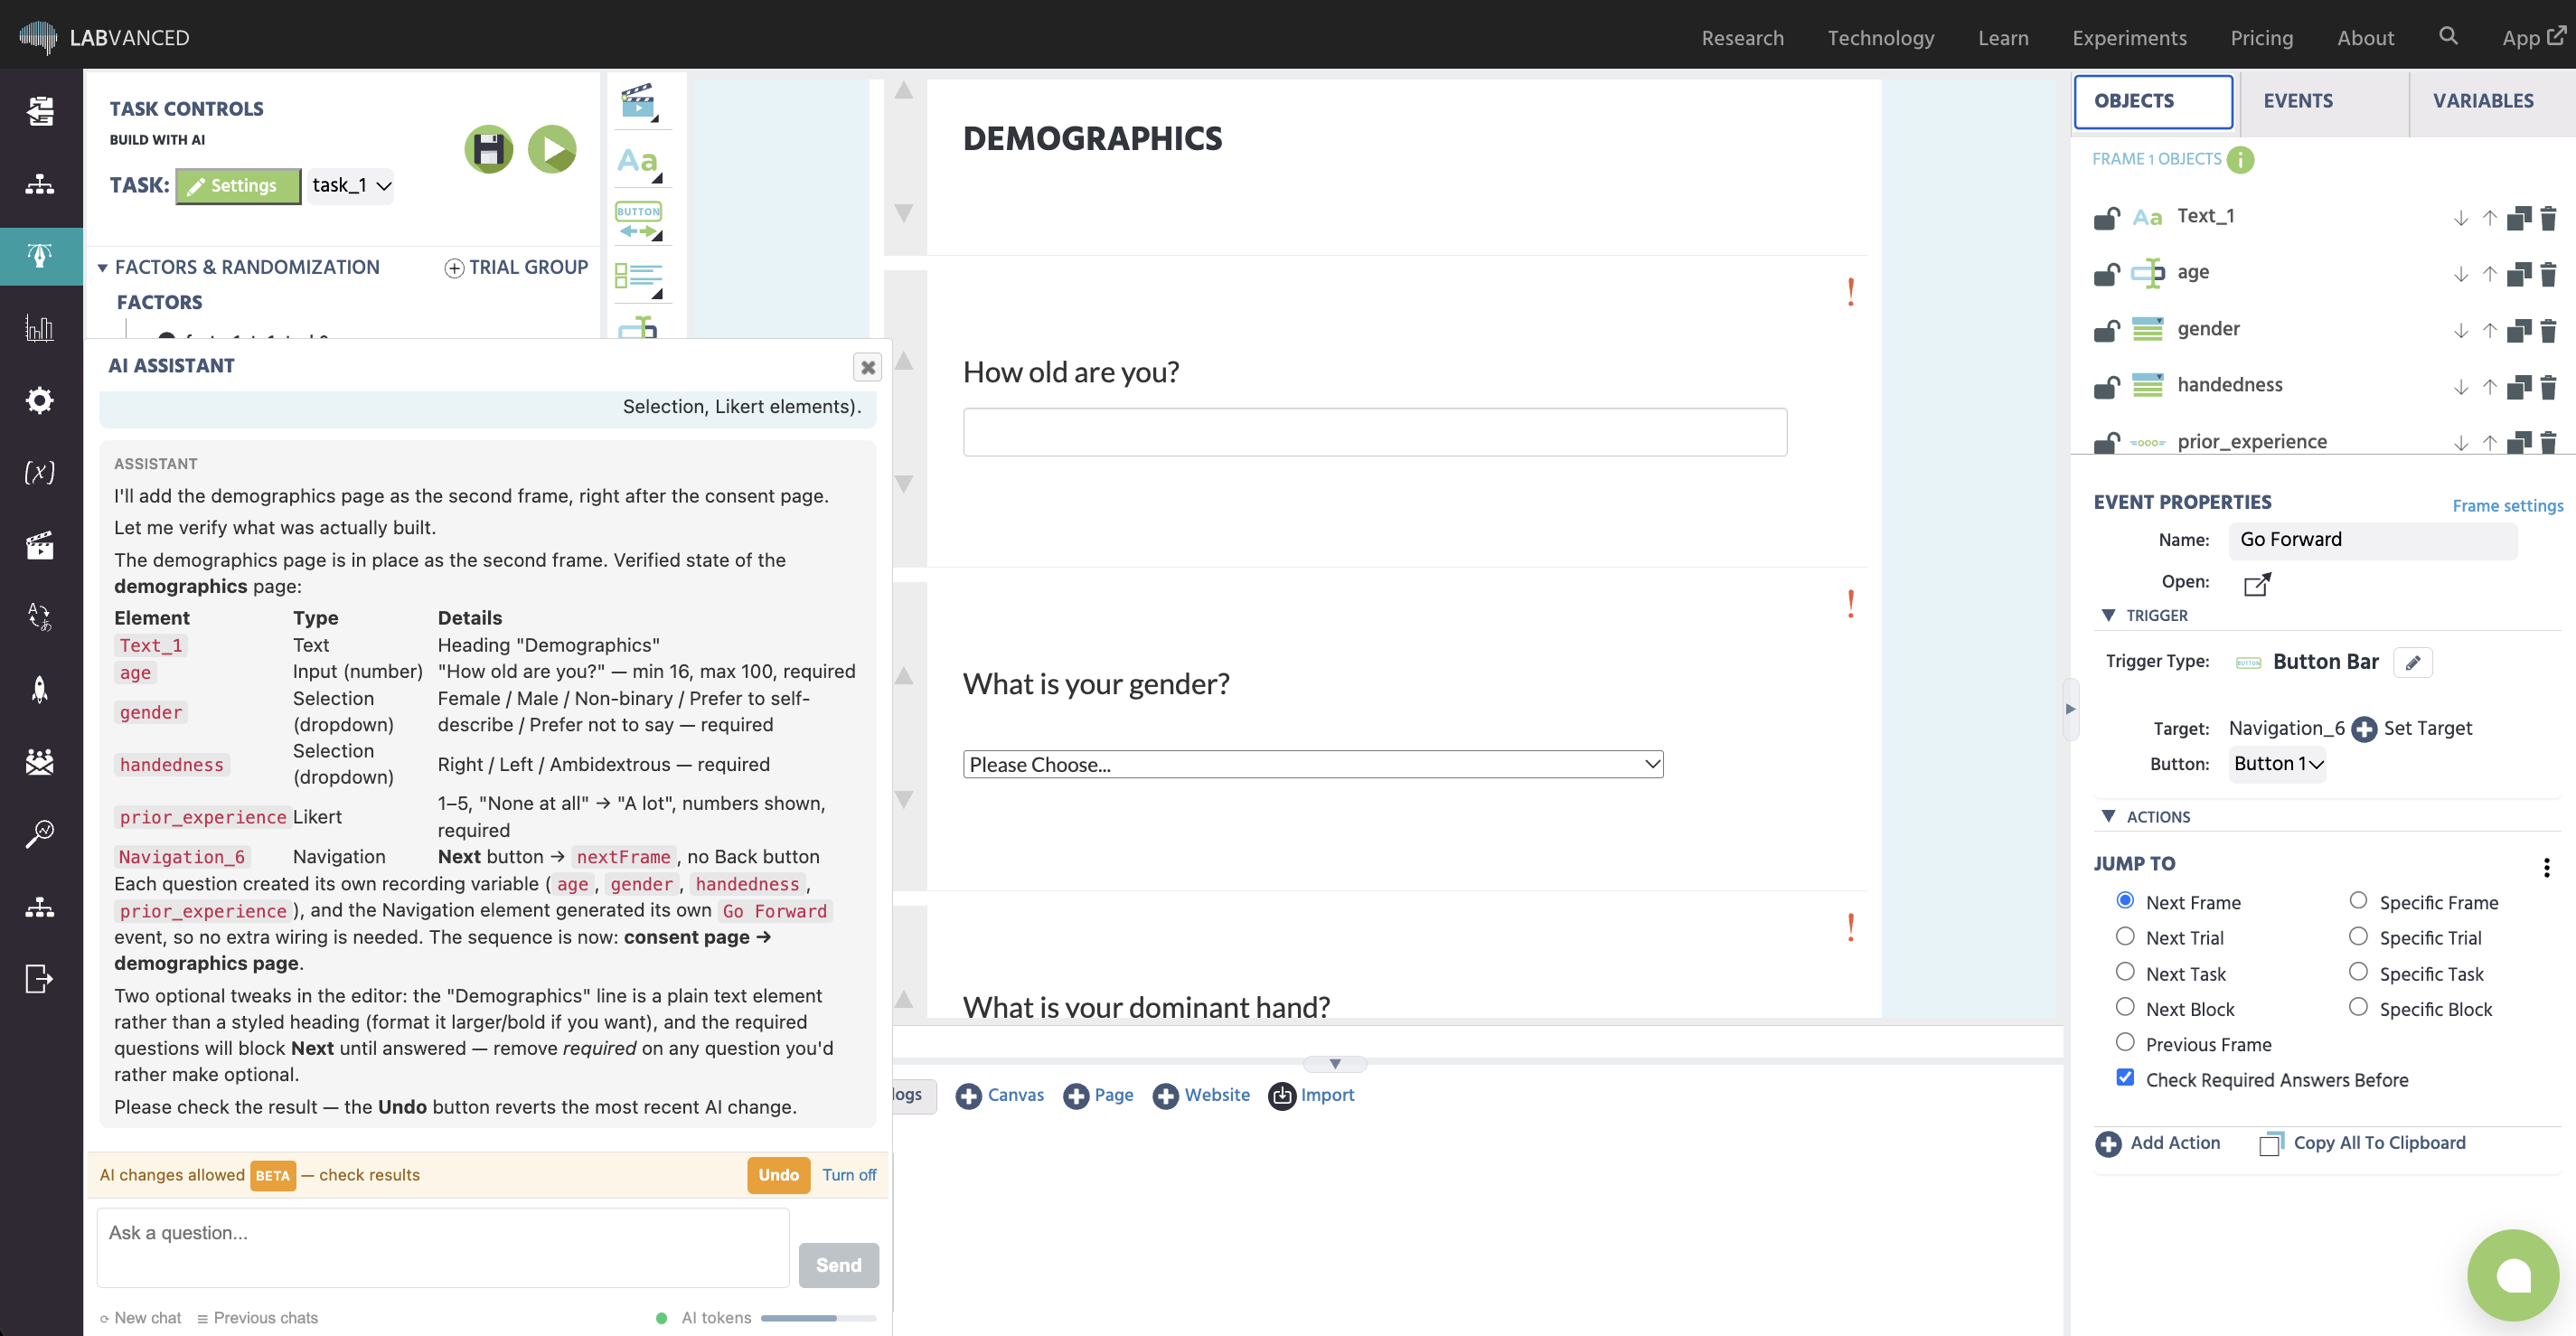
The assistant adds frame 2 after the consent page and reports what it built: a heading, an input element named age, selection elements named gender and handedness, a Likert element named prior_experience, and a navigation element. Each question has its own recording variable, with the same name as the element, and the navigation element created its Go Forward event.
Check the following before moving on:
- Open the
Variablestab and confirm thatage,gender,handedness, andprior_experienceexist. - Check the minimum and maximum of the
ageinput against your inclusion criteria. - Remove the required flag from any question participants should be able to skip. Required questions block the
Nextbutton until they are answered.
Step 3: A Second Questionnaire Frame
Ask for a third frame with more demographics questions that use question types the previous frame did not use. This shows how many question types the assistant can place in one request. In the demo study this frame contains a range element (computer_hours), a matrix with one row per experience area (exp_videogames, exp_surveys, exp_eyetracking, exp_programming), and checkboxes for six device types (device_desktop through device_smartwatch).
The assistant creates one recording variable for each range, matrix row, and checkbox, which is why the later steps can refer to them by name.
Step 4: A JavaScript Classification
The fourth frame takes the study beyond a questionnaire. The prompt describes the goal in plain terms and uses Labvanced vocabulary for the mechanism: a JavaScript action, and a linked variable that holds the result.
in the fourth frame,lets do something more creative. like what if we have a java script action that analyzed a few of the previous answers and then reported some kind of 'classification' (that can be a linked variable)
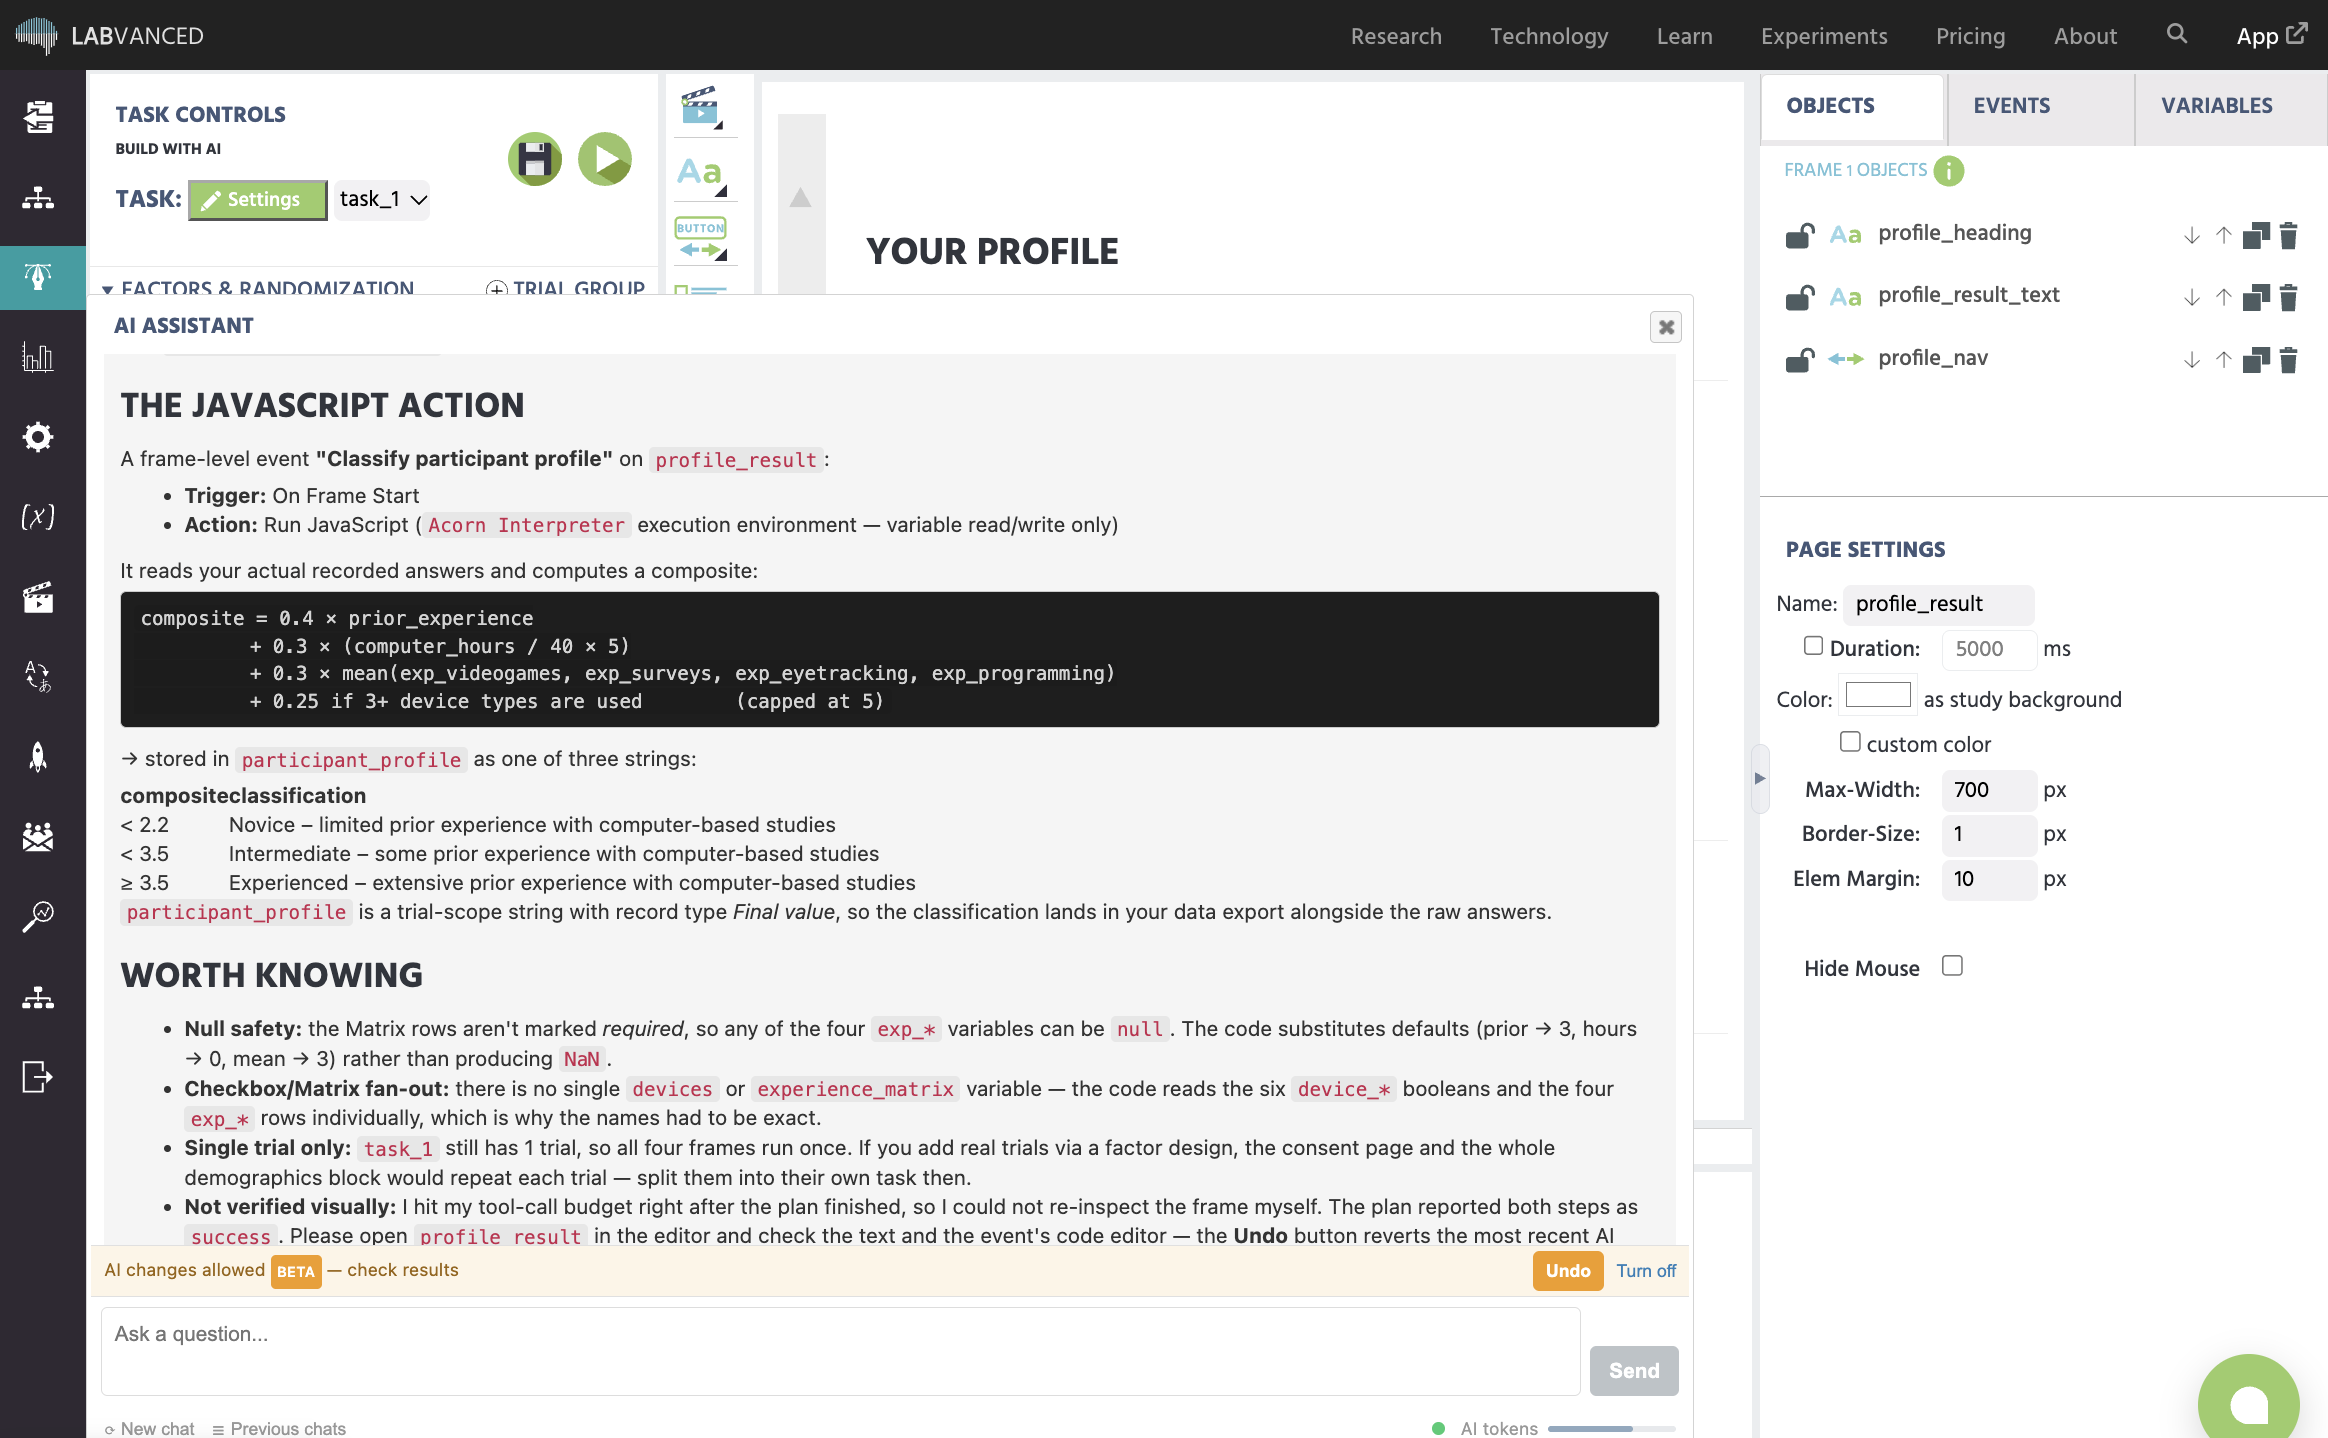
Terms such as JavaScript action and linked variable tell the assistant which parts of Labvanced to use. A prompt without them can lead to a different mechanism than the one you had in mind.
The assistant built one frame-level event for the classification.
Trigger:
On Frame Start
Action:Run JavaScript
The script reads the recorded answers, computes a weighted composite score from prior experience, weekly computer use, the four experience ratings, and the number of device types used, and stores one of three labels (Novice, Intermediate, or Experienced) in a variable named participant_profile. That variable is recorded as a final value, so the classification lands in your data export next to the raw answers.
Step 5: A Result Frame With Shapes
The first version of this frame was a page frame. The assistant continued in that frame type and then ran into a limit when it tried to visualize the profile.
The page frame can't hold shapes (rectangles/ellipses are canvas-only), so I'll make it visual with a live gauge, a styled card and a data breakdown.
Stopping the assistant and redirecting it gave a better result. This prompt is what turned the frame into a visual result page.
the page frame cant hold shapes, so maybe make a canvas fraem instead?
The assistant rebuilt the result as a canvas frame with a heading, a colored badge that shows the classification, a score gauge with the three ranges, and a "How this was calculated" breakdown. After a few rounds of fine-tuning, the result was a presentable result page.
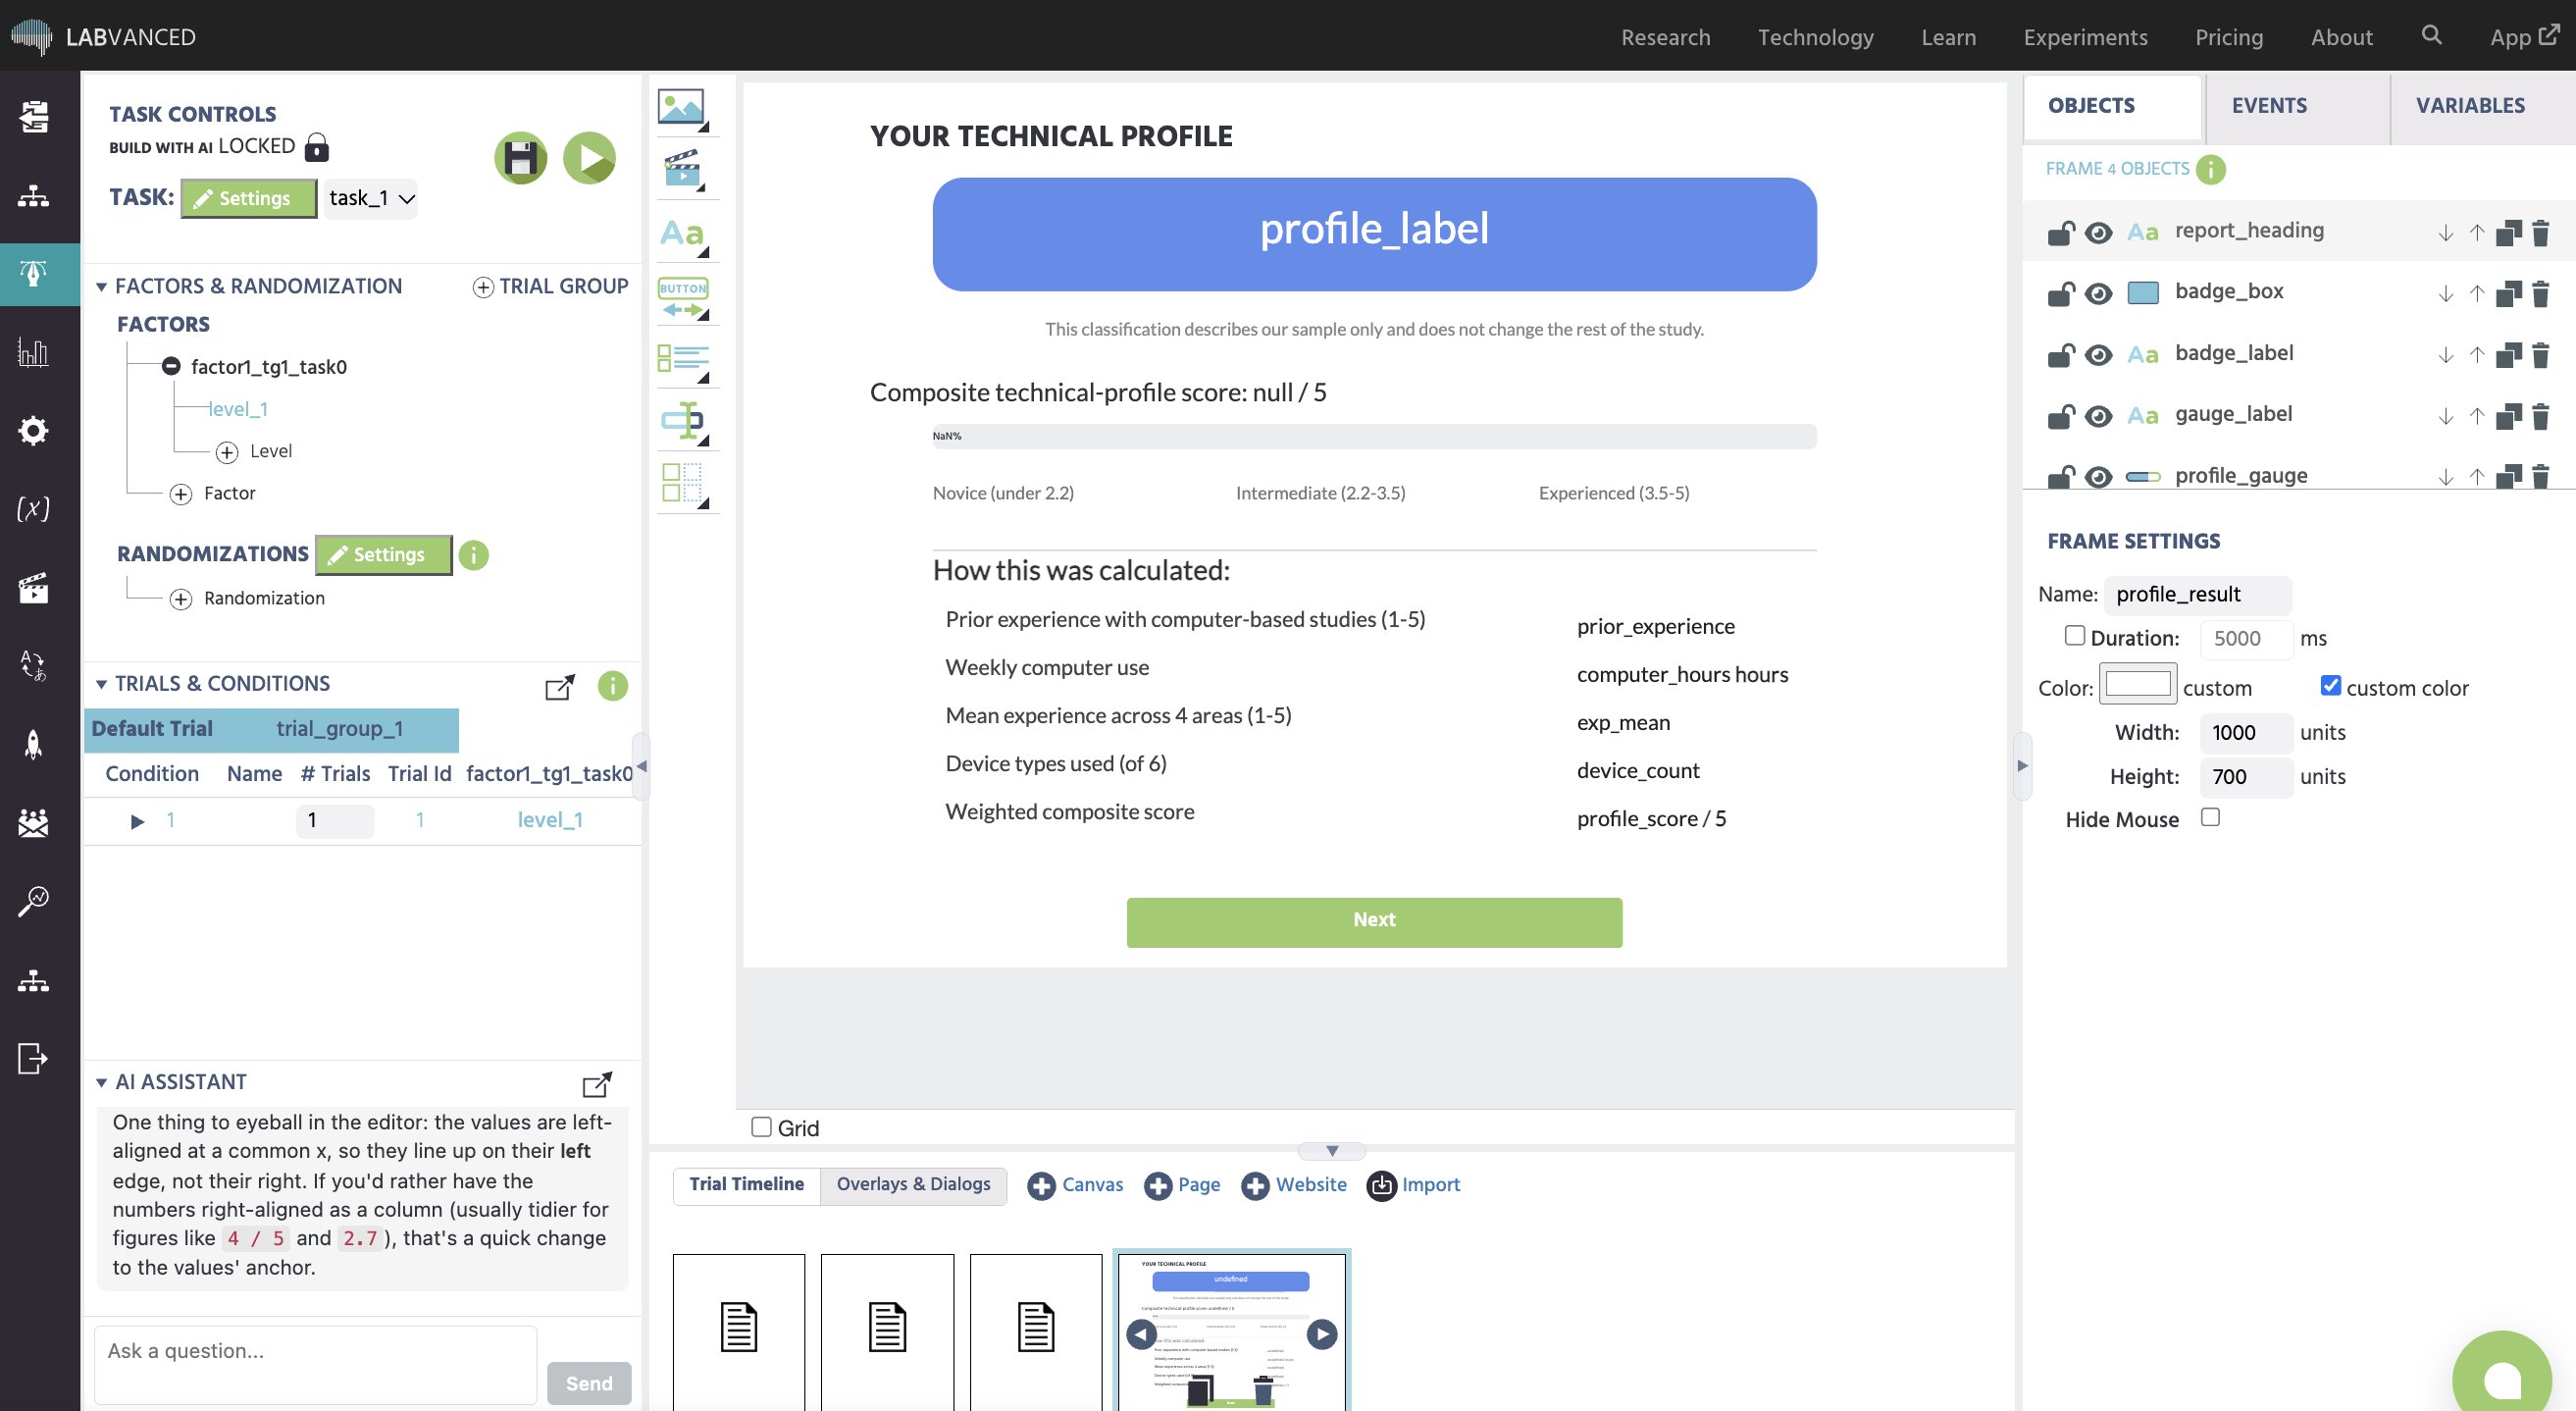
Note: in the editor, fields linked to variables show the variable name or an empty value until the study runs. The values appear when a participant completes the earlier frames.
Step 6: Check the Result
Ask the assistant for a read-only check in a new turn, for example now verify frame 4, and then open the frame in the editor yourself. In the demo study the check confirmed that all 13 variable names used by the script exist with matching types, and it listed points to know about:
- The matrix rows were not required, so a participant could reach the classification without rating every area. The script substitutes default values, and a classification can then rest on fewer ratings than intended.
- The result frame is the last frame of the task, so its
Nextbutton ends the trial. - The task has a single trial. If you add trials later, the consent page and demographics frames would repeat for each trial, so move them into their own task.
- Two text pieces ran together on the result page because no space separated the variable token from the sentence that followed. Insert a space or a line break after the token.
Everything the assistant lists here is an item for you to confirm or fix in the editor. The Undo button reverts the most recent AI change if a change does not work out.
Prompting Tips From This Build
- State the purpose, not just the parts: a consent page with a
Nextbutton gave a better result than asking for a text box alone. - Use platform terms: frame type, element, event, and linked variable.
- Redirect early: stopping the assistant and naming the frame type you want costs less than letting it continue in the wrong one.
- Ask for ideas first, then pick one and request it.
- Check in a separate turn: ask for a read-only verification after a build.
The AI Assistant guide collects the full list of prompting tips and explains the tool-call budget behind the assistant's replies.